There’s a certain magic in the air when flour dusts the countertop and the oven hums softly in the background. Baking, often called both an art and a science, invites us into a world where simple ingredients transform into comforting loaves, delicate cookies, and fluffy cakes. But behind every perfectly risen muffin or crisp-edged pie lies a language-a set of terms that can feel like a secret code to newcomers. Whether you’re a curious beginner or a passionate home baker looking to sharpen your skills, understanding these key baking terms is the first step to unlocking the full potential of your culinary creations. Let’s dive into the essential vocabulary that will turn your kitchen experiments into delicious successes.
Baking Basics: Key Terms Every Home Baker Should Know begins with mastering just a few essentials that transform simple ingredients into unforgettable baked delights. Understanding the purpose behind each ingredient, mastering precise measurements, and choosing the right tools all contribute to your baking success. Let’s dive into how these foundations elevate your creations to bakery-quality results.
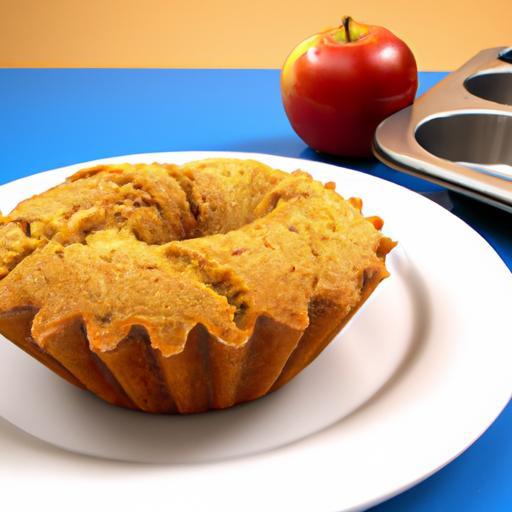
Prep and Cook Time
- Preparation: 15 minutes
- Cooking/Baking: 25-35 minutes (varies by recipe)
Yield
- Approximately 8 servings (depending on the recipe type and slice size)
Difficulty Level
- Easy to Medium – Perfect for home bakers ready to deepen their skills
Ingredients List to Build Your Baking Foundation
- 1 cup all-purpose flour, sifted – provides structure and texture
- 1 tsp baking powder – a leavening agent to create lift and lightness
- 1/2 tsp salt – balances sweetness and enhances flavors
- 1/2 cup unsalted butter, softened – adds richness and tenderness
- 3/4 cup granulated sugar – sweetens and helps with browning
- 2 large eggs – bind ingredients and trap air for lift
- 1 tsp vanilla extract – boosts aroma and flavor depth
- 1/2 cup milk (whole or 2%) – hydrates dry ingredients, ensuring proper crumb
Step-by-Step Instructions: From Ingredients to Oven-Perfect
- Preheat your oven to 350°F (175°C). This ensures even baking from the start.
- Prepare your bakeware by greasing or lining with parchment paper to prevent sticking.
- In a medium bowl, whisk together the flour, baking powder, and salt. This dry mixture guarantees even rising and seasoning.
- In a large bowl, cream the softened butter and sugar until light and fluffy, about 3-4 minutes. This step creates air bubbles vital for texture.
- Add eggs one at a time, beating well after each addition to maintain a smooth, emulsified batter.
- Mix in the vanilla extract. This step infuses your batter with delightful aroma.
- Alternate adding dry ingredients and milk to the wet mixture, starting and ending with the dry. Mix gently – overmixing can toughen your bake.
- Pour batter evenly into your chosen bakeware. Smooth the top with a spatula for even rising.
- Bake for 25-35 minutes or until a toothpick inserted in the center comes out clean.
- Allow the baked item to cool in the pan for 10 minutes before transferring to a wire rack to cool completely.
Chef’s Notes: Tips for Success
- Flour choice matters: Using all-purpose flour keeps textures balanced, but try cake flour for a softer crumb.
- Perfect your measurement: Spoon flour into your measuring cup and level it off – this avoids dense, dry outcomes.
- Mixing technique is crucial: Use a gentle folding motion when combining wet and dry ingredients to keep the batter airy.
- Bakeware decisions: Light-colored, non-stick pans conduct heat evenly; dark pans can cause overbrowning, so reduce oven temp by 25°F if using dark bakeware.
- Make-ahead tip: Batter can rest covered in the fridge up to 24 hours, offering convenience without compromising rise.
Serving Suggestions
- Serve your baked goods warm or at room temperature, paired with a dollop of whipped cream or fresh berries for contrast.
- Light dustings of powdered sugar or a drizzle of homemade glaze add visual appeal and flavor complexity.
- For a festive touch, sprinkle crushed nuts or colorful sprinkles before baking.
| Nutrition (per serving) | Calories | Protein | Carbs | Fat |
|---|---|---|---|---|
| Baking Basics Delight | 220 kcal | 3 g | 28 g | 10 g |
Explore more baking techniques to master your craft and delight your taste buds.
To deepen your understanding of ingredient roles and baking science, visit King Arthur Baking’s guide to baking ingredients.

Q&A
Q&A: Baking Basics – Key Terms Every Home Baker Should Know
Q1: What’s the deal with “folding” in baking? Is it like folding laundry?
A1: Not quite! Folding is a gentle mixing technique used to combine light, airy ingredients like whipped egg whites or whipped cream into a batter without deflating them. Imagine gently tucking in a love letter rather than crumpling it-soft, careful movements keep the batter fluffy and light.
Q2: I keep seeing “proofing” in bread recipes. Is my bread getting a fancy degree?
A2: Almost! Proofing is the stage where yeast gets active and the dough rises. Think of it as yeast’s spa day, where the warm, cozy environment encourages it to ferment sugars, producing gas bubbles that help the dough puff up into soft, airy bread.
Q3: Can “cream” be a verb too? Does it only mean dairy?
A3: Yes! In baking, to “cream” means to beat butter and sugar together until pale and fluffy. This process traps air, giving your baked goods a light and tender texture. So, when the recipe says “cream the butter and sugar,” it wants you to create a cozy, creamy cloud of sweetness.
Q4: What is “gluten,” and why should I care about it when baking?
A4: Gluten is a protein found in wheat and gives dough its stretchy structure. It’s what makes bread chewy and cookies hold their shape. Overworking gluten can make baked goods tough, while not enough gluten can mean crumbly results. Mastering gluten is like tuning an instrument-it ensures your baking hits all the right notes.
Q5: Why do some recipes call for “sifting” flour? Isn’t it just flour?
A5: Sifting flour is like giving your flour a little spa treatment-it aerates and removes lumps, making your batter smooth and easier to mix. It also ensures even distribution of ingredients like baking powder or cocoa powder, leading to more consistent, tender results.
Q6: What’s the difference between “baking soda” and “baking powder”?
A6: Baking soda is a single-ingredient leavener that needs an acid (like lemon juice or buttermilk) to activate. Baking powder contains both an acid and a base, so it activates on its own with moisture and heat. Think of baking soda as a solo performer needing a partner, while baking powder is a ready-to-rock duo.
Q7: What does “bench rest” mean? Is my dough taking a coffee break?
A7: Sort of! Bench rest means letting dough sit on the countertop (the “bench”) to relax. This brief pause helps gluten strands unwind, making the dough easier to shape and less likely to spring back. It’s the dough’s moment to chill before the next step.
Q8: Why do recipes say to “cream butter and sugar until light and fluffy”? What happens if I don’t?
A8: Creaming incorporates air into the butter and sugar, creating tiny pockets that expand when baked, giving your baked goods a light texture. Skipping or rushing this step can result in dense, heavy treats-like missing the hero’s entrance in a play!
Q9: Is “kneading” only for bread, or can I knead cookie dough too?
A9: While kneading is essential for bread to develop gluten structure, many cookie doughs require minimal kneading to keep them tender. Overkneading cookie dough can lead to tough cookies. It’s all about knowing when to work that dough and when to let it rest.
Q10: What is a “blind bake” and why would I do it?
A10: Blind baking is pre-baking a pie crust without the filling. It prevents sogginess when using juicy fillings like custards or fresh fruits. It’s like giving the crust a head start to crisp up before the grand filling finale.
Armed with these terms, you’re ready to step into your kitchen with confidence, turning recipes into delicious memories one bake at a time!
In Retrospect
Armed with these essential baking terms, your time in the kitchen transforms from guessing game to confident craft. Each word is a stepping stone on your journey to creating mouthwatering masterpieces, turning humble ingredients into delicious memories. So next time you crack open a recipe, let these key terms guide your hands and imagination-because every great baker first speaks the language of flour, sugar, and heat. Happy baking!


