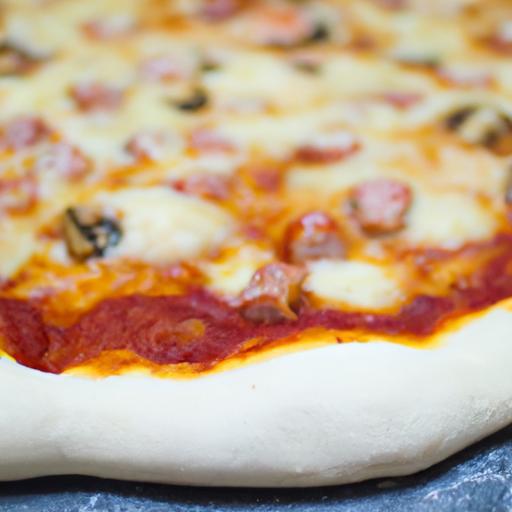
There’s something almost magical about the perfect pizza dough-the crisp, golden crust that crackles beneath a blanket of bubbling cheese and vibrant toppings. It’s the very foundation of every great pizza, yet achieving that ideal balance of chewiness and airiness can feel like an elusive art. Whether you’re a seasoned home cook or a curious novice, crafting perfect pizza dough from scratch transforms your kitchen into a pizzeria and every pizza night into a masterpiece. In this ultimate scratch guide, we’ll break down the science, the secrets, and the step-by-step process that turns simple ingredients into a glorious canvas for your favorite flavors. Get ready to roll up your sleeves, dust off your flour, and discover how to make pizza dough that’s not just good-but unforgettable.
Choosing the Finest Ingredients for Exceptional Dough
Crafting perfect pizza dough begins with selecting superior ingredients that set the foundation for a sublime crust. Use high-protein bread flour for elasticity and chew, coupled with fresh, high-quality yeast to awaken the dough with delightful rise and flavor. A pinch of fine sea salt enhances the natural taste, while extra virgin olive oil adds richness and tenderness. Even the water matters – filtered or spring water at room temperature will best hydrate your dough for optimal softness and structure.
Prep and Cook Time
- Preparation: 15 minutes
- Kneading & Fermentation: 2 to 24 hours (depending on proofing method)
- Baking: 10-15 minutes
- Total Time: Approximately 3 hours (with conventional fermentation) or up to 26 hours for cold fermentation
Yield
Makes 2 large 12-inch pizzas (4 servings)
Difficulty Level
Medium – Requires patience and hands-on technique but very rewarding
Ingredients
- 3 ½ cups bread flour, sifted and leveled
- 1 ¼ cups lukewarm filtered water (~105°F/40°C)
- 2 tsp active dry yeast or instant yeast
- 2 tbsp extra virgin olive oil
- 1 ½ tsp fine sea salt
- 1 tsp sugar (to feed the yeast and enhance browning)
Mastering the Art of Kneading for Ideal Texture
The kneading process is where science meets art – it develops gluten strands that give your pizza dough its signature stretch and chew. Begin by mixing your yeast with lukewarm water and sugar, allowing it to bloom for 5-10 minutes until foamy. Gradually combine the flour and salt, then pour in the yeast mixture and olive oil. Stir together until a shaggy dough forms.
Transfer your dough to a lightly floured surface and begin kneading. A gentle yet firm technique works best: fold the dough over itself, press down with the heel of your hand, then rotate it slightly. Continue this rhythm for about 8-10 minutes, or until the dough becomes smooth, elastic, and springs back when pressed.
Pro tip: Avoid adding too much extra flour during kneading – a slightly tacky dough is ideal for stretch and rise.
Unlocking the Secrets of Fermentation and Proofing
Patience is crucial in fermentation, which transforms simple dough into a complex-flavored masterpiece. Once kneaded, shape your dough into a ball and place it in a lightly oiled bowl, covered with a damp cloth or plastic wrap.
For a quick rise, proof at room temperature for 1.5-2 hours until doubled in size. Alternatively, refrigerate for 12-24 hours to develop deeper flavor and a tender crumb through cold fermentation.
After proofing, gently deflate the dough and divide it if making multiple pizzas. Allow the divided dough to rest for 15-30 minutes to relax the gluten, easing stretching without tearing.
Baking Techniques to Achieve Crispy Thin or Fluffy Thick Crusts
Creating your ideal crust happens in the oven. For a crispy thin crust, roll the dough out as thin as possible and bake on a preheated pizza stone or steel at the highest temperature your oven allows (usually 500-550°F/260-290°C). This intense heat mimics a wood-fired oven, crisping the bottom while leaving the edges satisfyingly crunchy.
Desiring a fluffier, thicker crust? Let your shaped dough rise once more after stretching-this “second proof” traps air pockets for an airy bite. Bake on a pizza pan or cast iron skillet to retain heat evenly, allowing the crust to rise fully before crisping. A light mist of water during the first two minutes of baking supercharges steam, resulting in a tender yet golden crust.
For both styles, finish with fresh toppings and bake until the cheese bubbles and edges blush golden brown, typically 10-15 minutes.
Instructions
- Bloom the yeast: In a small bowl, combine yeast, sugar, and lukewarm water. Stir gently and set aside for 5-10 minutes until it becomes foamy.
- Mix dry ingredients: In a large mixing bowl, whisk together bread flour and sea salt.
- Combine and knead: Pour the yeast mixture and olive oil into the flour. Stir with a wooden spoon until a shaggy dough forms, then transfer to a floured surface.
- Knead thoroughly: Knead the dough for 8-10 minutes until smooth, elastic, and slightly tacky. Use the heel of your hand to push and fold the dough, rotating as you go.
- First proof: Shape dough into a ball and place in an oiled bowl. Cover with a damp towel or plastic wrap and let rise for 1.5-2 hours at room temperature or refrigerate for 12-24 hours for a cold ferment.
- Divide and rest: Punch down dough gently, divide it into two balls, and rest for 15-30 minutes to relax gluten.
- Shape your crust: Stretch or roll the dough to your preferred thickness. For thin crust, make it very thin; for thicker crust, keep the dough slightly thick and allow a second proof for 20 minutes.
- Bake: Preheat oven and pizza stone/steel to 500-550°F (260-290°C). Transfer dough to baking surface. Bake for 10-15 minutes until crust edges are golden and cheese or toppings are bubbling.
- Serve immediately: Garnish with fresh basil, drizzle of olive oil, or a sprinkle of sea salt for enhanced flavor.
Tips for Success
- Flour varieties: For an even chewier dough, mix bread flour with a small ratio (up to 20%) of Italian “00” flour.
- Yeast alternatives: Instant yeast can be mixed directly into flour, skipping the bloom step.
- Make-ahead: Prepare dough a day ahead and refrigerate; bring to room temp before shaping.
- Hydration levels: Adjust water slightly based on flour absorption; dough should feel resilient yet a bit tacky.
- Troubleshooting: If dough is too sticky to handle, dust lightly but avoid excess flour that toughens crust.
Serving Suggestions
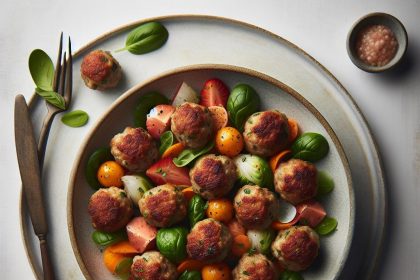
After baking, slice your pizza and add a finishing touch with fresh basil leaves, a drizzle of cold-pressed olive oil, or a sprinkle of crushed red pepper flakes. Pair your pie with a crisp arugula salad dressed with lemon vinaigrette for a refreshing balance. For wine lovers, a medium-bodied Chianti or a sparkling Prosecco enhances the experience beautifully.

| Nutrient | Per Serving |
|---|---|
| Calories | 280 kcal |
| Protein | 9 g |
| Carbohydrates | 48 g |
| Fat | 6 g |
For more on perfect pizza toppings, check out our Homemade Pizza Sauce Guide. To deepen your understanding of yeast and dough science, visit the Science of Dough website.
Q&A
Q&A: Crafting Perfect Pizza Dough – Your Ultimate Scratch Guide
Q1: Why is making pizza dough from scratch better than using store-bought dough?
A1: Making dough from scratch lets you tailor the flavor, texture, and thickness of your crust exactly how you like it. Plus, it’s a rewarding process that connects you to an age-old craft – every stretch and knead infuses your pizza with love and personality that store-bought just can’t replicate.
Q2: What are the basic ingredients for perfect pizza dough?
A2: You only need four simple staples: flour, water, yeast, and salt. Some recipes include olive oil or a pinch of sugar to enhance flavor and texture, but at its core, dough simplicity rules. Quality ingredients equal quality dough!
Q3: How do I know if my yeast is active?
A3: Proof your yeast by mixing it with warm water (around 105°F/40°C) and a pinch of sugar. Give it 5-10 minutes – if it bubbles and foams, your yeast is alive and ready to work its magic. No bubbles means time to get fresh yeast.
Q4: What’s the secret to kneading dough perfectly?
A4: Kneading develops gluten – the stretchy network that gives your crust structure. Use the heel of your hand, pressing and folding the dough over itself rhythmically for about 8-10 minutes. The dough should become smooth, elastic, and slightly tacky but not sticky. Think of it as a little workout for your hands that transforms sticky goo into pizza perfection!
Q5: How long should pizza dough rise?
A5: Ideally, let it rise for 1-2 hours at room temperature until it doubles in size. For even better flavor, try a slow fermentation: refrigerate the dough overnight or up to 72 hours. This slow chill deepens flavor layers and improves texture – patience truly pays off.
Q6: Can I use whole wheat or gluten-free flour?
A6: Absolutely! Whole wheat adds nuttiness and a hearty bite, but it may require a bit more hydration and kneading. Gluten-free flours need special blends and binding agents to mimic gluten’s stretchiness, so some trial and error is key. Either way, experimenting broadens your pizza horizons.
Q7: How thin or thick should I roll out my dough?
A7: That depends on your pizza style! Thin-crust fans should roll or stretch dough paper-thin for crispiness, while lovers of deep-dish or pan pizza want a thicker, pillowy base. A good rule of thumb: thinner dough cooks faster and crisps up nicely, thicker dough provides that doughy chew and hearty bite.
Q8: What baking tips can ensure a crispy crust?
A8: Preheat your oven as hot as it goes (450-500°F or 230-260°C) with a pizza stone or steel inside to mimic a hearth oven’s searing heat. This blast of thermal energy crisps the underside while locking in moisture. Also, avoid overloading your pizza with toppings-they can weigh down the dough and lead to sogginess.
Q9: How do I store leftover dough?
A9: Coat the dough lightly with oil, place it in an airtight container or plastic bag, and refrigerate for up to 3 days. For longer storage, freeze the dough in portions for up to 3 months. Thaw slowly in the fridge before using to keep texture perfect.
Q10: Any final pro tips for scratch pizza dough perfection?
A10: Don’t rush the process. Respect time, temperature, and technique. Get hands-on – pizza dough is tactile art. Embrace little imperfections – they tell your pizza story. And above all, have fun creating, because the best pizza crumb starts with joy and passion in the dough bowl. Happy baking!
In Retrospect
As you pull your perfectly risen dough from the mixing bowl, remember that crafting great pizza dough is both an art and a science-a delicate dance between precise measurements and intuitive feel. With patience, practice, and the right techniques outlined in this guide, you’re no longer just making dough; you’re laying the foundation for endless homemade pizza adventures. So roll up your sleeves, let the yeast work its magic, and prepare to slice into the delicious rewards of your scratch-made masterpiece. Your ultimate pizza journey starts here-one perfect crust at a time.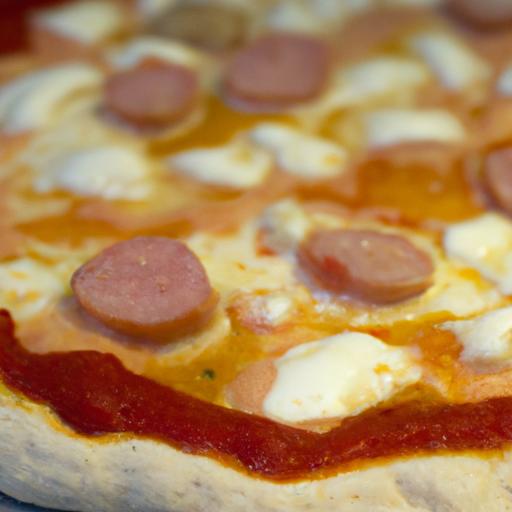


