In the world of snack enthusiasts, granola bars reign supreme as the perfect blend of convenience and crunch. But when it comes to choosing between homemade and store-bought options, the debate heats up like a toasted oat cluster fresh from the oven. Will your homemade creation bring the wholesome goodness and personalized flair you crave, or does the store-bought variety hold a secret arsenal of bold flavors and shelf-stable convenience? Join us as we embark on a crunchy showdown, peeling back the layers of ingredients, taste, nutrition, and cost to see which granola bar truly takes the crown. Whether you’re a kitchen crusader or a savvy supermarket shopper, this guide will help you snack smarter-and crunch happier.
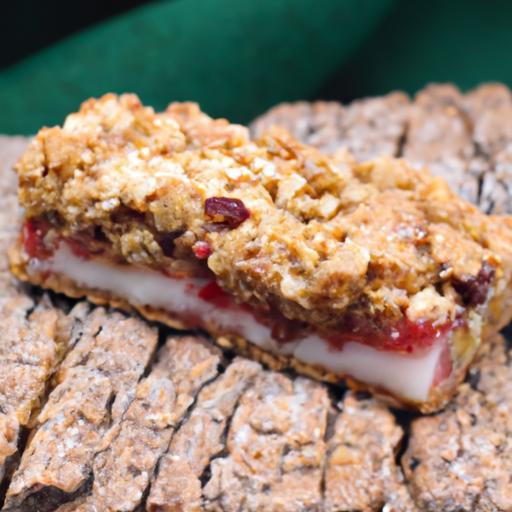
Homemade vs. store-bought granola bars offer distinct differences in crunch factor and texture that can elevate your snacking experience. The contrast between the artisanal chewiness of homemade bars and the manufactured crispness of commercial ones hinges on the ingredients and baking techniques used. Homemade bars allow you to customize the perfect balance of crunchiness and moisture, while store-bought bars often rely on stabilizers or preservatives to maintain consistent texture over time. Exploring these textures unlocks a sensory journey-each bite revealing layered nutty, chewy, and crisp sensations that define granola bars at their finest.
Prep and Cook Time
- Prep Time: 15 minutes
- Cook Time: 25 minutes
- Cooling Time: 30 minutes
Yield
8 bars (approx. 2.5 x 4 inches each)
Difficulty Level
Easy – suitable for beginner bakers and quick snack makers
Ingredients
- 2 cups rolled oats (old-fashioned, for optimal chew and crunch)
- ½ cup chopped almonds (lightly toasted)
- ¼ cup sunflower seeds
- ½ cup dried cranberries (unsweetened)
- ⅓ cup honey
- ⅓ cup natural almond butter (or peanut butter)
- 1 tsp pure vanilla extract
- ½ tsp sea salt
- 1 tbsp maple syrup (optional, for added caramel notes)
Instructions
- Preheat oven to 325°F (160°C). Line an 8×8 inch baking pan with parchment paper, leaving excess on sides to lift bars easily.
- Toast the oats and nuts: Spread oats and chopped almonds on a baking sheet. Toast for 10-12 minutes, stirring once for even browning, until fragrant and golden. Remove and cool slightly.
- Mix wet ingredients: In a small saucepan over low heat, combine honey, almond butter, maple syrup, vanilla extract, and sea salt. Stir continuously until smooth and gently warmed – do not boil.
- Combine all: In a large bowl, add toasted oats, almonds, sunflower seeds, and dried cranberries. Pour warmed almond butter mixture over the dry ingredients and fold gently but thoroughly until all oats are evenly coated.
- Transfer to pan: Press mixture firmly and evenly into the prepared baking pan using a spatula or back of a spoon – this compression is key for achieving the crunch factor.
- Bake: Bake for 20-25 minutes, or until edges turn golden brown. Avoid over-baking to keep the bars chewy inside.
- Cool and slice: Allow bars to cool completely in the pan (about 30 minutes) before lifting out and slicing into 8 bars. This step ensures bars set perfectly, locking in texture.
Tips for Success
- Crunch factor tuning: For a crunchier bar, toast nuts and oats a minute longer, and press mixture tighter in the pan.
- Smart swaps: Use sunflower seed butter or tahini for nut-free options. Swap cranberries with chopped dates or raisins for varied sweetness.
- Make ahead: Store bars in an airtight container at room temperature up to 5 days, or freeze individually wrapped for up to 3 months.
- Avoid sogginess: Ensure dried fruits have no added moisture and avoid excess liquid in wet ingredients to maintain crispness.
Serving Suggestions
Serve bars with a crisp apple or alongside a chilled glass of almond milk for a satisfying snack. Garnish with a light sprinkling of flaky sea salt or a drizzle of dark chocolate for an indulgent finish. Wrapping bars individually in parchment paper makes them perfect on-the-go treats for lunchboxes or hikes.
| Nutrient | Per Bar (1/8) |
|---|---|
| Calories | 210 kcal |
| Protein | 6g |
| Carbohydrates | 27g |
| Fat | 9g |
| Fiber | 4g |

Interested in exploring more wholesome breakfast ideas? Check out our healthy oatmeal recipes collection for inspiring morning treats. For reliable nutritional guidelines on nuts and seeds, visit ChooseMyPlate.gov.
Q&A
Q&A: Homemade vs. Store-Bought Granola Bars – The Crunchy Showdown
Q1: What makes homemade granola bars stand out in the crunchy showdown?
A: Homemade granola bars are like the artisanal masterpieces of snack time. You control every ingredient-from the nuts and seeds to the sweeteners and add-ins-making each bar uniquely tailored to your taste and dietary needs. Plus, they often burst with freshness and free from preservatives, giving you that wholesome crunch with a personal touch.
Q2: Why do some people still reach for store-bought granola bars despite the appeal of homemade?
A: Convenience is king! Store-bought bars offer quick grab-and-go fuel without the prep. They have shelf stability, consistent texture, and often creative flavor combos born from food science labs. For the busy bees and snack enthusiasts who like variety at their fingertips, these commercially crafted bars keep it simple and satisfying.
Q3: How does the crunch factor compare between homemade and store-bought granola bars?
A: Crunch is the crown jewel of any granola bar. Homemade bars can deliver a wholesome, rustic crunch depending on the toasting and baking technique. However, store-bought bars often achieve a uniform, resilient crunch through specialized processing and additives designed to keep that snap even in your pocket or lunchbox.
Q4: Are there nutritional differences worth noting between homemade and store-bought bars?
A: Absolutely! Homemade bars let you skip the added sugars, artificial flavors, and preservatives commonly hidden in store-bought varieties. You can boost fiber, protein, and healthy fats by selecting nutrient-dense ingredients. On the flip side, some store-bought brands offer fortified options packed with vitamins or protein for targeted nutrition, so it depends on your goals.
Q5: Which option is more cost-effective in the long run?
A: Homemade bars often win the cost game because ingredients like oats, nuts, and dried fruits bought in bulk can be stretched across multiple batches. Although the initial prep time and effort are higher, your wallet tends to thank you over weeks and months. Store-bought bars, while pricier per serving, save time and hassle-sometimes worth the splurge for a busy lifestyle.
Q6: Can homemade granola bars match the shelf life of their commercial counterparts?
A: Not quite. Homemade bars usually have a shorter shelf life-think about a week to two weeks refrigerated-due to their fresh, preservative-free nature. Store-bought bars, with their carefully engineered moisture balance and preservatives, can stay snack-ready for months, making them travel-friendly and ideal for stocking up.
Q7: Final verdict: Which granola bar rules the crunchy showdown?
A: Both homemade and store-bought granola bars bring unique strengths to the table. Homemade bars shine in freshness, customization, and wholesome ingredients. Store-bought bars win on convenience, consistency, and portability. Your perfect crunchy champion depends on your priorities-whether it’s crafting your own snack masterpiece or grabbing a reliable, tasty bar on-the-go. Why not enjoy both and keep the snack game crunchy and exciting?
Key Takeaways
In the crunchy showdown between homemade and store-bought granola bars, the true winner depends on what you value most: the control and creativity of crafting your own wholesome bites, or the convenience and consistency of grabbing a ready-made snack. Homemade bars invite you to experiment with flavors and tailor each chew to your liking, turning every bite into a personalized adventure. On the other hand, store-bought options promise portability and speed, perfect for those on the go. Whichever side of the aisle you choose, understanding the ingredients and nutritional trade-offs ensures your snack time is both satisfying and smart. So next time hunger strikes, whether you reach for the mixing bowl or the pantry shelf, savor the crunch-and the choice.


