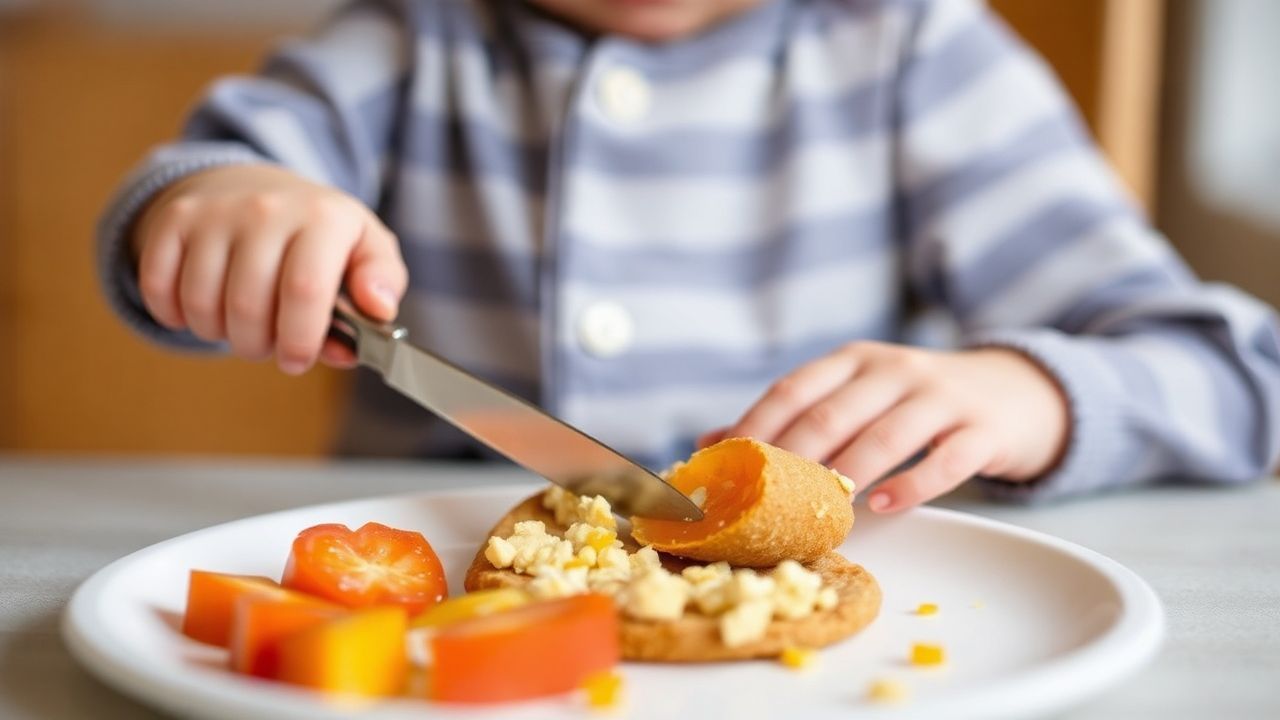
Mealtime can be a delightful adventure for young children, with tiny hands eager to explore new textures and tastes. However, ensuring cutting kids’ food safely presents a unique challenge for caregivers. Balancing independence with safety requires more than just a sharp knife; it demands thoughtful techniques, appropriate tools, and a touch of creativity. This guide offers essential tips to make food preparation a secure and enjoyable experience, empowering both little ones and the adults guiding them.
At a Glance: Mastering Safe Food Cutting for Kids
- Prioritize child-safe utensils and a stable, non-slip cutting surface.
- Introduce the “claw grip” to protect little fingers during cutting.
- Select soft, ripe foods that are easy to slice for beginners.
- Foster independence and responsibility through supervised involvement.
The Importance of Safe Food Cutting for Young Children
Cutting kids’ food safely is paramount for preventing choking incidents and fostering a positive relationship with food. Children’s developing chewing abilities and smaller oral cavities make them more susceptible to food-related hazards. By preparing food appropriately, caregivers ensure that mealtime is not only safe but also a more relaxed and enjoyable experience for everyone involved.
This skill transforms meal preparation from a potential risk into a valuable learning opportunity. It allows children to engage more directly with their food, encouraging sensory exploration and building confidence in their own abilities. Teaching safe cutting techniques also instills a sense of responsibility and self-sufficiency from an early age.
Essential Tools for Safe Food Preparation
Equipping your kitchen with the right tools is the first step towards safe food cutting for children. Child-safe knives, often made of plastic or nylon with rounded tips, are designed to slice through soft foods without posing a significant risk. These are ideal for introducing the concept of cutting to toddlers and preschoolers under supervision.
A stable, non-slip cutting board is equally crucial. Look for boards with suction cups or rubber grips to prevent accidental slips during use. This stability is essential for both safety and for allowing children to focus on the cutting motion itself. Consider smaller-sized boards that are easier for little hands to manage and secure.
Choosing the Right Utensils for Cutting Kids’ Food
Selecting appropriate cutting tools for young children is vital. Plastic or nylon knives are excellent starting points, offering a safe way for kids to mimic adult cutting actions. As they gain confidence, you might introduce silicone knives or even blunt-tipped kitchen scissors designed for food preparation.
Beyond knives, other tools can enhance safety and engagement. Food picks, particularly those with blunt ends and bright colors, can help children spear bite-sized pieces and make eating more fun. These can also be used to stabilize food on the cutting board. Remember to regularly inspect all tools for any signs of wear or damage that could compromise safety.
Creating a Secure Environment for Cutting Kids’ Food
The environment where food is cut plays a significant role in safety. Ensure a well-lit, spacious area free from distractions. Securing the cutting board firmly to the counter is non-negotiable. This prevents the board from sliding, which could lead to accidents.
Comfort and stability for the child are also important. Providing a sturdy chair or stool that allows them to reach the cutting surface comfortably and safely is recommended. For younger children, a mat or a small, stable table can create a dedicated and secure cutting zone.
Mastering Safe Cutting Techniques with Children
Teaching children how to cut food safely involves a step-by-step approach, emphasizing patience and clear demonstration. Begin by introducing the child-safe tools and explaining their purpose. Show them how to hold the knife gently but firmly, focusing on a controlled motion.
Demonstrate the cutting action on soft, easy-to-manage foods like ripe bananas or avocados. This allows children to feel the texture of the food and understand how the knife interacts with it. Keep the initial cutting tasks simple, such as halving or quartering.
The “Claw Grip” for Finger Protection When Cutting
A fundamental technique for teaching safe cutting is the “claw grip.” This involves curling the fingers of the non-dominant hand inward, tucking the fingertips away from the blade’s path. The knuckles then act as a guide for the knife, keeping fingers safely behind the cutting edge.
Consistently model and reinforce the claw grip. Explain that this is how “little fingers stay safe” while “big fingers” do the cutting. Practice this grip with both hands, ensuring the child understands its importance for every cutting task. This simple technique dramatically reduces the risk of nicks and cuts.
Step-by-Step Cutting Guidance for Kids
Start with foods that offer minimal resistance, such as very ripe pears, bananas, or cooked sweet potatoes. Guide your child’s hand initially, showing them how to apply gentle pressure and move the knife smoothly. Celebrate small successes and offer encouragement throughout the process.
As their confidence grows, you can introduce slightly firmer foods like cucumbers or soft apples. Always supervise closely and be ready to step in if the cutting motion becomes unsteady. The goal is to build their skills gradually, ensuring each step is mastered before moving to the next.
Selecting Appropriate Foods for Young Cutters
The choice of food significantly impacts the safety and success of a child’s cutting practice. Opt for soft, ripe fruits and vegetables that yield easily to a child-safe knife. This minimizes the effort required and reduces the chance of the knife slipping.
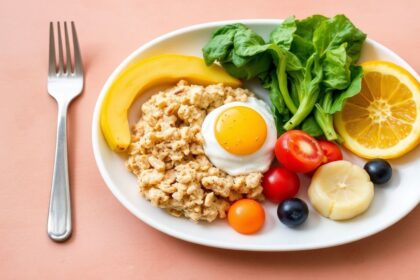
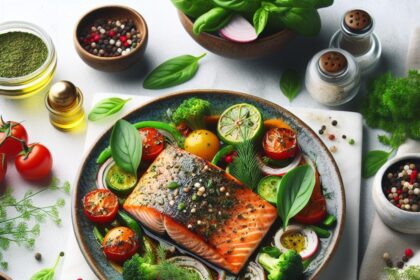
Examples include bananas, avocados, ripe pears, cooked carrots, zucchini, and soft cheeses. These foods are forgiving and allow children to practice their cutting skills without frustration. Always ensure they are at room temperature or slightly cool, as very cold or hard foods can be more challenging.
Foods to Avoid for Beginner Cutters
Certain foods pose a higher risk due to their texture or shape and should be avoided when teaching young children to cut. Hard, raw vegetables like carrots or celery sticks can be too tough for plastic knives. Similarly, small, round foods like whole grapes or cherry tomatoes present a significant choking hazard, even after cutting if not prepared correctly.
Sticky foods, nuts, popcorn, and large chunks of meat should also be avoided. These can be difficult for children to manage and can increase the risk of choking. When in doubt, err on the side of caution and select softer, more easily managed food items. For more information on food safety for young children, refer to guidelines on food safety.
Creative Presentation to Encourage Independent Eating
Making food visually appealing can significantly boost a child’s interest in eating, especially after they’ve had a hand in preparing it. Presentation turns mealtime into a fun, interactive experience, encouraging children to try new things and develop healthier eating habits.
Utilize colorful plates, cookie cutters, and food molds to create engaging shapes and designs. This can transform simple fruits and vegetables into playful characters or exciting scenes, making mealtime something to look forward to. This approach aligns with principles of positive child nutrition.
Themed Snack Plates and Bento Boxes
Creating themed snack plates can spark a child’s imagination. Arrange cut fruits and vegetables into patterns that resemble animals, flowers, or even simple faces. This encourages creativity and makes the food more inviting.
Bento boxes are another fantastic way to present food. By dividing the box into compartments, you can offer a variety of textures, colors, and flavors. This variety not only looks appealing but also encourages children to explore different food groups and learn about balanced meals. You can find inspiration for bento box designs online, often featuring cute animal shapes made from food.
DIY Food Art and Kabobs
Allowing children to participate in “food art” by arranging their own plates can be incredibly empowering. Provide a variety of pre-cut fruits and vegetables and let them create their own edible masterpieces. This fosters creativity and gives them ownership over their meal.
Making fruit or vegetable kabobs is another engaging activity. Once ingredients are cut into manageable pieces, children can thread them onto blunt-ended skewers. This is a fun, hands-on way to encourage healthy eating and practice fine motor skills. Ensure the skewers are not too sharp and supervise closely.
Tips for a Successful and Safe Mealtime Experience
Consistent reinforcement and a positive attitude are key to successful food preparation with children. Always offer praise for their efforts, no matter how small. Keep the learning sessions short and engaging to maintain their attention and prevent frustration.
Regularly inspect all cutting tools and boards for wear and tear. Dull knives require more force and are therefore more dangerous than sharp ones. Replace any tools that are damaged or no longer safe for use. This ensures a consistently safe cutting experience, crucial for effective kitchen utensil use.
Involving Children in Cleanup
Involving children in the cleanup process reinforces responsibility and teaches them proper handling of kitchen items. Have them help wash the child-safe utensils or wipe down the cutting board. This instills good habits and a sense of ownership over the kitchen space.
Make cleanup a part of the activity. Use fun, colorful sponges and mild, child-safe dish soap. This makes a potentially mundane task more enjoyable and reinforces the importance of hygiene in food preparation.
Nutritional Value of Common Cutting Foods
Understanding the nutritional benefits of the foods children are cutting can add another layer of engagement to mealtime. Many soft fruits and vegetables are packed with essential vitamins, minerals, and fiber, contributing to a healthy diet.
For instance, bananas are a great source of potassium and vitamin B6, crucial for energy and brain function. Cucumbers offer hydration and are low in calories, making them a refreshing snack. Avocados are rich in healthy fats, fiber, and numerous vitamins, supporting overall growth and development.
| Nutrient | Banana (per 100g) | Cucumber (per 100g) | Avocado (per 100g) |
|---|---|---|---|
| Calories | 89 | 16 | 160 |
| Protein | 1.1g | 0.7g | 2g |
| Carbs | 23g | 3.6g | 9g |
| Fat | 0.3g | 0.1g | 15g |
Frequently Asked Questions
Q1: Why is it important to cut kids’ food differently than adults’?
Kids have smaller mouths, less-developed chewing skills, and are more prone to choking hazards. Cutting their food into manageable, bite-sized pieces ensures they can eat safely while enjoying mealtime stress-free. This proactive approach to food preparation is a cornerstone of child nutrition and safety.
Q2: What are the best shapes and sizes to cut kids’ food?
Think small and simple! Soft fruits and veggies cut into tiny cubes or thin strips work wonders. For round foods like grapes or cherry tomatoes, slice them lengthwise to avoid the choking risk posed by whole round shapes. Aim for pieces that are no larger than a child’s fingertip.
Q3: Should I use special tools to cut kids’ food?
Absolutely! Child-friendly knives with rounded tips and ergonomic grips are fantastic for little hands learning independence. Silicone cutting boards and food scissors designed for kids can also make the experience safer and more fun. These tools are specifically designed to reduce risk and enhance the learning process.
Q4: How can I teach my child to safely cut their own food?
Patience and supervision are key. Start with soft foods and kid-safe knives, showing slow, careful cutting motions. Praise their efforts and gradually build confidence while emphasizing gentle handling and attention. Remember to demonstrate the “claw grip” to protect their fingers.
Q5: Are there any foods to avoid cutting or serving to young kids?
Yes, tough or sticky foods like hard candy, large nuts, or whole grapes can pose choking hazards regardless of size. Also, avoid overly slippery foods that are hard to grasp, unless cut into manageable portions. Prioritize foods that are easy to chew and swallow.
Q6: What’s a fun way to encourage kids to get involved in safe food prep?
Turn cutting into a creative game! Use cookie cutters to shape sandwiches or fruits into stars and hearts, or have a “color palette” day where kids cut and arrange vibrant veggies. It’s a playful learning experience with a safety bonus, making healthy eating an enjoyable activity.
Q7: How often should I sharpen or replace cutting tools used for kids?
Keeping knives sharp – but kid-appropriate – is safer than dull blades that require extra force. Regularly check for wear and replace tools that become unsafe or difficult to handle, ensuring a smooth, controlled cut every time. Damaged or worn tools can be a safety hazard.
Q8: Any quick safety tips for busy parents during mealtime prep?
Always supervise little chefs, cut food with clean, sturdy tools on stable surfaces, and remember to chat about safety as you prep. A few mindful moments prevent mishaps and nurture good habits that last a lifetime. Make safety a consistent part of your kitchen routine.
Wrapping Up: A Safe Foundation for Little Eaters
In the journey of teaching little ones to navigate the world of food, safety is the secret ingredient that makes every meal both fun and worry-free. By equipping tiny hands with the right tools and techniques, we empower children to become confident, independent eaters while keeping mishaps at bay. This process builds essential life skills and a positive relationship with food.
Remember, cutting kids’ food safely isn’t just about sharp knives or soft textures—it’s about blending patience, creativity, and care into each step. With these smart tips in your culinary toolkit, mealtime becomes a joyful adventure where safety and smiles go hand in hand. So, here’s to safe slicing and happy dining—for kids and caregivers alike!

See also: cutting kids food
- The Importance of Safe Food Cutting for Young Children
- Essential Tools for Safe Food Preparation
- Choosing the Right Utensils for Cutting Kids’ Food
- Creating a Secure Environment for Cutting Kids’ Food
- Mastering Safe Cutting Techniques with Children
- Selecting Appropriate Foods for Young Cutters
- Creative Presentation to Encourage Independent Eating
- Tips for a Successful and Safe Mealtime Experience
- Nutritional Value of Common Cutting Foods
- Frequently Asked Questions
- Q1: Why is it important to cut kids’ food differently than adults’?
- Q2: What are the best shapes and sizes to cut kids’ food?
- Q3: Should I use special tools to cut kids’ food?
- Q4: How can I teach my child to safely cut their own food?
- Q5: Are there any foods to avoid cutting or serving to young kids?
- Q6: What’s a fun way to encourage kids to get involved in safe food prep?
- Q7: How often should I sharpen or replace cutting tools used for kids?
- Q8: Any quick safety tips for busy parents during mealtime prep?
- Wrapping Up: A Safe Foundation for Little Eaters


