The Culinary Crucible: Fostering Independence Through Safe Chopping
Should we shield our youngest explorers from the very tools that unlock a world of culinary creativity, or guide them with unwavering vigilance towards mastery? In the vibrant theatre of the family kitchen, the act of chopping food can be a pivotal moment – a gateway to independence, a lesson in fine motor skills, and, undeniably, a potential pitfall if not approached with informed care. “Chop with Care: Safe Food Cutting Tips for Young Kids” is more than just a guide; it’s a strategic blueprint for parents and guardians aiming to transform meal preparation from a risk-laden chore into a thrilling, educational adventure. We explore the nuanced art of equipping tiny hands with the confidence and competence to slice and dice, ensuring that every movement builds skill and fosters a lifelong love for cooking, rather than leading to an unfortunate “ouch.” This is about more than just avoiding accidents; it’s about cultivating capability, igniting curiosity, and building foundational life skills.
- The Culinary Crucible: Fostering Independence Through Safe Chopping
- Mastering the Mechanics: Fundamental Cutting Techniques
- Selecting the Right Ingredients for Practice
- Soft Fruits and Vegetables: The Ideal Starting Point
- Graduating to Firmer Foods: A Measured Progression
- Creating a Conducive Learning Environment
- The Anatomy of a Safe Kitchen Station
- Patience and Positive Reinforcement: The Cornerstones of Learning
- Integrating Cutting Skills into Mealtime and Beyond
- FAQ: Addressing Common Concerns
- Frequently Asked Questions
- Q1: How can I ensure my child stays focused and doesn’t get distracted while cutting?
- Q2: What are the signs that my child is ready to move to slightly firmer foods?
- Q3: How do I handle a situation where my child accidentally cuts themselves, even with a child-safe knife?
- In Summary
- Empowerment Through Skill: Teaching safe cutting instills confidence and a sense of accomplishment in children.
- Motor Skill Development: The act of chopping refines fine motor skills, hand-eye coordination, and bilateral coordination.
- Culinary Engagement: Early exposure to safe food preparation fosters a positive relationship with food and cooking.
- Supervision is Paramount: Consistent, attentive adult supervision is the cornerstone of any safe kitchen activity for children.
The journey of learning to chop safely begins long before the knife meets the food. It starts with the deliberate selection of tools that are not only functional but also fundamentally designed for little hands and their developing capabilities. “Chop with Care: Safe Food Cutting Tips for Young Kids” champions the use of specialized, child-friendly utensils. These aren’t mere toys; they are thoughtfully engineered implements, often featuring rounded tips to prevent accidental punctures and serrated edges that offer just enough grip to glide through softer ingredients like ripe bananas or soft-skinned cucumbers. Imagine a bright, ergonomically designed knife, perfectly scaled for a child’s grip, that provides tactile feedback and a sense of ownership. This deliberate choice in equipment demystifies the cutting process, replacing apprehension with a palpable sense of empowerment and encouraging a positive initial interaction with kitchen tools.
Kid-Friendly Utensils: Design for Development
The effectiveness of child-safe knives lies in their intelligent design. Unlike their adult counterparts, these tools prioritize safety without sacrificing the core function of cutting. Rounded tips are a non-negotiable feature, acting as a primary safeguard against accidental jabs. The serrated edge, often finer than that on a chef’s knife, allows for easier slicing through softer foods with minimal pressure, reducing the likelihood of the knife slipping due to excessive force. Handles are typically thicker and more textured, providing a secure grip that is crucial for children who are still developing their dexterity. These features collectively ensure that the child can focus on the technique – the motion, the pressure, and the coordination – rather than being solely preoccupied with the inherent risks of a sharp object.
The Cutting Board: A Stable Platform for Success
Equally critical to the cutting utensil is the surface upon which the chopping occurs. A stable cutting board is paramount for preventing the food from sliding unexpectedly and for ensuring the board itself doesn’t move, which could lead to a loss of control. Child-sized cutting boards are often lighter and may come with integrated non-slip bases or grooves. For boards that lack these features, a simple yet highly effective solution is to place a damp cloth or a non-slip mat underneath. This small but significant step creates a secure, predictable workspace, allowing the child to concentrate on their cutting movements without the added distraction of a wobbly surface.
Mastering the Mechanics: Fundamental Cutting Techniques
Once the appropriate tools and environment are established, the focus shifts to the actual mechanics of chopping. This stage requires patience, clear demonstration, and consistent reinforcement of safe practices. “Chop with Care: Safe Food Cutting Tips for Young Kids” emphasizes techniques that prioritize finger safety and control, turning potentially awkward movements into confident actions.
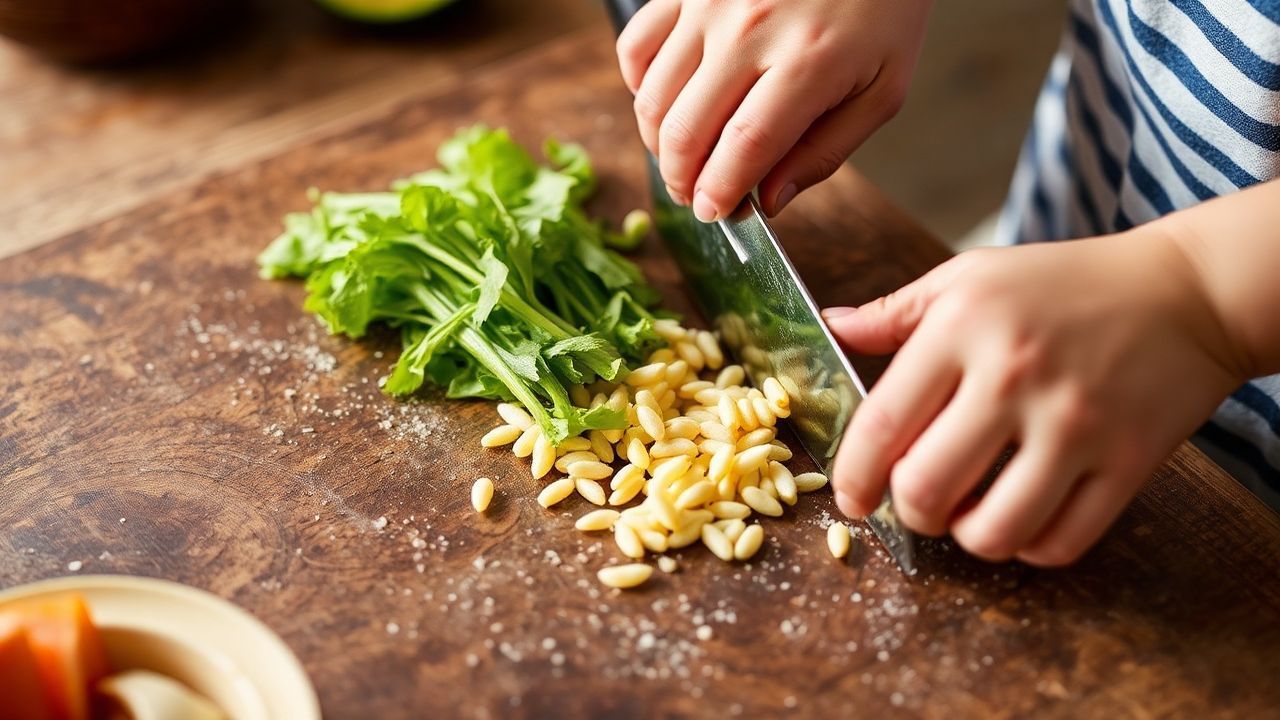
The “Bear Claw” Grip: Protecting Little Digits
A cornerstone of safe cutting for children is the “bear claw” grip. This technique involves using the non-dominant hand to hold the food, with the fingertips curled inward, resembling a bear’s paw. The knuckles of this hand then act as a natural barrier, keeping the fingers safely tucked away from the path of the knife blade. This simple yet profound method provides a physical buffer, significantly reducing the risk of accidental cuts. It’s a visual cue that children can easily grasp and remember, transforming a potentially dangerous hand position into a protective one.
Controlled Slicing: The Gentle Sawing Motion
Rather than a forceful chop, children should be encouraged to use a gentle, sawing motion. This involves moving the knife back and forth smoothly, allowing the serrated edge to do the work. This technique is particularly effective with softer foods and promotes a more controlled cut. Rushing the process or applying excessive pressure can lead to the knife slipping, increasing the risk of accidents. Guiding children to focus on a steady, rhythmic movement helps them build confidence and precision, reinforcing the idea that carefulness, not speed, is the hallmark of good technique.
Selecting the Right Ingredients for Practice
The success of early cutting lessons hinges on selecting appropriate foods that offer minimal resistance and are forgiving of less-than-perfect technique. “Chop with Care: Safe Food Cutting Tips for Young Kids” advocates for starting with items that are soft, manageable, and visually appealing.
Soft Fruits and Vegetables: The Ideal Starting Point
Foods like ripe bananas, strawberries, seedless cucumbers, and soft pears are excellent for beginners. Their tender texture requires little force to cut, allowing children to practice the sawing motion effectively without frustration. These ingredients also provide immediate positive feedback, as they yield easily to the knife, reinforcing the child’s sense of accomplishment. The visual appeal of vibrant fruits and vegetables can also enhance engagement, making the learning process more enjoyable. For instance, slicing a banana into discs or quartering a strawberry provides distinct shapes that children can see and feel proud of.
Graduating to Firmer Foods: A Measured Progression
As a child’s confidence and skill grow, they can gradually be introduced to slightly firmer ingredients. Foods like cooked sweet potato (cooled), zucchini, or even mild cheeses can be good next steps. When introducing firmer items, it’s essential to ensure they are cut into manageable sizes and that the child understands the need for a little more pressure and careful control. Carrots and apples, while popular, should typically be introduced much later, as their hardness can be challenging for young children and requires more advanced knife skills and supervision. The transition should always be guided by the child’s demonstrated ability and comfort level.
Creating a Conducive Learning Environment
Beyond tools and techniques, the psychological and environmental aspects of teaching children to chop are equally vital. “Chop with Care: Safe Food Cutting Tips for Young Kids” underscores the importance of a positive, patient, and distraction-free setting.
The Anatomy of a Safe Kitchen Station
Setting up a dedicated cutting station is a proactive step towards safety and focus. This involves ensuring the workspace is at an appropriate height for the child, preventing them from hunching over or stretching uncomfortably. As mentioned, a non-slip mat under the cutting board is non-negotiable. Furthermore, minimizing distractions is key. This means turning off the television, putting away other toys, and ensuring that siblings or pets are not in the immediate vicinity during the cutting activity. A calm, focused environment allows the child to concentrate fully on the task at hand.
Patience and Positive Reinforcement: The Cornerstones of Learning
Children learn at their own pace, and frustration can quickly dampen enthusiasm. Parents and guardians must approach these lessons with an abundance of patience. Celebrate every small success – a perfectly sliced strawberry, a well-executed “bear claw” grip. Offer gentle corrections, demonstrating the correct technique again without criticism. Positive reinforcement, whether verbal praise or a small acknowledgment, significantly boosts a child’s confidence and encourages them to persevere. Remember, the goal is not speed or perfect uniformity, but the development of safe habits and growing independence.
Integrating Cutting Skills into Mealtime and Beyond
The ability to safely chop food is not an isolated skill; it’s a gateway to greater participation in meal preparation and a deeper connection with food. “Chop with Care: Safe Food Cutting Tips for Young Kids” highlights how this newfound competence can be celebrated and expanded upon.
From Chopping Board to Plate: Culinary Creations
Once a child gains confidence in their cutting abilities, they can begin to see their efforts translate into delicious outcomes. This is where the serving suggestions come into play. Imagine a child proudly presenting a colorful fruit salad they helped assemble, or a platter of cucumber rounds for a family snack. These tangible results are powerful motivators. Simple additions like a sprinkle of cinnamon on banana slices, a drizzle of honey, or a dollop of yogurt for dipping can elevate their creations, making them feel like true chefs. This connection between their effort and the enjoyable final product reinforces the value of their culinary contributions.
Beyond the Kitchen: Transferable Life Skills
The skills honed through safe food cutting extend far beyond the culinary realm. The focus required, the precision of movement, and the understanding of tool usage all contribute to developing essential life skills. Hand-eye coordination is critical for everything from writing and drawing to participating in sports. The patience and discipline learned in mastering a new skill translate into academic pursuits and problem-solving. Moreover, involving children in meal preparation fosters a healthier relationship with food, encouraging them to try new things and understand where their food comes from. This holistic development is a significant benefit of teaching children to “chop with care.”
FAQ: Addressing Common Concerns
Frequently Asked Questions
Q1: How can I ensure my child stays focused and doesn’t get distracted while cutting?
Maintaining focus is a significant challenge with young children. To mitigate distractions, create a dedicated “cutting zone” that is free from toys, screens, and other stimuli. Explain the importance of focus for safety before you begin. You can also make the activity more engaging by incorporating storytelling or singing simple songs related to the food they are cutting. For example, as they slice strawberries, you might talk about how they will be used in a delicious dessert. If your child seems restless or unfocused, it’s a clear sign to take a break. Pushing them when they’re not engaged can lead to mistakes and a negative association with the activity. Consistency in setting expectations and providing a calm environment are key to building their ability to concentrate over time.
Q2: What are the signs that my child is ready to move to slightly firmer foods?
A child’s readiness to progress from soft foods to firmer ones is usually indicated by their demonstrated confidence and control with the current materials. Look for consistent application of the “bear claw” grip, steady sawing motions, and minimal fumbling or dropping of the knife. They should be able to cut through soft items with ease and precision, requiring little to no redirection. If they are consistently producing neat slices and can handle the knife and food with minimal effort and maximum safety, they are likely ready for the next step. Always introduce firmer foods gradually, perhaps by cutting them into smaller, more manageable pieces initially, and remain present to offer guidance as needed. Their willingness to try and their comfort level are also important indicators.
Q3: How do I handle a situation where my child accidentally cuts themselves, even with a child-safe knife?
Accidents can happen, even with the best precautions. If a minor cut occurs, remain calm. This is crucial for reassuring your child and preventing panic. Gently wash the wound with mild soap and water, and apply a sterile bandage. For very minor nicks that are easily managed with a bandage, a brief discussion about what happened and a reminder of safe practices is usually sufficient. However, if the cut is deeper, bleeds continuously, or causes significant pain, seek immediate medical attention. After any incident, it’s important to reassess the situation. Was the supervision adequate? Was the tool appropriate? Was the child too tired or distracted? Use it as a learning opportunity for both of you, reinforcing the importance of carefulness without instilling excessive fear.
In Summary
Empowering young children with the skill of safe food cutting is a profound investment in their development. “Chop with Care: Safe Food Cutting Tips for Young Kids” provides a roadmap to navigate this exciting culinary journey, transforming potential hazards into opportunities for growth. By meticulously selecting child-appropriate tools, demonstrating and reinforcing safe techniques like the “bear claw” and controlled sawing motions, and choosing forgiving ingredients, parents can build a solid foundation of confidence and competence. Remember that the environment, characterized by patience and positive reinforcement, plays a critical role in a child’s willingness to learn and their retention of these vital skills. As children gain mastery, they not only contribute more meaningfully to meal preparation but also develop transferable life skills, fostering independence, coordination, and a lifelong appreciation for the art of cooking. Equip them with knowledge, guide them with patience, and watch them chop their way to culinary confidence and beyond.
RELATED TOPICS: Child Kitchen Safety, Early Culinary Education, Fine Motor Skill Development, Parenting Hacks, Healthy Eating Habits
See also: Chop with Care: Safe Food Cutting Tips for Young Kids

