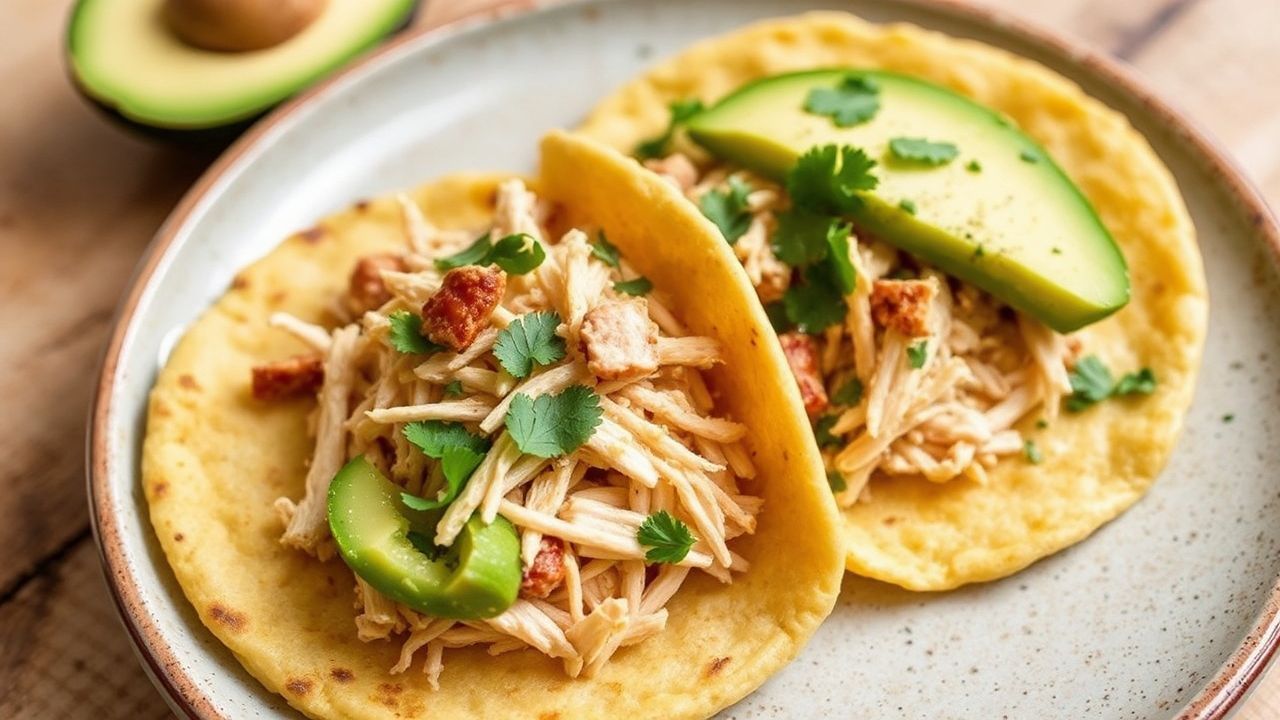
The aroma of freshly cooked corn, subtly sweet and earthy, wafts from the kitchen, a scent that instantly transports me to bustling street markets and convivial family gatherings. It’s the inimitable perfume of arepas, those humble yet magnificent corn cakes that form the heart of Venezuelan and Colombian culinary identity. Today, we’re not just making arepas; we’re crafting a symphony of textures and flavors by filling them with succulent shredded chicken and the luxurious creaminess of ripe avocado. This isn’t merely a recipe; it’s an invitation to explore a dish that is both deeply traditional and endlessly adaptable, proof of the power of simple, quality ingredients.
- The Foundation: Crafting the Perfect Arepa Dough
- The Heart of the Filling: Tender Shredded Chicken
- The Creamy Counterpoint: Ripe Avocado
- Assembling the Masterpiece: Bringing It All Together
- Nutritional Information (Per Serving, approximate)
- Elevating Your Arepa Game: Expert Tips
- The Enduring Appeal of the Arepa
- Frequently Asked Questions
- What is the best type of corn flour for making arepas?
- Can I make the shredded chicken and avocado filling ahead of time?
- How do I store leftover arepas?
- What are some other popular arepa fillings besides chicken and avocado?
At a Glance: Mastering Arepas with Shredded Chicken and Avocado
- The Dough is Key: Achieving the perfect arepa dough consistency is paramount for both texture and ease of handling.
- Shredded Chicken Mastery: Slow-cooked or pressure-cooked chicken yields the most tender, flavorful filling.
- Avocado’s Role: Ripe, unblemished avocado is non-negotiable for its creamy, buttery contribution.
- Balancing Act: The interplay between the slightly crisp exterior of the arepa, the savory chicken, and the cool avocado is the dish’s true magic.
The genesis of the arepa stretches back centuries, predating the arrival of Europeans. Indigenous peoples of the region, particularly the Cumanagotos of Venezuela and the indigenous tribes of Colombia, cultivated maize and developed sophisticated methods for processing it into a staple food. The process of nixtamalization, where corn is treated with an alkaline solution (like lime or wood ash), unlocks vital nutrients like niacin and improves digestibility—proof of ancient culinary wisdom. The modern arepa, typically made from precooked corn flour (harina P.A.N. is a ubiquitous brand), represents an evolution of these ancient techniques, offering unparalleled convenience and consistency for home cooks. Its versatility is astounding; it can be grilled, baked, fried, or steamed, and serves as a blank canvas for an infinite array of fillings.
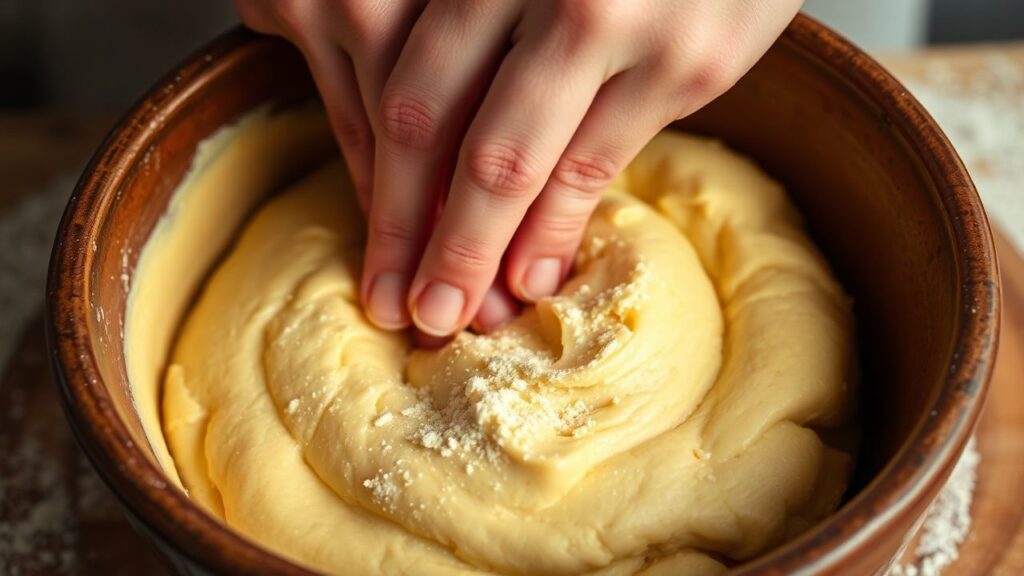
The Foundation: Crafting the Perfect Arepa Dough
The soul of any great arepa lies in its dough. Precision and a touch of intuition converge here. The goal is a dough that is pliable enough to shape yet firm enough to hold its form during cooking, yielding a slightly crisp exterior and a tender, fluffy interior. The primary ingredient is precooked corn flour, specifically formulated for arepas, which hydrates quickly and evenly.
Ingredients for the Arepas (Yields 8-10 arepas)
- 400g (approximately 4 cups) precooked white or yellow corn flour (harina P.A.N. or similar)
- 1 liter (approximately 4 cups) lukewarm water
- 10g (approximately 2 teaspoons) salt
- 15ml (approximately 1 tablespoon) vegetable oil (optional, for added richness)
Method for the Arepas
1. Hydration is Crucial: In a large mixing bowl, combine the lukewarm water and salt. Stir until the salt is fully dissolved, ensuring even distribution of seasoning throughout the dough.
2. Gradual Flour Addition: Begin adding the corn flour gradually, whisking or stirring continuously. Incorporate the flour slowly to prevent lumps and achieve a smooth consistency. The mixture will start to thicken considerably.
3. Kneading for Texture: Once all the flour has been incorporated and the mixture resembles a thick, cohesive mass, knead it with your hands. This stage is critical for developing the dough’s structure. Knead for about 5-7 minutes, until the dough is smooth, elastic, and no longer sticky. If the dough feels too dry, add a tablespoon of water at a time. If it feels too wet, add a tablespoon of corn flour. The ideal consistency is similar to playdough – firm but pliable.
4. Resting the Dough: Cover the bowl with a damp cloth or plastic wrap and let the dough rest for at least 10 minutes. This allows the corn flour to fully hydrate and the gluten (even though it’s gluten-free corn flour, there’s a protein matrix that benefits from resting) to relax, making the dough easier to handle and resulting in a more tender arepa.
The Heart of the Filling: Tender Shredded Chicken
The shredded chicken filling provides the savory depth of this dish. The key is to cook the chicken in a way that renders it exceptionally tender and allows it to absorb aromatic flavors.
Ingredients for the Shredded Chicken
- 500g (approximately 1.1 lbs) boneless, skinless chicken breasts or thighs (thighs offer more flavor and moisture)
- 1 medium onion, quartered
- 2 cloves garlic, smashed
- 1 bay leaf
- 5ml (1 teaspoon) salt
- 2.5ml (½ teaspoon) black pepper
- Water or chicken broth, enough to cover the chicken
Method for the Shredded Chicken
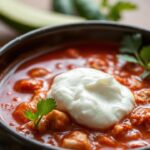
1. Aromatic Simmering: Place the chicken in a medium saucepan. Add the quartered onion, smashed garlic cloves, bay leaf, salt, and pepper. Cover the chicken with water or chicken broth. Bring to a boil over medium-high heat, then reduce the heat to low, cover, and simmer gently for 20-25 minutes for breasts, or 30-40 minutes for thighs, until the chicken is cooked through and tender. Alternatively, use a pressure cooker for about 10-15 minutes.
2. Cooling and Shredding: Once cooked, remove the chicken from the liquid and let it cool slightly. Reserve the cooking liquid; it can be used to moisten the shredded chicken later if needed. Using two forks, shred the chicken into bite-sized pieces. A mix of textures adds interest.
3. Flavor Enhancement (Optional but Recommended): For an even richer flavor, sauté some finely chopped onion and garlic in a little oil, then add the shredded chicken and a splash of the reserved cooking liquid, stirring to combine and warm through. Some cooks also add a pinch of cumin or a dash of hot sauce at this stage.
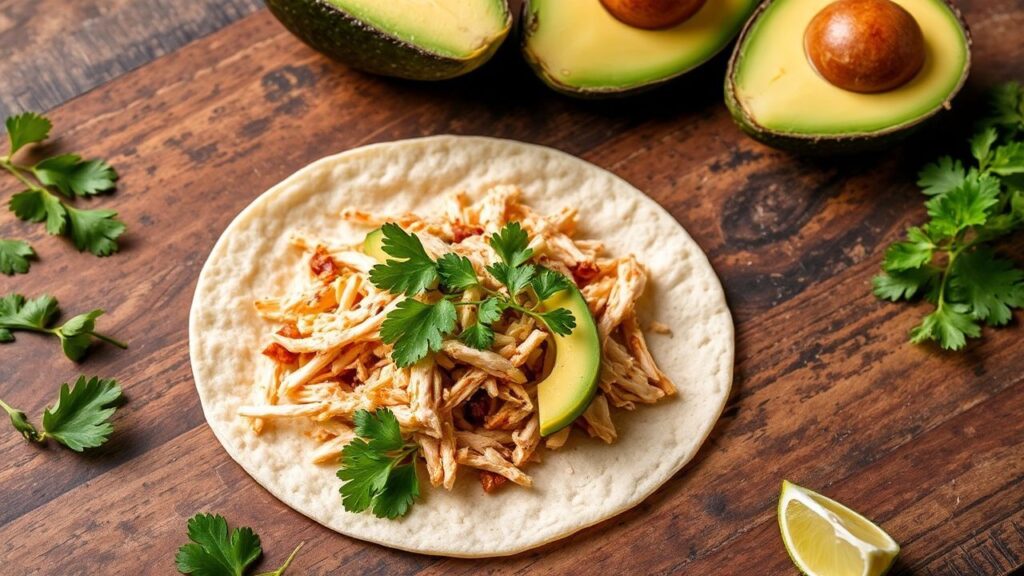
The Creamy Counterpoint: Ripe Avocado
The avocado acts as a cooling, creamy foil to the savory chicken and the slightly dense arepa. Its subtle richness and buttery texture are essential to the dish’s overall balance.
Ingredients for the Avocado
- 2 ripe avocados
- Juice of ½ lime
- Pinch of salt
Method for the Avocado
1. Gentle Preparation: Halve the avocados, remove the pits, and scoop out the flesh into a bowl.
2. Mashing (or Not): Mash the avocado with a fork until it reaches your desired consistency—from roughly chunky to a smooth purée. A slightly chunky texture is often preferred to provide textural contrast.
3. Seasoning: Gently mix in the lime juice and a pinch of salt. The lime juice brightens the flavor and helps prevent the avocado from browning too quickly.
Assembling the Masterpiece: Bringing It All Together
The assembly of arepas is a tactile process that culminates in a handheld culinary delight.
Method for Assembly and Cooking
1. Shaping the Arepas: Take a portion of the rested dough (about the size of a golf ball or slightly larger, depending on your preference). Roll it between your palms to form a smooth ball, then gently flatten it into a disc about 1.5-2 cm (about ¾ inch) thick. Ensure the edges are not cracked; if they are, gently press them together.
2. Cooking the Arepas: You have several excellent options for cooking arepas:
- Grilling/Pan-Frying (Traditional): Heat a lightly oiled griddle or heavy-bottomed skillet (cast iron is ideal) over medium heat. Place the shaped arepas on the hot surface and cook for 5-7 minutes per side, until golden brown and a crust has formed. They should sound hollow when tapped.
- Baking: Preheat your oven to 200°C (400°F). Place the arepas on a baking sheet lined with parchment paper and bake for 20-25 minutes, flipping halfway through, until they are firm and golden. This method yields a slightly softer arepa.
- Frying (for a crispier exterior): Heat about 1-2 cm (½ inch) of vegetable oil in a deep skillet over medium-high heat. Carefully place the arepas in the hot oil (don’t overcrowd the pan) and fry for 3-5 minutes per side, until golden brown and puffed up. Drain on paper towels.

3. Creating the Pocket: Once the arepas are cooked and slightly cooled, carefully slice them horizontally about two-thirds of the way through, creating a pocket. Be gentle to avoid breaking them apart completely.
4. The Grand Filling: Generously spoon the shredded chicken into the pocket of each arepa.
5. The Avocado Crown: Top the shredded chicken with a dollop of the prepared avocado.
6. Final Touches (Optional): For an extra layer of flavor and texture, consider adding a sprinkle of chopped cilantro, a drizzle of salsa rosada (a pink sauce often made with mayonnaise and ketchup), or a few slices of pickled red onion.
Nutritional Information (Per Serving, approximate)
- Calories: 350-450 kcal (will vary based on cooking method and exact ingredient quantities)
- Protein: 20-25g
- Fat: 15-20g (majority from avocado and cooking oil)
- Carbohydrates: 30-40g
- Fiber: 5-7g
- Sodium: Varies significantly based on added salt during preparation.
*Note: This is a general estimate. Actual nutritional values will depend on specific ingredient choices and portion sizes.*
Elevating Your Arepa Game: Expert Tips
Achieving restaurant-quality arepas at home requires attention to detail and a willingness to experiment. These insights will help you master this beloved dish.
The inherent beauty of arepas lies in their adaptability. While chicken and avocado are a classic pairing, the possibilities are virtually limitless. Consider the *Reina Pepiada*, a Venezuelan icon featuring shredded chicken mixed with mayonnaise and avocado—a precursor to this modern interpretation. In Colombia, arepas are often served simply with butter and cheese, or as a side to hearty stews. The textural contrast is key; aim for a filling that offers a different mouthfeel than the arepa itself. For instance, a crunchy *hogao* (a Colombian tomato and onion sofrito) or some crisp fried plantains can add another dimension.
The quality of your corn flour matters. While many brands are readily available, some professional chefs swear by specific types for their texture and flavor profile. Harina P.A.N. is widely considered the gold standard for its consistency and ease of use. Experimenting with different brands might reveal subtle differences that can enhance your final product. Similarly, the ripeness of your avocado is non-negotiable. An underripe avocado will be hard and flavorless, while an overripe one can be stringy and brown. Look for avocados that yield gently to pressure.
The Enduring Appeal of the Arepa
Arepas are more than just a meal; they are a cultural touchstone, a symbol of home, and proof of the culinary ingenuity of Latin America. The combination of tender shredded chicken and creamy avocado transforms this humble corn cake into a sophisticated yet utterly comforting dish that appeals to palates across the globe. Whether enjoyed as a quick lunch, a hearty dinner, or a late-night snack, arepas with shredded chicken and avocado offer a satisfying and flavorful experience that celebrates the simple elegance of well-prepared food. The history of maize, as seen in the [Nixtamalization](https://en.wikipedia.org/wiki/Nixtamalization) process, underpins the very existence of the arepa, connecting us to ancient traditions with every delicious bite.
Frequently Asked Questions
What is the best type of corn flour for making arepas?
The most recommended and widely used corn flour for making authentic arepas is precooked corn flour, specifically designed for arepas. Brands like Harina P.A.N. (often labeled as “masarepa” or “harina de maiz precocida”) are formulated to hydrate quickly and evenly, creating a smooth, pliable dough that cooks to a perfect texture. This type of flour is crucial because it has already been cooked and dried, allowing it to absorb water rapidly and form a cohesive dough suitable for shaping and cooking into arepas. Using regular cornmeal or masa harina (which is typically used for tortillas and tamales) will yield a different texture and may not result in the characteristic arepa.
Can I make the shredded chicken and avocado filling ahead of time?
Yes, both the shredded chicken filling and the avocado preparation can be made ahead of time, with some considerations. The shredded chicken can be cooked and shredded up to 2-3 days in advance and stored in an airtight container in the refrigerator. When ready to use, gently reheat it on the stovetop with a splash of its cooking liquid or a little broth to ensure moisture. The avocado mixture is best prepared closer to serving time, as avocado tends to brown when exposed to air. However, if you must prepare it in advance, mixing in the lime juice thoroughly and storing it in an airtight container with plastic wrap pressed directly onto the surface of the avocado can help minimize oxidation for a few hours. For optimal freshness and vibrant color, it’s ideal to mash and season the avocado just before assembling the arepas.
How do I store leftover arepas?
Leftover arepas can be stored in an airtight container at room temperature for up to 2 days if they are plain, or in the refrigerator for up to 3-4 days if they have been filled. If storing filled arepas, it’s best to store the arepas and the filling separately if possible, to prevent the arepas from becoming soggy, especially if the filling is moist. To reheat plain arepas, you can gently warm them on a griddle, in a toaster oven, or even in a microwave for a short period. If reheating filled arepas, it’s often best to reheat the arepa first, then add the filling or reheat the filling separately and assemble. Fried arepas may lose some of their crispness upon reheating.
What are some other popular arepa fillings besides chicken and avocado?
The beauty of arepas lies in their incredible versatility, and they are enjoyed with a vast array of fillings. Some of the most popular include:
- Reina Pepiada: A classic Venezuelan filling of shredded chicken mixed with mayonnaise and avocado.
- Carne Mechada: Shredded, slow-cooked beef, often stewed with tomatoes and spices.
- Perico: A Venezuelan scrambled egg dish with tomatoes and onions.
- Queso: Simple yet delicious arepas filled with various types of cheese, such as white cheese or mozzarella.
- Domino: A vegetarian option combining black beans and white cheese.
- Tuna Salad: A common and refreshing filling, especially in coastal regions.
- Pulled Pork: Similar to *carne mechada*, but using pork for a different savory flavor.
- Vegetable Medleys: Sautéed mushrooms, bell peppers, and onions, or roasted vegetables.
See also: Arepas