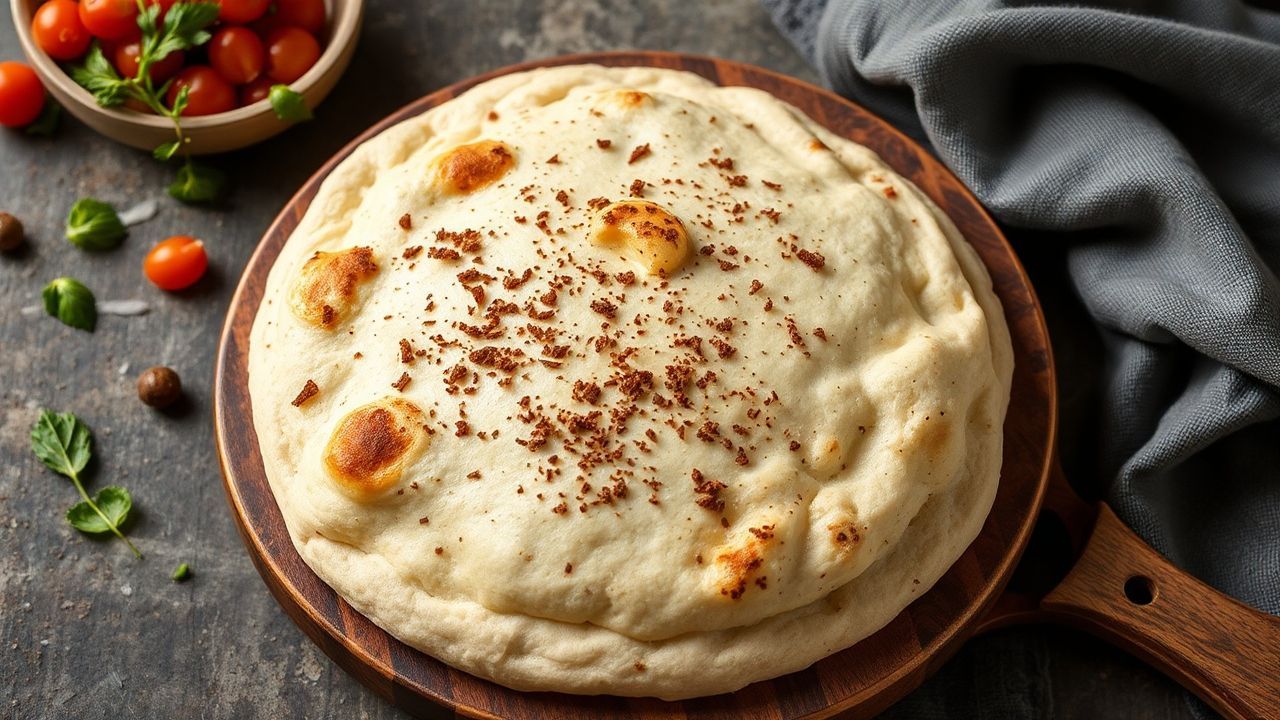
Pita is more than just a simple flatbread; it’s a culinary cornerstone, a portable pocket of delight that graces tables across the Mediterranean, Middle East, and beyond. Its versatility is legendary, serving as a vehicle for everything from hearty kebabs to vibrant salads, or simply enjoyed with a drizzle of olive oil and a sprinkle of za’atar. Yet, the magic of truly great pita lies in its ethereal puff, the dramatic inflation that creates that iconic hollow interior, perfect for stuffing. Many home bakers find this elusive puff a frustrating challenge, often ending up with dense, sad disks rather than the airy vessels they envision. This is not by accident; achieving that perfect puff is a science, a delightful interplay of ingredients, technique, and temperature.
The true art of pita making isn’t just about mixing flour and water; it’s about coaxing a culinary miracle from humble ingredients, transforming them into a bread that inflates with life.
This guide is born from years spent in bustling kitchens, from the sun-drenched shores of the Levant to the experimental labs of modern gastronomy, all dedicated to understanding the nuances of this beloved bread. We will dissect the anatomy of a perfectly puffed pita, revealing the critical factors that contribute to its success, and equipping you with the knowledge to replicate this wonder in your own home. Forget the store-bought imitations; prepare to start to create pita so fresh, so light, and so wonderfully puffy, it will redefine your appreciation for this timeless staple.
The Foundational Pillars of Puffy Pita
The quest for the perfectly puffed pita begins with understanding its fundamental requirements. While the ingredients list might appear deceptively simple – flour, water, yeast, salt, and sometimes a touch of sugar or oil – the quality and precise handling of each element are paramount. These aren’t mere components; they are the building blocks of a delicate chemical and physical reaction that culminates in that signature puff.
At the heart of any successful yeast bread is the flour. For pita, a bread flour is often preferred over all-purpose flour due to its higher protein content. This protein, primarily gluten, forms a strong, elastic network when hydrated and kneaded. This network is crucial for trapping the gases produced by the yeast, allowing the dough to stretch and expand dramatically without tearing, which is essential for the puff. A study published in the *Journal of Cereal Science* highlights how gluten network development directly influences dough extensibility and gas retention, key factors in achieving an airy crumb structure.
The role of yeast cannot be overstated. Whether using active dry yeast or instant yeast, its vitality is non-negotiable. The yeast consumes sugars in the dough and releases carbon dioxide gas, the very air that inflates the pita. An under-proofed dough, or one made with sluggish yeast, will lack the necessary gas to achieve a significant puff. Conversely, over-proofing can weaken the gluten structure, leading to a premature collapse. The temperature of the liquid used to activate the yeast is also critical; too hot, and it kills the yeast; too cold, and it slows its activity considerably. The ideal range is typically between 105-115°F (40-46°C) for active dry yeast.
Salt, while essential for flavor, also matter significantly in dough structure. It tightens the gluten strands, preventing the dough from becoming too slack and aiding in the development of a more robust structure capable of holding gas. Sugar, if used, acts as food for the yeast, accelerating fermentation, and can also contribute to browning and a slightly tender crust. A small amount of olive oil can enhance dough extensibility and add a subtle richness, though too much can inhibit gluten development and the crucial puff.
The Alchemy of Kneading and Proofing
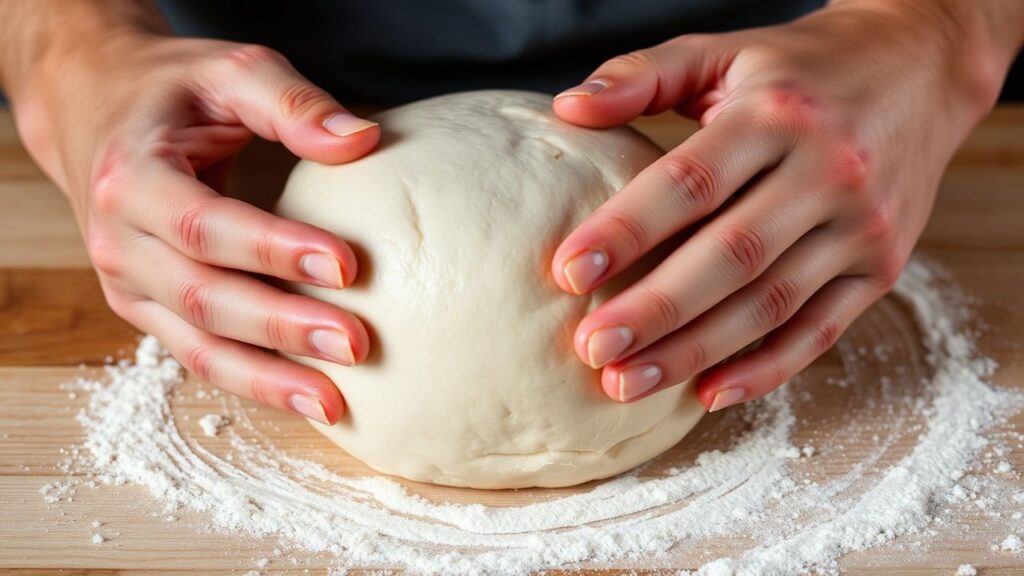
Once the ingredients are combined, the real magic begins with kneading and proofing. These stages are where the dough transforms from a sticky mass into a pliable, elastic entity ready to perform. Kneading is the process of developing the gluten network. This can be done by hand or with a stand mixer. The goal is to work the dough until it is smooth, elastic, and passes the “windowpane test” – when a small piece of dough can be stretched thin enough to see light through it without tearing. This indicates a well-developed gluten structure, capable of trapping the expanding gases.
Following kneading, the proofing or rising stage is critical. This is when the yeast goes to work, producing carbon dioxide and causing the dough to double in size. For pita, a warm, draft-free environment is ideal. A common mistake is to rush this process. Sufficient time allows the yeast to fully populate the dough and create enough gas bubbles. A standard first proof might take 1-2 hours, depending on ambient temperature.
However, for optimal puff, a double-proofing method is often employed. After the first rise, the dough is gently deflated, divided into individual portions, and then allowed to rest and rise again. This second proof, often shorter than the first, allows the gluten to relax after being divided and shaped, and ensures a good distribution of gas within each individual pita ball. This is where the foundation for that dramatic puff is truly laid.
The difference between a flat, uninspired pita and a gloriously puffed one often comes down to patience during the proofing stages.
Shaping and the High-Heat Imperative
The transformation from a proofed dough ball to a puffed pita happens in the oven, and the conditions are critical. The shaping process must be handled with a delicate touch. Overworking or aggressively degassing the dough at this stage will deflate the precious air bubbles created during proofing. Each portion of dough should be gently flattened and then, importantly, rolled out evenly. Uneven thickness can lead to one side puffing more than the other, or the pita failing to puff at all. The dough should be rolled to approximately 1/8 to 1/4 inch thickness.
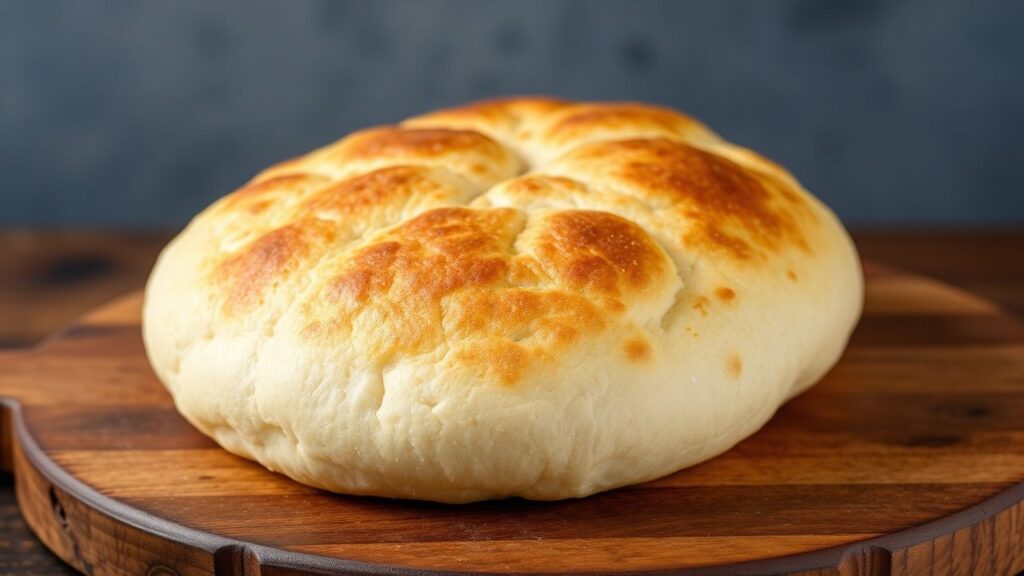
The true catalyst for the dramatic puff is intense, dry heat. This is arguably the most crucial factor. When the rolled-out pita hits a scorching hot surface, the moisture within the dough rapidly turns to steam. Simultaneously, the yeast, still active at this temperature, releases a final surge of carbon dioxide. The combination of rapidly expanding steam and gas within the well-developed gluten structure forces the dough to inflate dramatically. This rapid expansion is what creates the iconic pocket.
Traditionally, pita is baked in very hot clay ovens or on a *saj* (a convex metal griddle). Replicating this in a home kitchen requires achieving temperatures of 450-500°F (230-260°C). A preheated baking stone or baking steel is indispensable. These surfaces retain and transfer heat efficiently, mimicking the intense heat of a professional oven. Placing the rolled-out pita directly onto a screaming hot stone or steel initiates the rapid steam and gas expansion immediately.
A common pitfall is using an oven that isn’t hot enough or is not properly preheated. If the oven is too cool, the dough will begin to dry out before it has a chance to puff, resulting in a cracker-like texture rather than a soft, airy bread. The baking time is also very short, typically only 2-4 minutes per pita, as they cook incredibly quickly at these high temperatures. Overbaking will lead to a brittle, dry pita.
Expert Insights for Unparalleled Puff
Achieving consistently puffy pita is a craft honed through understanding and practice. Here are some expert-level insights to elevate your results:
Troubleshooting the Puffless Pita
Even with the best intentions, sometimes the puff eludes us. Understanding common issues can help diagnose and correct problems for future bakes.
One of the most frequent culprits is insufficient heat. As discussed, the oven or cooking surface must be intensely hot to generate the rapid steam and gas expansion. If your oven doesn’t reach or maintain the required high temperature, the puff will be compromised.
Another issue can be overworking the dough during shaping. Aggressively rolling or stretching the dough after proofing can rupture the delicate gluten walls that are meant to trap the gas. The goal is to flatten and roll gently, preserving as much of the internal air as possible.
Uneven rolling is also a common problem. If the dough is rolled too thin in some spots and too thick in others, the steam and gas will escape more readily from the thinner areas, preventing an even puff. Aim for consistent thickness across the entire surface of the pita.
Finally, flour type and quality can play a subtle yet significant role. Using a low-protein flour might result in a weaker gluten network, less capable of containing the expanding gases. Always opt for a good quality bread flour for the best structural integrity.
Beyond the Basic Puff: Flavor and Texture Enhancements
While the puff is the star, the flavor and texture of your pita can be further refined. A touch of whole wheat flour can be incorporated into the bread flour mix (e.g., 20-30%) to add a nutty depth and slightly chewier texture. Be mindful that whole wheat flour absorbs more water, so you may need to adjust hydration accordingly.
Experimenting with herbs and spices directly in the dough is another avenue. Finely chopped fresh herbs like parsley or cilantro, or a pinch of dried oregano or thyme, can imbue the pita with subtle aromatic notes. For a more robust flavor, a small amount of finely ground spice blend, such as za’atar or sumac, can be incorporated during the kneading stage.
For a richer, softer pita, a small amount of milk can be used in place of some of the water. This adds lactose and fat, which contribute to a more tender crumb and enhanced browning. However, excessive fat can hinder the puff, so this should be done judiciously.
The Cultural Significance of Puffy Pita
The humble pita’s ability to puff is more than just a culinary achievement; it’s a symbol of sustenance and conviviality across cultures. In many Levantine households, the sight of a freshly baked, perfectly puffed pita emerging from the oven is a source of pride and a signal for the family to gather. The hollow pocket is not merely a functional design; it’s an invitation to share, to fill with communal dishes, and to break bread together. Research into food anthropology often points to how the form and function of staple foods like pita reflect and reinforce social structures and traditions. Its ability to hold diverse fillings makes it an ideal food for both individual enjoyment and communal feasting.
Frequently Asked Questions
What is the best type of flour for puffy pita?
The best flour for achieving a puffy pita is a high-protein bread flour. Its superior gluten-forming capabilities create a strong, elastic dough that can trap the gases produced by yeast and steam during baking, leading to the characteristic puff and hollow interior. All-purpose flour can be used, but it may result in a less pronounced puff and a slightly denser texture.
How do I ensure my pita puffs every time?
Consistent puffing relies on several critical factors: a well-developed gluten structure from proper kneading, adequate proofing to build gas, even rolling of the dough, and, most importantly, baking in an extremely hot oven (450-500°F or 230-260°C) on a preheated baking stone or steel. The intense, dry heat is what rapidly converts moisture to steam and activates the yeast for that dramatic inflation.
Can I make pita without yeast?
While yeast-leavened pita is traditional and achieves the signature puff, unleavened flatbreads exist in many cultures. However, these will not puff in the same way as yeasted pita. For a puffed pita, yeast is essential for creating the gas that inflates the bread.
Why are my pita breads flat and dense?
Flat and dense pita is usually a result of one or more of the following: insufficient yeast activity (old yeast, incorrect water temperature), under-kneading (weak gluten network), over-proofing (gluten structure breakdown), insufficient oven heat (lack of rapid steam expansion), or overworking the dough during shaping.
How can I store freshly baked puffy pita?
To maintain their softness and puffiness, store cooled pita in an airtight container or a plastic bag at room temperature for 1-2 days. For longer storage, they can be frozen. Reheat gently in a warm oven, on a skillet, or briefly in a toaster to revive their texture. Avoid refrigerating them, as this can make them stiff.
See also: Pita

