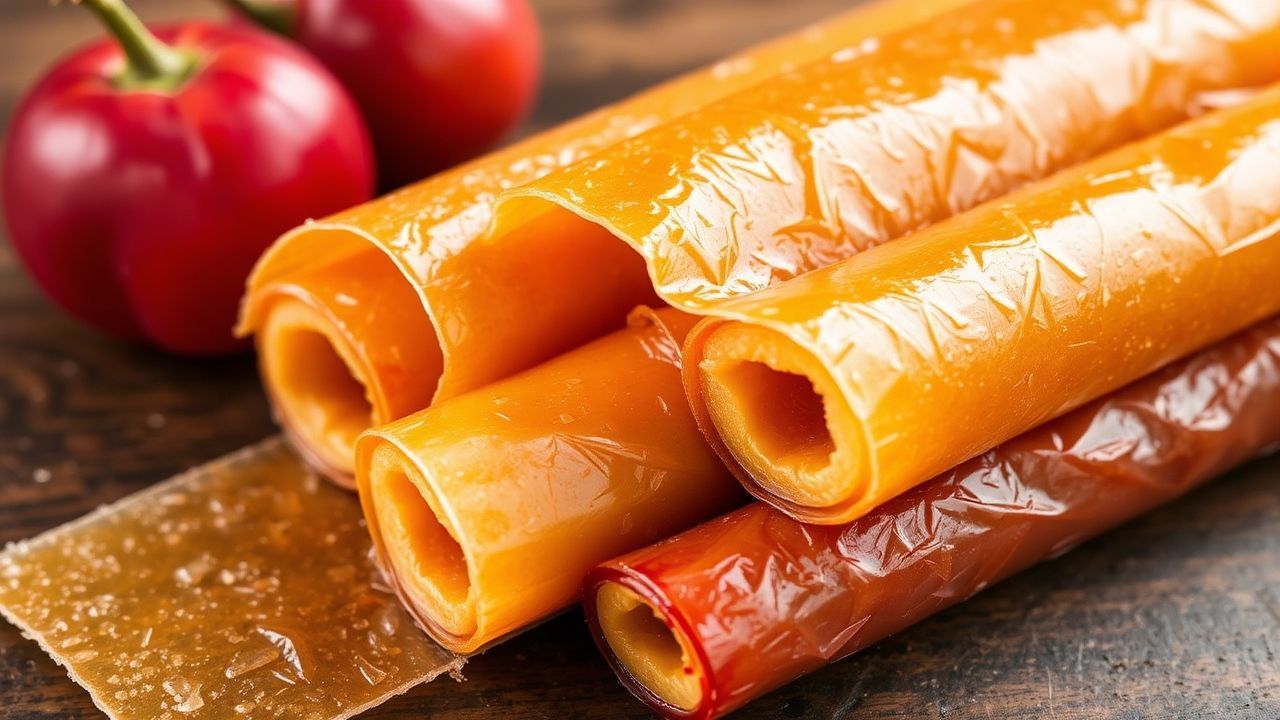
The Magic of Homemade Fruit Leather Rolls
There’s a unique satisfaction in biting into a chewy, fruity roll of homemade fruit leather. It’s more than just a treat; it’s a celebration of nature’s bounty, preserved through a simple, rewarding process. This guide unlocks the secrets to transforming fresh fruit into vibrant, tangy rolls that capture the essence of sunshine. Whether you seek a healthier alternative to processed snacks or a delightful kitchen project, crafting fruit leather at home offers a creative outlet and a delicious outcome.
- The Magic of Homemade Fruit Leather Rolls
- Mastering the Art of Fruit Leather
- Prep and Cook Time Essentials
- Yield and Servings
- Skill Level: Approachable Medium
- Essential Ingredients for Fruity Rolls
- Step-by-Step Fruit Leather Creation
- 1. Preparing Your Fruit Base
- 2. Achieving a Silky Smooth Puree
- 3. Gently Cooking the Puree
- 4. Spreading for Even Drying
- 5. The Art of Dehydration
- 6. Cooling and Rolling Technique
- 7. Proper Storage for Longevity
- Expert Tips for Perfect Fruit Leather
- Choosing the Best Fruits
- Exploring Flavor Combinations
- The Importance of Thinness
- Utilizing Parchment Paper
- Make-Ahead Convenience
- Serving and Presentation Ideas
- Frequently Asked Questions (FAQ)
- Q1: What defines fruit leather and why make it at home?
- Q2: Which fruits are best for homemade fruit leather?
- Q3: Is specialized equipment needed for fruit leather?
- Q4: How can I achieve the perfect chewy texture?
- Q5: Can I infuse custom flavors and spices?
- Q6: What’s the best way to store fruit leather rolls?
- Q7: Is homemade fruit leather a healthy snack choice?
- Q8: Can children participate in making fruit leather?
- Future Outlook: The Enduring Appeal of Fruit Leather
- Homemade fruit leather is a wholesome snack preserving natural fruit flavors.
- Requires basic kitchen tools and minimal preparation time.
- Drying process is key to achieving the perfect chewy texture.
- Versatile for various fruits and flavor combinations.
Mastering the Art of Fruit Leather
DIY Delight: How to Make Homemade Fruit Leather Rolls embodies the joy of transforming simple fruits into a concentrated, chewy delight. This age-old preservation technique, once essential for extending fruit’s shelf life, now offers a wonderful blend of nostalgia and culinary creativity. Imagine unwrapping a strip of intensely flavored fruit leather, its vibrant color and satisfying chewiness proof of pure ingredients. The secret to this delightful snack lies in selecting peak-season fruits and mastering the gentle cooking and drying stages.
Prep and Cook Time Essentials
Preparation: 15 minutes
Cooking & Blending: 10 minutes
Drying Time: 6 to 8 hours (or overnight, depending on your method)
Yield and Servings
Expect to yield approximately 6-8 rolls, each around 8 inches in length. This can vary based on the thickness of your spread and the total drying duration.
Skill Level: Approachable Medium
Crafting fruit leather is rated as medium difficulty. It requires careful attention during the blending and drying phases. However, the process is very manageable, making it an excellent DIY food project for beginners eager to explore homemade snacks.
Essential Ingredients for Fruity Rolls
- 4 cups assorted fresh, ripe fruit (e.g., strawberries, mangoes, peaches, apples), prepared as needed
- 2 tablespoons fresh lemon juice (enhances flavor and preserves vibrant color)
- 2-3 tablespoons honey or maple syrup (optional, adjust to taste based on fruit sweetness)
- 1 teaspoon ground cinnamon or vanilla extract (optional, for added flavor complexity)
- A pinch of salt (to deepen and balance the fruit’s natural sweetness)
Step-by-Step Fruit Leather Creation
1. Preparing Your Fruit Base
Begin by thoroughly washing and drying your chosen fruits. Remove any stems, pits, or cores. Chop the fruit into uniform pieces; this ensures consistent blending and a smoother puree. Using the ripest fruit available is crucial for achieving natural sweetness, which forms the foundation of your fruit leather’s flavor profile.
2. Achieving a Silky Smooth Puree
Transfer the prepared fruit into a high-speed blender or food processor. Add the fresh lemon juice, optional sweetener, ground cinnamon or vanilla extract if using, and a pinch of salt. Blend the mixture for 2-3 minutes until it reaches a completely smooth consistency. A finer puree is key to developing a smoother, more elastic fruit leather texture.
3. Gently Cooking the Puree
Pour the smooth fruit puree into a nonstick skillet or saucepan. Cook over medium-low heat, stirring continuously. This constant attention prevents the puree from scorching on the bottom. The cooking process thickens the puree and reduces excess water content, which is vital for successful drying.
Continue cooking for about 8-10 minutes. You’ll notice the puree becomes slightly thicker, yet it should remain easily spreadable. This consistency is essential for achieving an even layer in the next step. Overcooking can lead to a drier, less pliable final product.
4. Spreading for Even Drying
Prepare a rimmed baking sheet by lining it with a silicone baking mat or parchment paper. Carefully pour the thickened fruit puree onto the prepared sheet. Use an offset spatula to spread the puree into a uniform layer, aiming for a thickness of about 1/8 inch. Evenness is critical; thicker areas will take significantly longer to dry and may result in uneven textures.
5. The Art of Dehydration
Preheat your oven to its lowest setting, typically between 140-170°F (60-75°C). Alternatively, use a food dehydrator set to a similar temperature. Place the prepared baking sheet into the preheated oven or dehydrator. Allow the fruit leather to dry for 6 to 8 hours. Drying times can fluctuate based on the thickness of your spread, ambient humidity, and your specific appliance.
The fruit leather is ready when it feels no longer sticky to the touch but remains pliable. It should bend without cracking. Over-drying will make it brittle, while under-drying will leave it too sticky to handle.
6. Cooling and Rolling Technique
Once the fruit leather has reached the desired texture, remove the baking sheet from the oven or dehydrator. Let the sheet cool completely on a wire rack. This cooling period is important for the leather to firm up slightly. Gently peel the dried fruit leather away from the silicone mat or parchment paper. It should come off cleanly.
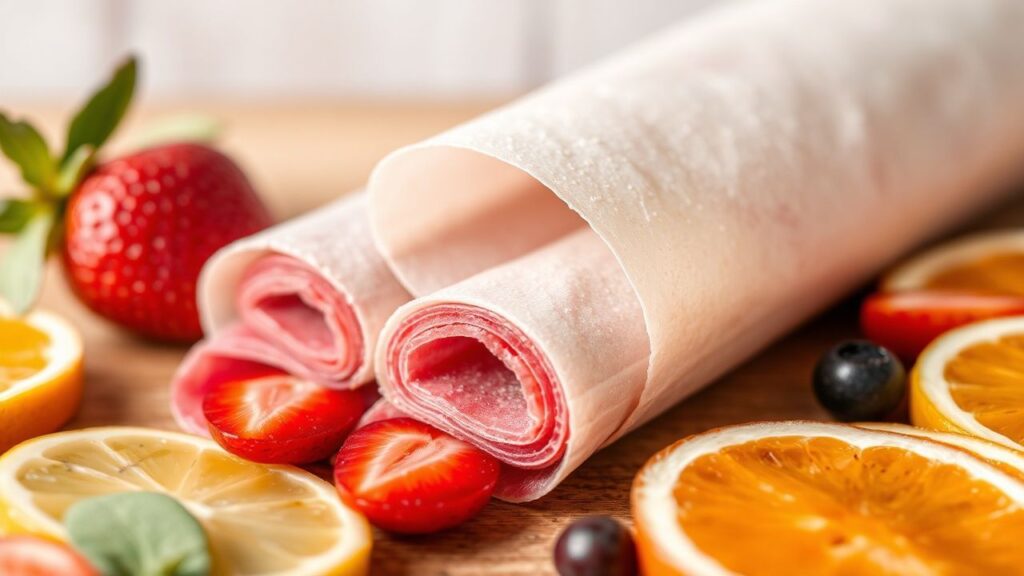
Using kitchen scissors or a sharp knife, cut the large sheet into strips, approximately 1.5 to 2 inches wide. Roll each strip around a piece of parchment paper or wax paper. This rolling technique helps the leather maintain its shape and prevents it from sticking to itself during storage, ensuring easy unwrapping later.
7. Proper Storage for Longevity
Store your finished fruit leather rolls in an airtight container. At room temperature, they can last for up to a month. For extended freshness and to maintain that luscious chewiness, consider refrigerating the container. Proper drying is the first line of defense against mold, and airtight storage seals in the quality.
Expert Tips for Perfect Fruit Leather
Choosing the Best Fruits
For optimal flavor and texture, select fruits that are naturally sweet, ripe, and juicy. Fruits like mangoes, ripe peaches, and berries are excellent choices. Tart fruits such as cranberries or rhubarb may require a bit more sweetener. Tropical fruits like pineapple often stand beautifully on their own, offering a bright, exotic taste.
Exploring Flavor Combinations
Don’t be afraid to experiment with adding complementary flavors. Stirring in ground herbs like mint or a tiny pinch of chili powder can add an exciting dimension. For a richer, more decadent twist, consider swirling in a spoonful of nut butter after the puree has been cooked but before spreading.
The Importance of Thinness
Spreading the fruit puree too thickly is a common pitfall. A thick layer significantly increases drying time and can lead to uneven texture, potentially resulting in brittle edges and a still-sticky center. Aim for a consistent, thin layer across the entire baking sheet for the most uniform results.
Utilizing Parchment Paper
While silicone baking mats offer a nonstick surface, parchment paper is a highly effective and readily available alternative. Ensure the parchment paper is trimmed to fit the dimensions of your baking sheet. This simple step guarantees easy removal of the fruit leather without tearing or sticking.
Make-Ahead Convenience
Fruit leather rolls are an ideal make-ahead snack. Their portability and shelf-stability make them perfect additions to lunchboxes, trail mix for hiking, or quick, healthy snacks for busy days. Store them in individual portions for grab-and-go ease.
Serving and Presentation Ideas
Slice your homemade fruit leather rolls into bite-sized pieces for a wholesome snack, or tear them into ribbons to add a colorful flourish to yogurt bowls and smoothie rims. They serve as a natural, appealing candy alternative for children’s lunchboxes. Layering them with cheese can create a sophisticated snack platter, or wrapping them around nuts offers an elegant hors d’oeuvre.
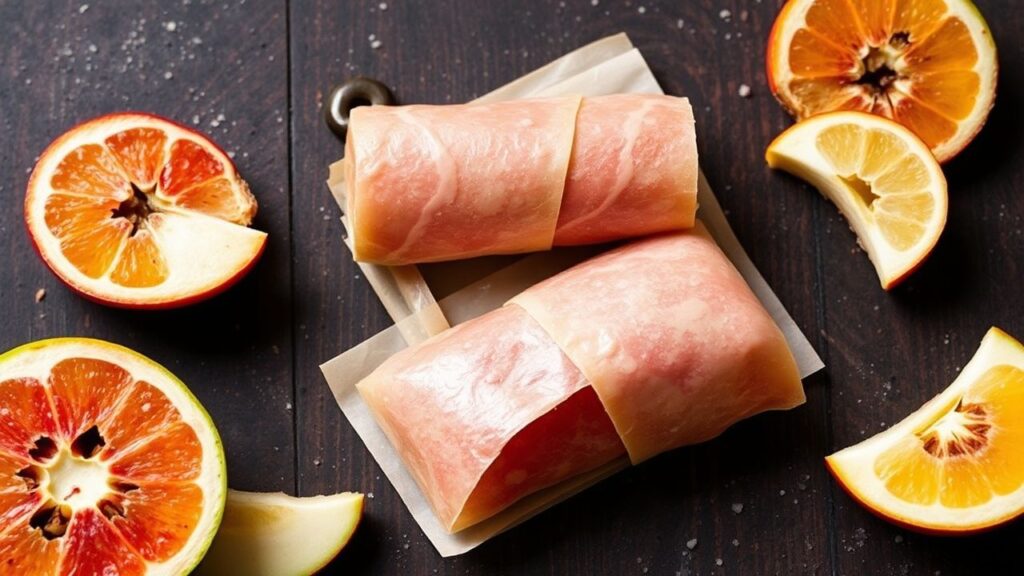
For a visually stunning presentation, arrange multiple fruit leather flavors rolled side-by-side on a rustic wooden tray. Alternatively, use cookie cutters to create fun shapes for parties and gatherings. Complement these fruity delights with a refreshing iced tea or sparkling water infused with fresh herbs to enhance their natural sweetness.
| Nutritional Component | Per Roll (approx.) |
|---|---|
| Calories | 90-110 |
| Protein | 0.5 g |
| Carbohydrates | 22 g |
| Fat | 0.2 g |
| Fiber | 2 g |
For more insights into fruit preservation, explore the Wikipedia guide on fruit leather. Discover additional creative recipes in our collection of easy homemade snacks.
Frequently Asked Questions (FAQ)
Q1: What defines fruit leather and why make it at home?
Fruit leather is essentially fruit that has been pureed and then dehydrated into a thin, chewy, flexible sheet. Making it at home grants you complete control over ingredients. You eliminate preservatives, artificial colors, and excess sugars, ensuring a pure, wholesome fruity snack. It’s a fantastic way to enjoy concentrated fruit flavor.
Q2: Which fruits are best for homemade fruit leather?
The beauty of fruit leather is its versatility. Almost any fruit can be used! Classic choices like strawberries, mangoes, apples, and peaches yield excellent results. For a more adventurous palate, consider blending berries with tropical fruits like pineapple, or adding a splash of citrus for a tangy counterpoint. Your imagination is the only limit.
Q3: Is specialized equipment needed for fruit leather?
No, specialized equipment is not a prerequisite. A standard kitchen oven or a food dehydrator works perfectly. The core steps involve spreading the fruit puree onto a lined baking sheet and drying it at a low temperature. While a blender or food processor greatly simplifies pureeing, even manual methods can be employed in a pinch.
Q4: How can I achieve the perfect chewy texture?
The key to achieving the ideal chewy texture lies in precise drying time and temperature control. Maintain a low oven heat, around 140°F (60°C), and allow the puree to dry for 4-8 hours. Check it periodically. The fruit leather is ready when it’s no longer tacky to the touch but still bends without breaking. This consistency is often described as similar to soft leather.
Q5: Can I infuse custom flavors and spices?
Absolutely! Customization is one of the greatest joys of making fruit leather at home. You can easily add complementary spices like cinnamon, ginger, or nutmeg. A dash of cayenne pepper can introduce a surprising hint of heat. Even pureed fresh herbs such as mint or basil can add an unexpected burst of freshness and aroma.
Q6: What’s the best way to store fruit leather rolls?
Once your fruit leather is completely cooled, roll each piece individually in parchment paper or plastic wrap. Store these rolls in an airtight container. Kept in a cool, dry place, they should remain delicious for up to a month. For longer storage, freezing the rolls in a freezer-safe bag or container is an excellent option, preserving them for several months.
Q7: Is homemade fruit leather a healthy snack choice?
Yes, homemade fruit leather is an exceptionally healthy snack option. Because it’s made from pure fruit, often with minimal or no added sugars, it provides a nourishing and fiber-rich alternative to processed snacks. It’s an ideal choice for children’s lunchboxes, outdoor adventures, or any time you need a natural, fruity energy boost.
Q8: Can children participate in making fruit leather?
Certainly! Making fruit leather is a fantastic activity to involve children. They can assist with blending the fruit, spreading the puree onto the baking sheet, and even rolling the finished product. It’s an engaging and educational way to teach them about healthy eating and the fun of kitchen creativity.
With these detailed instructions and helpful tips, you’re well-equipped to embark on your own fruit leather creation journey. Prepare to delight in the sweet satisfaction of crafting these irresistible and wholesome rolls from scratch. Happy making, and even happier snacking!
Future Outlook: The Enduring Appeal of Fruit Leather
As you unroll a tangy, chewy piece of homemade fruit leather, you taste more than just fruit. You experience the concentrated essence of nature, transformed by your own hands. This simple fusion of ripe fruit, patient effort, and a touch of creativity elevates everyday ingredients into a deeply satisfying treat. Embrace experimentation with your favorite fruits and flavor profiles, and bask in the sweet reward of DIY delight.
See also: fruit leather rolls

