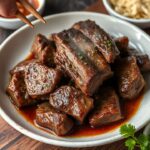
The Humble Chickpea’s Grand Transformation: A Falafel Odyssey
I recall a humid afternoon in the bustling souks of Marrakech, the air thick with the intoxicating perfume of spices. Amidst the vibrant chaos, a small cart, seemingly unremarkable, drew a crowd. The vendor, with nimble, practiced hands, was frying small, verdant spheres. The aroma that wafted from his stall was unlike anything I had encountered – earthy, herbaceous, and undeniably alluring. He served them, piping hot, nestled in a warm pita pocket with a dollop of tahini and a scattering of pickles. That was my first true encounter with falafel, not as a mere fast-food staple, but as a culinary revelation. This wasn’t just fried chickpea dough; it was a symphony of textures and flavours, proof of the transformative power of simple ingredients when treated with respect and expertise. The quest for that perfect falafel platter – a harmonious marriage of crispy, flavourful falafel, silken hummus, and soft, yielding pita – is a journey many embark upon, but few truly master. It’s a dish that transcends borders and cultures, a beloved icon of Middle Eastern cuisine that has found a permanent place on tables worldwide.
- The Humble Chickpea’s Grand Transformation: A Falafel Odyssey
- Crafting the Quintessential Falafel: More Than Just Fried Dough
- The Art of the Fry: Achieving Falafel Nirvana
- Hummus: The Velvety Emollient of the Platter
- The Humble Pita: A Canvas for Culinary Art
- Assembling Your Masterpiece: The Falafel Platter
- Elevating Your Falafel Platter: Expert Touches
- Conclusion: A Celebration of Simplicity and Flavour
- Frequently Asked Questions
At a Glance: Unlocking Falafel Excellence
- The Foundation is Key: Fresh, high-quality chickpeas are paramount; dried are non-negotiable for authentic texture.
- Herbaceous Depth: A generous hand with fresh parsley and cilantro is crucial for that signature bright, green hue and complex flavour.
- Crisp Exterior, Tender Interior: Achieving the perfect balance requires precise frying temperatures and avoiding overcrowding the pan.
- Hummus Harmony: Smooth tahini, a squeeze of lemon, and a touch of garlic are the pillars of truly exceptional hummus.
Crafting the Quintessential Falafel: More Than Just Fried Dough
The soul of any falafel platter lies, undoubtedly, in the falafel itself. While readily available in many eateries, achieving that elusive combination of a shatteringly crisp exterior and a tender, flavourful interior at home can seem like a culinary Everest. The secret, as I’ve discovered through countless iterations and discussions with seasoned chefs across the Levant, lies not in complex techniques, but in a profound understanding of the ingredients and their interaction. The base, of course, is the humble chickpea. For authentic falafel, one must eschew canned chickpeas entirely. Their texture is too soft, their moisture content too high, leading to a greasy, crumbly end product. The true path lies with dried chickpeas, soaked overnight and then ground raw. This raw preparation is critical; cooking the chickpeas before grinding results in a paste that is too dense and sticky, compromising the light, airy texture that defines superior falafel.
The flavour profile is built upon this foundation. A robust blend of fresh herbs is non-negotiable. I’m talking about a generous quantity of fresh parsley and cilantro, finely chopped, which not only imbues the falafel with its characteristic verdant hue but also provides a bright, herbaceous counterpoint to the earthy chickpea. A touch of cumin and coriander provides warmth and depth, while a pinch of cayenne or a whisper of chili flake can offer a subtle, lingering heat. The binding agents are simple: flour or breadcrumbs, and sometimes a small amount of baking soda to encourage a lighter texture during frying. The size and shape of the falafel balls are also a matter of personal preference, but I find a uniform, golf-ball-sized disc or sphere fries more evenly, ensuring consistent results.
The Anatomy of the Perfect Falafel Dough
The preparation of the falafel mixture is where precision begins to pay dividends. It’s not merely about tossing ingredients into a food processor; it’s about understanding how each component contributes to the final texture and flavour.
Ingredients for Falafel Dough (Yields approx. 20-25 falafel)
- 500g (approx. 2.5 cups) dried chickpeas, soaked overnight and drained (do NOT cook)
- 1 large bunch fresh parsley (approx. 100g), stems removed, roughly chopped
- 1 large bunch fresh cilantro (approx. 100g), stems removed, roughly chopped
- 1 large onion, roughly chopped
- 4-5 cloves garlic, roughly chopped
- 1 teaspoon ground cumin
- 1 teaspoon ground coriander
- ½ teaspoon cayenne pepper (optional, for heat)
- 1 teaspoon salt, or to taste
- ½ teaspoon black pepper
- 2 tablespoons all-purpose flour (or chickpea flour for gluten-free)
- 1 teaspoon baking soda (optional, for extra lightness)
- Vegetable oil, for frying
Method for Falafel Dough
1. The Grind: In a food processor, combine the soaked and drained chickpeas, chopped parsley, cilantro, onion, and garlic. Pulse until the mixture is coarsely ground. Avoid over-processing into a smooth paste; a slightly textured consistency is desirable for a pleasing bite. You may need to do this in batches depending on the size of your food processor.
2. Spice Infusion: Add the cumin, coriander, cayenne pepper (if using), salt, and black pepper to the food processor. Pulse a few more times to evenly distribute the spices.
3. Binding and Aerating: Add the flour and baking soda (if using). Pulse until just combined. The mixture should hold together when squeezed. Over-mixing at this stage can develop gluten and lead to tough falafel.
4. Resting (Optional but Recommended): For optimal flavour development and texture, cover the mixture and refrigerate for at least 30 minutes, or up to 2 hours. This allows the flavours to meld and the chickpeas to absorb some of the moisture.
The Art of the Fry: Achieving Falafel Nirvana
Frying is where the magic truly happens, transforming the raw mixture into those iconic, golden-brown spheres. The temperature of the oil is paramount. Too low, and the falafel will absorb excess oil, becoming greasy and heavy. Too high, and the exterior will burn before the interior is cooked through. A consistent oil temperature between 175-190°C (350-375°F) is the sweet spot.
When adding the falafel to the hot oil, do so in batches. Overcrowding the pan will drastically lower the oil temperature, leading to the dreaded greasy falafel. Allow ample space for each piece to brown evenly and develop its signature crisp crust. The frying time will vary depending on the size of your falafel, but typically 3-5 minutes per batch, turning them occasionally, until they are deeply golden brown and firm to the touch. A slotted spoon or spider strainer is your best friend here, allowing you to carefully remove the cooked falafel and drain them on a wire rack set over a baking sheet. This elevation is crucial to prevent the bottoms from becoming soggy.
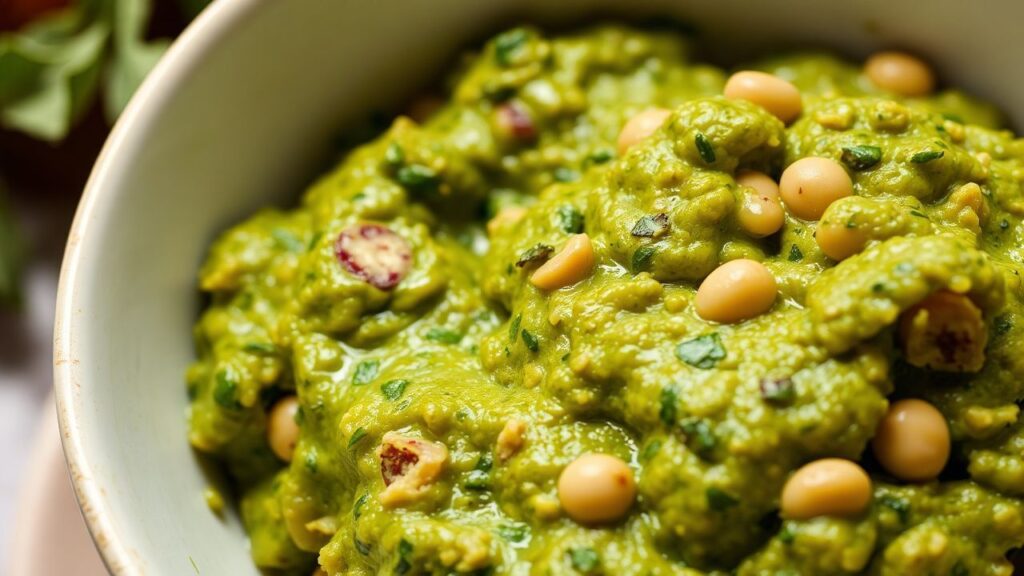
Hummus: The Velvety Emollient of the Platter
No falafel platter is complete without a generous swirl of creamy, luscious hummus. While store-bought hummus can suffice in a pinch, the homemade version is in a league of its own, offering a depth of flavour and a silken texture that is simply incomparable. The key to exceptional hummus lies in the quality of its core components: tahini, chickpeas, and lemon juice.
The tahini, a paste made from ground sesame seeds, is the heart of hummus. Opt for a good quality, single-origin tahini. It should be smooth, rich, and have a slightly bitter, nutty flavour. When you open a jar of good tahini, the oil should have separated naturally. Stir it vigorously to re-emulsify it before using. The chickpeas for hummus are typically cooked, unlike those for falafel. Cooking them until very tender, almost falling apart, is essential for achieving that ultra-smooth, velvety texture. Some chefs even advocate for removing the skins from the cooked chickpeas, a tedious but rewarding step that guarantees the smoothest possible hummus.
The balance of lemon juice and garlic is also critical. Too little lemon, and the hummus will taste flat; too much, and it will be overwhelmingly tart. Start with a conservative amount and adjust to your preference. Freshly squeezed lemon juice is always superior to bottled. Garlic should be present but not overpowering; a raw clove can be quite pungent, so some prefer to gently sauté it or even use roasted garlic for a mellower flavour.
Ingredients for Hummus (Yields approx. 2 cups)
- 400g (approx. 2 cups) cooked chickpeas, drained, reserving some liquid
- 100g (approx. ½ cup) good quality tahini
- 2-3 cloves garlic, minced
- Juice of 1 large lemon (approx. ¼ cup), or to taste
- ½ teaspoon salt, or to taste
- 2-4 tablespoons ice-cold water (or reserved chickpea liquid)
- Olive oil, for drizzling
- Paprika or sumac, for garnish
Method for Hummus
1. The Tahini-Lemon Emulsion: In a food processor, combine the tahini and lemon juice. Process for about 1-2 minutes until the mixture becomes thick and creamy, almost like a paste. This step is crucial for achieving a smooth texture.
2. Garlic and Salt: Add the minced garlic and salt to the food processor. Process for another minute.
3. Chickpea Integration: Add half of the cooked chickpeas to the food processor. Process until smooth. Gradually add the remaining chickpeas, processing until the mixture is very smooth and creamy. Scrape down the sides of the bowl as needed.
4. Achieving Silken Smoothness: While the food processor is running, slowly drizzle in the ice-cold water (or reserved chickpea liquid), a tablespoon at a time, until the hummus reaches your desired consistency. It should be light, airy, and incredibly smooth.
5. Taste and Adjust: Taste the hummus and adjust seasoning. Add more lemon juice for brightness or salt for depth as needed.
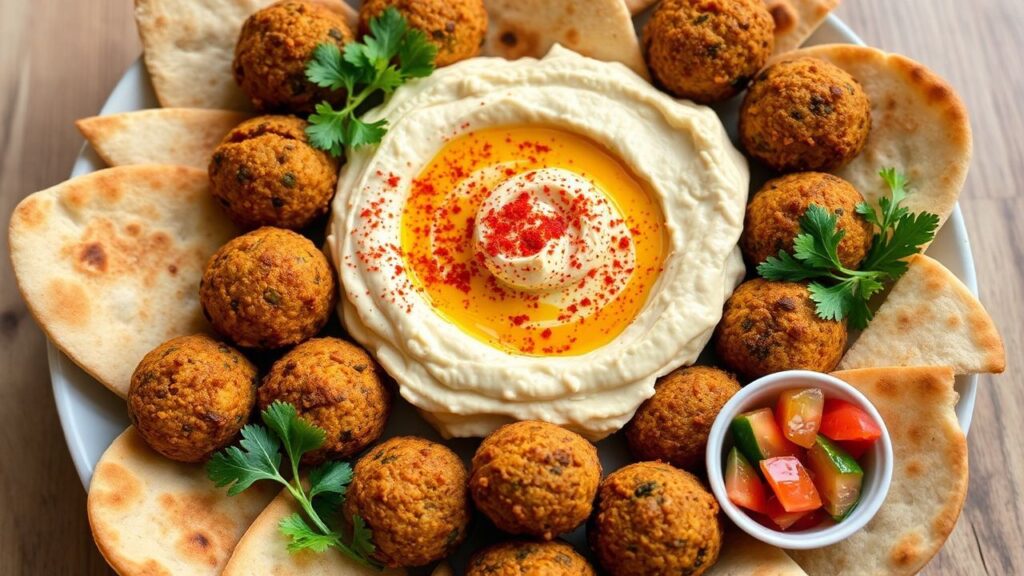
6. Serving: Transfer the hummus to a serving bowl. Create a small well in the centre and drizzle generously with good quality olive oil. Garnish with a sprinkle of paprika or sumac.
The Humble Pita: A Canvas for Culinary Art
The pita bread, often an afterthought, matter significantly in the falafel platter experience. It acts as the vessel, the edible spoon, and the textural counterpoint to the crisp falafel and smooth hummus. While store-bought pita is convenient, making your own elevates the entire ensemble to a new level of authenticity and flavour.
The beauty of homemade pita lies in its simplicity and the joy of watching it puff up majestically in the oven, creating that signature pocket. The dough is a basic yeast dough, requiring just a few ingredients and a bit of patience for rising. The key to the puff is a very hot oven and a preheated baking surface, such as a pizza stone or a heavy baking sheet. The rapid expansion of steam within the dough causes it to inflate dramatically.
Ingredients for Pita Bread (Yields 6-8 pitas)
- 300g (approx. 2.5 cups) all-purpose flour
- 1 teaspoon active dry yeast
- ½ teaspoon sugar
- ¾ teaspoon salt
- 180ml (approx. ¾ cup) warm water (around 40-45°C / 105-115°F)
- 1 tablespoon olive oil, plus extra for greasing
Method for Pita Bread
1. Activate the Yeast: In a small bowl, combine the warm water, yeast, and sugar. Let it sit for 5-10 minutes until foamy.
2. Mix the Dough: In a large bowl, whisk together the flour and salt. Make a well in the centre and pour in the activated yeast mixture and olive oil.
3. Knead: Mix until a shaggy dough forms, then turn it out onto a lightly floured surface. Knead for 8-10 minutes until the dough is smooth and elastic.
4. First Rise: Lightly oil a clean bowl. Place the dough in the bowl, turning to coat. Cover with plastic wrap or a damp kitchen towel and let it rise in a warm place for 1-1.5 hours, or until doubled in size.
5. Portion and Rest: Punch down the dough and divide it into 6-8 equal portions. Roll each portion into a ball and let them rest, covered, for 10-15 minutes.
6. Shape the Pitas: On a lightly floured surface, flatten each ball and roll it out into a thin circle, about 18-20cm (7-8 inches) in diameter and about 0.5cm (¼ inch) thick.
7. Bake: Preheat your oven to its highest setting (250-275°C / 475-525°F) with a pizza stone or baking sheet inside for at least 30 minutes. Carefully place 1-2 pitas onto the preheated surface. Bake for 2-4 minutes, or until puffed up and lightly golden. Flip and bake for another 30 seconds to 1 minute.
8. Cool: Remove the pitas from the oven and wrap them immediately in a clean kitchen towel to keep them soft and pliable.
The journey of falafel, from its humble origins likely in ancient Egypt as a meat substitute for Coptic Christians during Lent, to its global ubiquity today, is proof of its enduring appeal. It’s a dish that speaks of comfort, community, and vibrant flavours. The specific techniques employed by vendors in Cairo, for instance, often involve a slightly wetter dough than what is common in the Levant, resulting in a more delicate falafel that is often served with a simpler tahini sauce. Conversely, in parts of Lebanon, you might find falafel balls studded with whole coriander seeds, offering a delightful textural surprise and an intensified herbaceous aroma. These regional variations underscore the adaptability and rich history embedded within this seemingly simple dish.
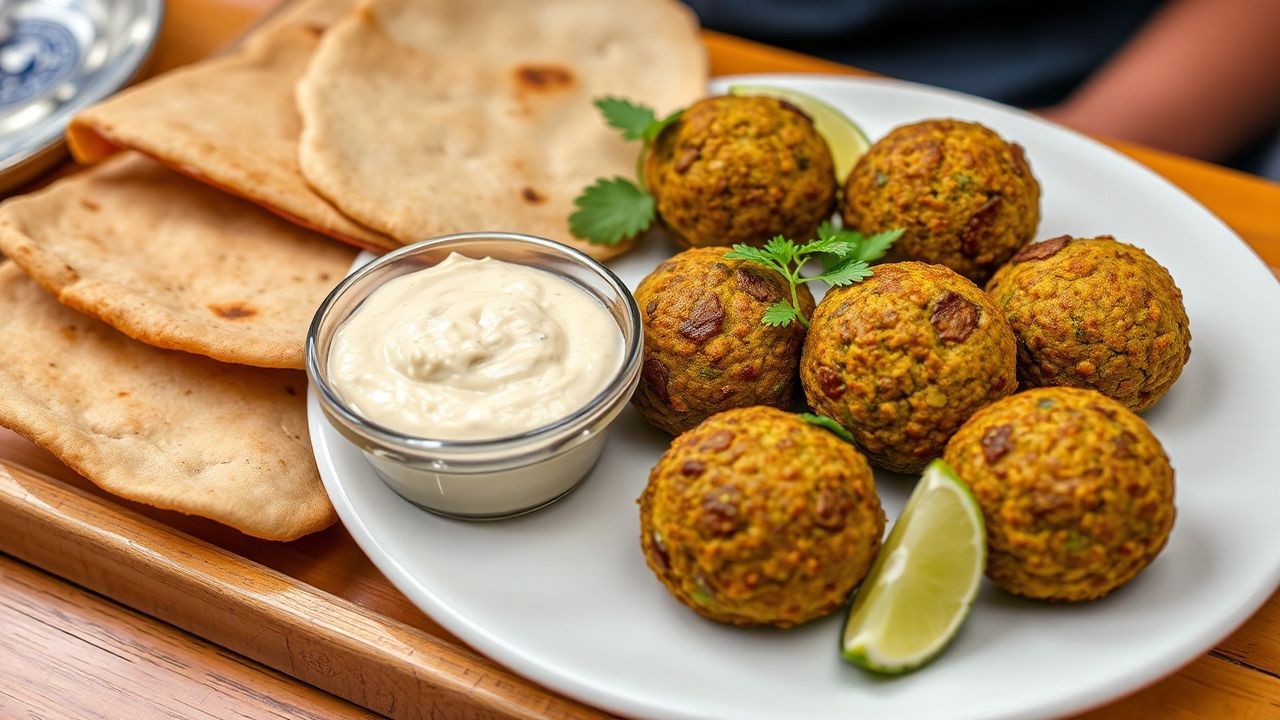
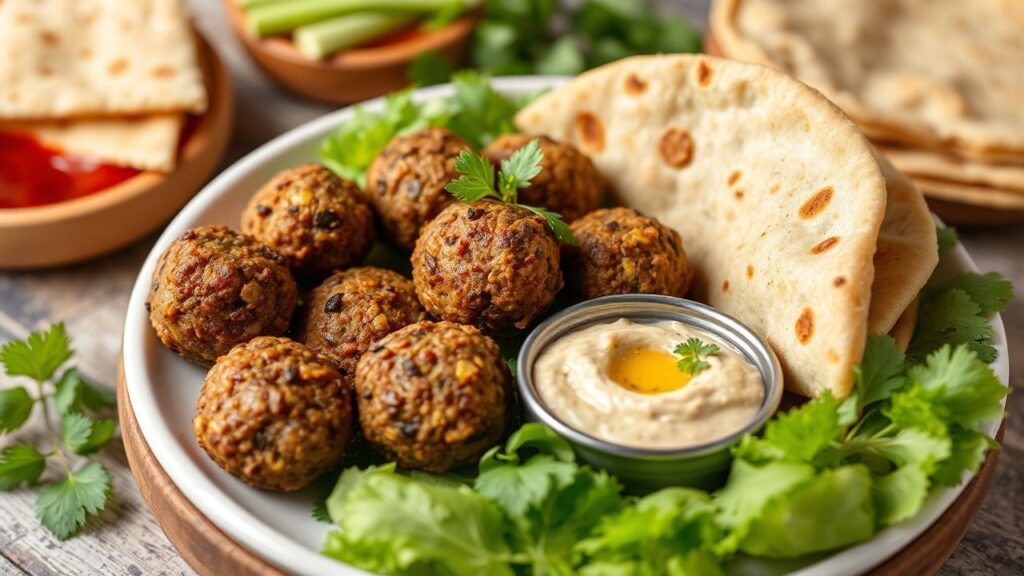
Assembling Your Masterpiece: The Falafel Platter
The true artistry of the falafel platter emerges when all the components come together. It’s not just about placing them on a plate; it’s about creating a visually appealing and gastronomically cohesive experience.
Start with a generous smear of your freshly made hummus as the foundation. Arrange the golden-brown falafel balls artfully around the hummus. Tuck in warm, fluffy pita bread, either whole or cut into triangles, ready to be filled or dipped. The accompaniments are where you can truly personalize your platter. Classic choices include:
- Pickled vegetables: Tangy cucumbers, turnips, or chilies provide a crucial acidic crunch.
- Fresh salad: A simple chopped salad of tomatoes, cucumbers, and parsley, dressed with lemon and olive oil, offers freshness.
- Tahini sauce: A thinner, more liquid version of tahini, often thinned with lemon juice and water, is a classic drizzle.
- Hot sauce or chili paste: For those who crave an extra kick.
- Fresh herbs: Sprigs of parsley or mint add a final burst of colour and aroma.
Nutritional Information (Per Serving – approximate, based on 4 servings)
- Calories: 550-650 kcal
- Protein: 20-25g
- Fat: 30-40g (primarily from frying and olive oil)
- Carbohydrates: 50-60g
- Fiber: 10-15g
This nutritional profile can vary significantly based on the amount of oil used for frying, the portion size of hummus, and added garnishes. The inherent nature of falafel, made from chickpeas, lends it a good amount of fiber and plant-based protein.
Elevating Your Falafel Platter: Expert Touches
To truly transform your falafel platter from merely good to extraordinary, consider these advanced techniques and flavour enhancements:
- Infused Oils: Consider infusing your frying oil with a sprig of rosemary or a crushed garlic clove for a subtle aromatic note.
- Spice Blends: Experiment with different spice blends for your falafel. Za’atar, a Middle Eastern spice mix, can add a wonderfully tangy and herbaceous dimension.
- Roasted Garlic Hummus: For a milder, sweeter garlic flavour in your hummus, roast the garlic cloves before mincing and adding them to the food processor.
- Toasted Pita: Lightly toasting your homemade pita bread can add a delightful crispness and enhance its nutty flavour.
- Garnishes Galore: Don’t underestimate the power of presentation. A sprinkle of sumac, a drizzle of pomegranate molasses, or a scattering of toasted sesame seeds can add visual appeal and complex flavour layers.
The global spread of falafel is remarkable. In London, for instance, you’ll find a diverse array of falafel variations, from traditional Palestinian-style falafel served in a bustling Borough Market stall to more contemporary interpretations incorporating global flavours. One notable eatery, “Comptoir Libanais,” has been instrumental in popularizing authentic Lebanese cuisine, including a well-loved falafel platter, to a broad audience, demonstrating the dish’s broad appeal and adaptability.
Conclusion: A Celebration of Simplicity and Flavour
The falafel platter, with its harmonious interplay of textures and tastes, is more than just a meal; it’s an experience. It’s a celebration of simple ingredients, transformed through skillful preparation into something truly magical. From the crispy, herb-infused falafel to the velvety hummus and the soft, yielding pita, each element matter significantly in this culinary symphony. By understanding the nuances of each component – the importance of raw chickpeas for falafel, the creamy magic of well-emulsified tahini for hummus, and the airy puff of perfectly baked pita – you can recreate this beloved dish with confidence and flair. So, gather your ingredients, embrace the process, and prepare to be transported with every delicious bite.
Frequently Asked Questions
What is the best way to store leftover falafel?
Leftover falafel is best stored in an airtight container in the refrigerator for up to 2-3 days. To reheat, the ideal method is to bake them in a preheated oven at around 180°C (350°F) for 8-10 minutes, or until heated through and slightly re-crisped. Microwaving will make them soft and can result in a rubbery texture, so it’s generally discouraged if crispness is desired.
Can I make falafel ahead of time?
Yes, the falafel mixture can be prepared a day in advance and stored in an airtight container in the refrigerator. This resting period can actually help the flavours meld further. However, it is best to fry the falafel just before serving for optimal texture and crispness. If you must fry them ahead, reheat them as described above. Hummus and pita bread also store well for a day or two.
Why are my falafel not holding their shape?
If your falafel mixture is not holding its shape, it’s likely due to a few common issues. Firstly, ensure you are using dried chickpeas that have been soaked overnight and not cooked ones. Secondly, the mixture might be too wet. You can try adding a tablespoon or two more flour or chickpea flour gradually until it binds. Conversely, if the mixture is too dry and crumbly, add a tiny bit of water or a splash of olive oil. The size of your food processor can also play a role; if it’s too small, you might not be achieving the right texture.
See also: Falafel
