The Humble Ferment That Conquered the World
Forget the notion that authentic, deeply flavorful *kimchi* is an arcane art reserved for seasoned Korean grandmothers or bustling restaurant kitchens. The truth, often obscured by mystique and intimidating ingredient lists, is far more accessible. Decades spent immersed in the world of fermentation have revealed that the most profound culinary experiences often spring from the simplest of intentions: a desire for vibrant flavor, a touch of tradition, and a willingness to engage with the transformative magic of microbes. This guide focuses on understanding the core principles that make *kimchi* so universally beloved, and then applying them with clarity and confidence to create your own remarkable batches at home. We’ll strip away the complexity and focus on delivering that quintessential salty, spicy, umami-rich punch that has made *kimchi* a global phenomenon.
- The Humble Ferment That Conquered the World
- The Foundation: Understanding Your Kimchi Ingredients
- The Alchemy of Fermentation: A Step-by-Step Guide
- Phase 1: Preparing the Cabbage
- Phase 2: Crafting the Kimchi Paste (Yangnyeom)
- Phase 3: Assembling Your Kimchi
- Nutritional Profile: Beyond the Spice
- Elevating Your Kimchi Game: Pro-Tips from the Kitchen
- Conclusion: Your Culinary Journey Awaits
- Frequently Asked Questions about Homemade Kimchi
At a Glance: Key Takeaways for Homemade Kimchi Success
- Napa Cabbage is King (for this recipe): While numerous vegetables can be fermented, Napa cabbage provides the ideal texture and flavor base for a classic, approachable *kimchi*.
- Salt is Your Ally: Proper salting is crucial for drawing out moisture, tenderizing the cabbage, and creating the initial environment for beneficial bacteria.
- The ‘Gochugaru’ Factor: Korean chili flakes (*gochugaru*) are essential for authentic flavor and color. Seek out good quality flakes.
- Patience is a Virtue: Fermentation is a living process; don’t rush it. A few days at room temperature is often all that’s needed before refrigeration.
Why Homemade Kimchi is an Essential Skill
The allure of *kimchi* extends far beyond its role as a condiment. It’s a pillar of Korean cuisine, a vital source of probiotics, and proof of the power of preserving food through fermentation. In recent years, *kimchi* has seen an explosion in popularity worldwide, not just as a side dish but as an ingredient that elevates everything from tacos to grilled cheese. Store-bought versions, while convenient, often lack the nuanced complexity and vibrant tang that comes from a carefully prepared homemade batch. They can be overly salty, lack depth, or contain preservatives that mute the natural fermentation process. Embracing the homemade route empowers you to control the ingredients, tailor the spice level, and witness firsthand the delightful transformation of simple vegetables into a fermented masterpiece. This journey into making your own *kimchi* is about participating in a culinary tradition that spans centuries.
The Foundation: Understanding Your Kimchi Ingredients
An exceptional *kimchi* is built upon a foundation of carefully selected, high-quality ingredients. While the possibilities for *kimchi* are as varied as the Korean peninsula itself, this beginner-friendly recipe focuses on the most popular and accessible version: *baechu kimchi*, made with Napa cabbage.
Core Components for a Classic Napa Cabbage Kimchi
- Napa Cabbage: Look for firm, heavy heads with crisp, unblemished leaves. The inner leaves should be pale green and tightly packed. For approximately 2-2.5 kg (4.5-5.5 lbs) of cabbage, you’ll need about 2 large heads.
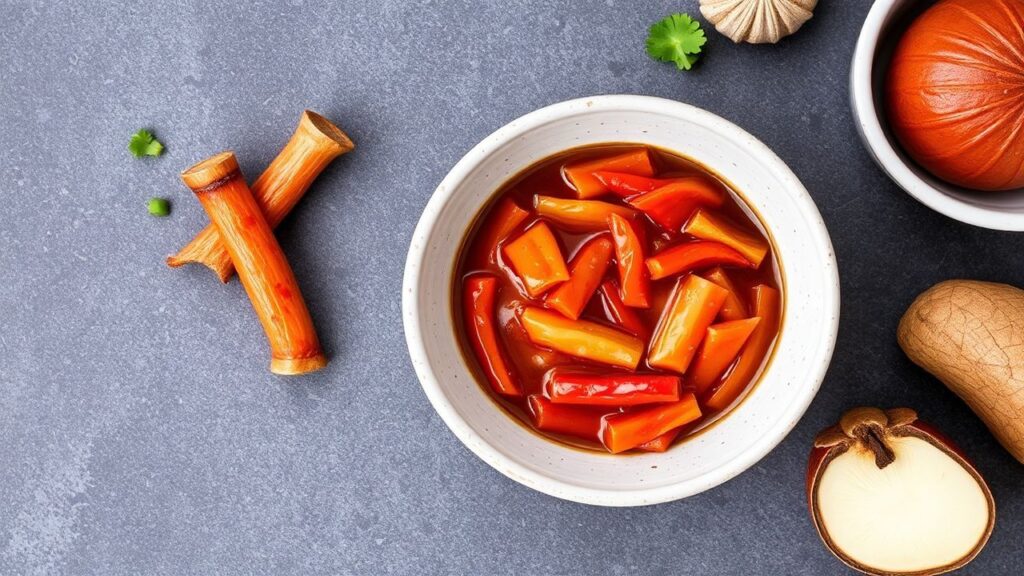
- Korean Radish (Mu): Also known as daikon radish, this adds a pleasant crunch and subtle sweetness. About 500g (1.1 lbs) is ideal.
- Scallions (Green Onions): The green parts contribute a fresh, oniony bite. Use one large bunch.
- Garlic: Fresh garlic is paramount for flavor. Aim for 10-12 cloves, or more if you’re a garlic enthusiast.
- Ginger: Fresh ginger root adds warmth and a pungent aroma. A piece about the size of your thumb (approximately 30-40g or 1-1.5 oz) is usually sufficient.
- Korean Chili Flakes (Gochugaru): This is the soul of your *kimchi*’s spice and color. Crucially, use *gochugaru* and not other chili powders. For a medium spice level, you’ll need around 60-80g (about ½ to ¾ cup). Adjust to your preference; many South Koreans use upwards of 100g for a spicier kick.
- Fish Sauce (Myeolchi Aekjeot or Kkanari Aekjeot): This provides essential umami and salinity. Opt for a good quality Korean fish sauce. About 60ml (¼ cup) is a good starting point.
- Salted Fermented Shrimp (Saeujeot): These tiny, intensely flavored shrimp add another layer of savory depth and aid in fermentation. If unavailable, you can increase the fish sauce slightly or omit, but it’s highly recommended for authentic flavor. About 2 tablespoons, finely minced.
- Sweetener: A touch of sweetness balances the salt and spice. Granulated sugar or a drizzle of honey works well. 1-2 tablespoons.
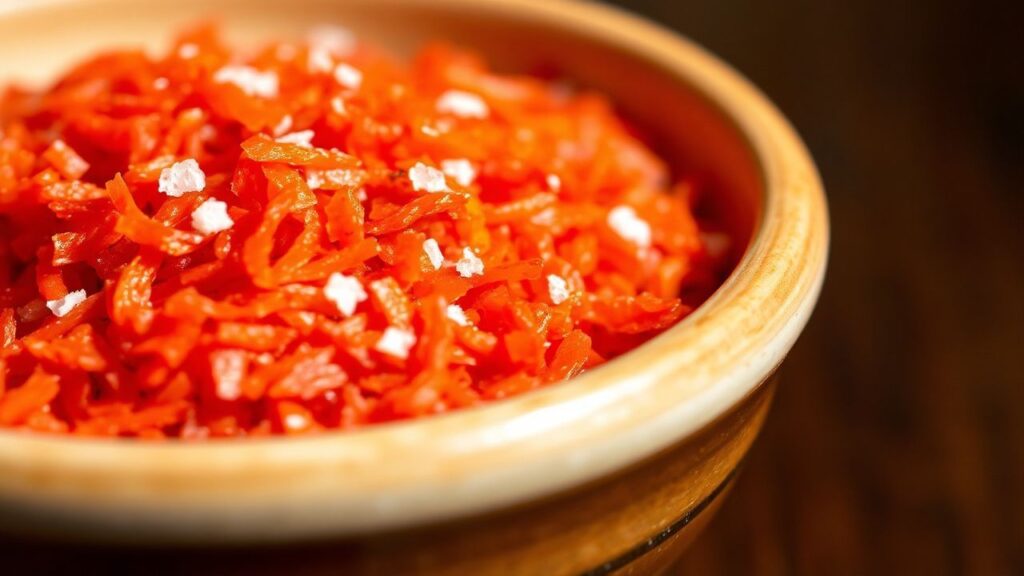
- Coarse Sea Salt (for brining): This is distinct from the *gochugaru* salt. You’ll need a significant amount, approximately 1 cup (around 200-250g), for brining the cabbage.
The Importance of Gochugaru
It is impossible to overstate the significance of *gochugaru* in achieving authentic *kimchi*. This specific type of chili flake, derived from sun-dried Korean chili peppers, possesses a unique balance of sweetness, mild heat, and a vibrant crimson hue. Unlike cayenne or other common chili powders, *gochugaru* is less about searing heat and more about a complex, nuanced flavor profile. The quality of your *gochugaru* directly impacts the final taste and appearance of your *kimchi*. For a richer, more complex flavor, look for *gochugaru* that is coarse and bright red. Fine flakes tend to dissolve more quickly and can make the paste too muddy.
The Alchemy of Fermentation: A Step-by-Step Guide
Mastering homemade *kimchi* requires patience and precise technique. This method ensures that the cabbage becomes tender and flavorful, the spices meld beautifully, and the fermentation process begins effectively.
Phase 1: Preparing the Cabbage
1. Cut the Cabbage: Trim the tough outer leaves from the Napa cabbage heads. Cut each head lengthwise into quarters, then slice away the hard core. Finally, cut the quarters into bite-sized pieces, about 2 inches wide. If using whole leaves, you can quarter them and then cut them into manageable strips.
2. Brine the Cabbage: In a very large bowl or basin, thoroughly toss the cabbage pieces with the coarse sea salt. Ensure every piece is coated. The salt will begin to draw out moisture immediately. Let it sit for 1.5 to 2 hours, turning the cabbage every 30 minutes. The cabbage should become pliable and wilted, not brittle. The goal is to tenderize and season the cabbage, not to pickle it.
3. Rinse and Drain: After brining, rinse the cabbage thoroughly under cold running water at least three times to remove excess salt. Squeeze out as much water as possible from the cabbage pieces. Let them drain in a colander for at least 30 minutes, allowing any residual water to drip away. This step is critical; excess water will dilute your *kimchi* paste and can lead to a mushy texture.
Phase 2: Crafting the Kimchi Paste (Yangnyeom)
1. Prepare Aromatics: Finely mince the garlic and ginger. Slice the Korean radish into thin matchsticks (julienne). Slice the scallions into 1-inch pieces.
2. Mix the Paste: In a medium bowl, combine the *gochugaru*, fish sauce, salted fermented shrimp (if using), sugar, minced garlic, and ginger. Mix thoroughly until a thick, uniform paste forms. This is your *yangnyeom*.
3. Incorporate Vegetables: Add the julienned radish and sliced scallions to the *yangnyeom*. Mix well to coat.
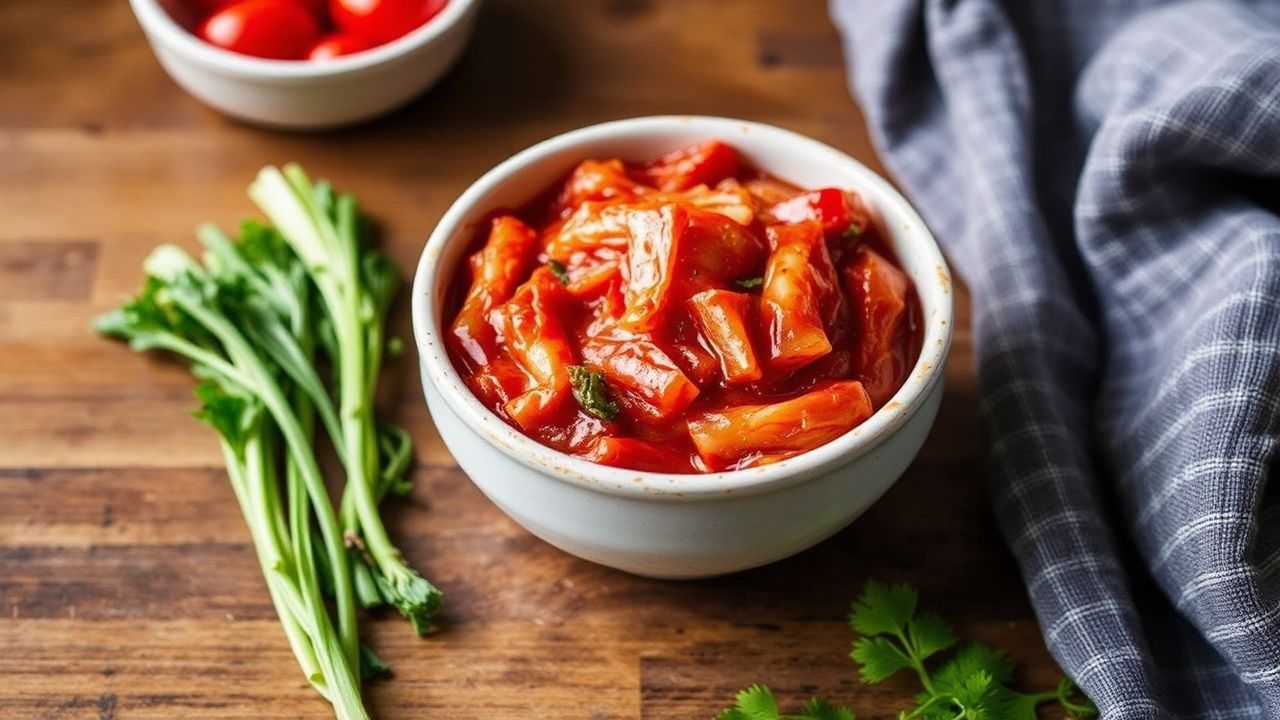
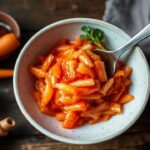
Phase 3: Assembling Your Kimchi
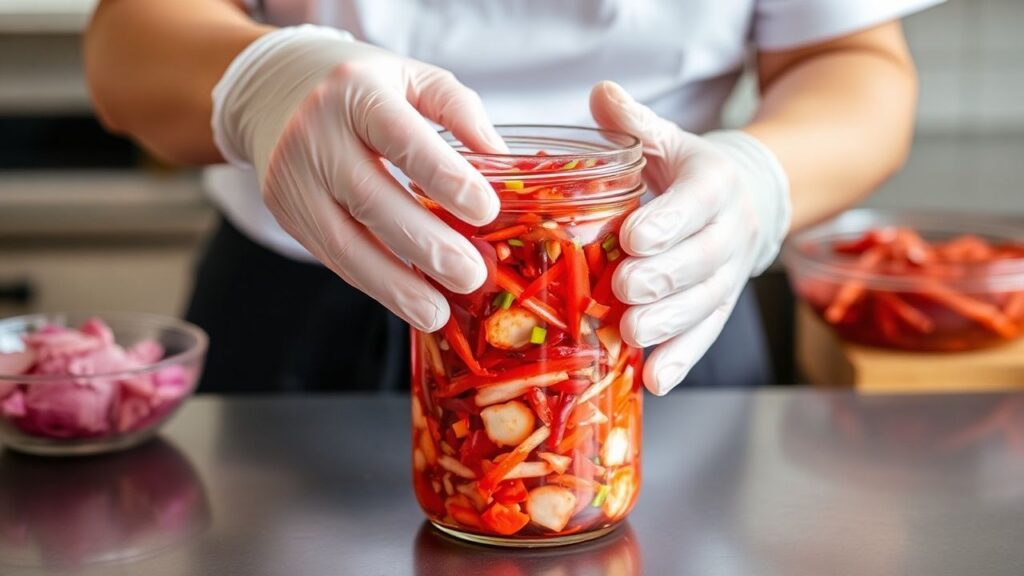
1. Combine and Coat: Add the drained cabbage to the bowl with the *yangnyeom* mixture. Wearing disposable gloves is highly recommended, as *gochugaru* can stain and irritate skin. Gently but thoroughly toss the cabbage with the paste, ensuring every leaf and piece is evenly coated. Work the paste into the nooks and crannies of the cabbage.
2. Pack the Jars: Tightly pack the coated *kimchi* into clean, sterilized glass jars or food-grade fermentation crocks. Press down firmly to remove any air pockets. Leave about 1-2 inches of headspace at the top of each jar, as the *kimchi* will produce brine and expand during fermentation.
3. Initial Fermentation: Cover the jars loosely (or use an airlock if you have one). Leave the jars at room temperature for 1 to 3 days, depending on the ambient temperature and your preference for fermentation. You should start to see bubbles forming and a tangy aroma developing. A good indicator is when the brine begins to rise to the top of the *kimchi*.
4. Refrigerate: Once the *kimchi* has reached your desired level of fermentation at room temperature, seal the jars tightly and transfer them to the refrigerator. The cold temperature will significantly slow down the fermentation process, allowing the flavors to mature and deepen over time. Your *kimchi* is now ready to eat, though it will continue to develop and improve in flavor for weeks, even months.
Nutritional Profile: Beyond the Spice
Homemade *kimchi*, when prepared with this recipe, offers a compelling nutritional profile that goes beyond mere flavor. It’s a powerhouse of vitamins, minerals, and beneficial probiotics.
| Nutrient | Per Serving (approx. 100g) |
|---|
| :————– | :————————- |
| Calories | 30-40 |
|---|
| Carbohydrates | 5-7g |
| Fiber | 2-3g |
|---|
| Protein | 1-2g |
| Vitamin A | ~15% DV |
|---|
| Vitamin C | ~20% DV |
| Vitamin K | ~50% DV |
|---|
| Sodium | ~10-15% DV (varies greatly) |
| Probiotics | High |
|---|
*Note: Nutritional values are estimates and can vary based on specific ingredient ratios and fermentation time.*
The fermentation process is key to unlocking these benefits. The lactic acid bacteria responsible for fermentation break down sugars, creating beneficial compounds and probiotics that are excellent for gut health. Studies, such as those published in the Journal of Medicinal Food, have highlighted the potential health benefits associated with regular *kimchi* consumption, including immune system support and antioxidant properties.
Elevating Your Kimchi Game: Pro-Tips from the Kitchen
To truly transform your homemade *kimchi* from good to extraordinary, consider these expert-level enhancements and considerations.
Ingredient Sourcing and Quality
- Gochugaru Matters: As mentioned, invest in high-quality *gochugaru*. Brands like S&S (Sun & Salt) or Han-mi are often favored for their vibrant color and balanced heat. Buying from an Asian grocery store will yield the best results.
- Freshness is Key: Use the freshest garlic and ginger you can find. Their pungent aromas are crucial to the *kimchi* paste.
- Salt Wisely: While coarse sea salt is recommended for brining, avoid iodized table salt, which can interfere with fermentation.
Flavor Enhancements and Variations
- Sweetness Balance: If you find your *kimchi* too sharp, a tiny bit more sugar or honey can round out the flavor. Conversely, if it’s too bland, a touch more fish sauce can boost the umami.
- Adding Other Vegetables: While this recipe focuses on Napa cabbage, consider adding thinly sliced carrots for color and sweetness, or chives for a more pungent onion flavor. Pear or apple, finely grated, can also add a delightful sweetness and complex aroma. A small amount, perhaps 1/4 cup grated fruit, can make a significant difference.
- Spice Control: For a milder *kimchi*, reduce the amount of *gochugaru*. For a fierier kick, increase it, or add a small amount of finely minced fresh chili pepper.
Fermentation Nuances
- Temperature Control: The room temperature at which you begin fermentation significantly impacts the speed and flavor development. Warmer temperatures (around 70-75°F or 21-24°C) will accelerate fermentation, while cooler temperatures will slow it down. It’s a balance to achieve the desired tang without over-fermenting and developing off-flavors.
- The ‘Burp’ Method: If you don’t have an airlock, “burping” your jars daily during the initial room-temperature fermentation (briefly opening and resealing them) can help release excess gases. This is akin to how a baker might allow a sourdough starter to breathe.
- Taste as You Go: The best way to understand when your *kimchi* is ready for the fridge is to taste it. After the initial room-temperature phase, take a small sample. It should have a pleasant tang and a slightly effervescent quality.
Conclusion: Your Culinary Journey Awaits
Embarking on the path to homemade *kimchi* is an incredibly rewarding experience. It’s a journey that connects you to an ancient culinary tradition, offers profound health benefits, and, most importantly, allows you to create a dish that is uniquely yours. The principles are straightforward: quality ingredients, careful brining, a balanced paste, and patient fermentation. This recipe serves as your launchpad, but true mastery comes from practice and personal adaptation. Don’t be afraid to experiment, to adjust the spice, the salt, or the sweetness to suit your palate. The vibrant, complex flavors of authentic *kimchi* are well within your reach, promising a delightful addition to countless meals. Your kitchen is now a laboratory of delicious possibility.
Frequently Asked Questions about Homemade Kimchi
How long does homemade kimchi last?
Once refrigerated, properly made homemade *kimchi* can last for several months, even up to a year. The flavor will evolve over time, becoming more sour and complex. Younger *kimchi* (aged 1-4 weeks in the fridge) is often preferred for its fresh, crisp texture and vibrant spice. Older *kimchi* develops a deeper, more pungent flavor and a softer texture, making it excellent for cooking in stews or fried rice. Always check for signs of spoilage, such as mold (other than the white kahm yeast, which is harmless but can affect flavor) or a foul odor, before consuming.
What if my kimchi doesn’t get bubbly?
A lack of bubbling during the initial room-temperature fermentation can be due to several factors. The most common is a temperature that is too cool; the lactobacilli that drive fermentation are more active in warmer environments. Ensure your *kimchi* is placed in a consistently warm spot (ideally 70-75°F or 21-24°C). Another reason could be insufficient salt, which is crucial for creating the right environment for beneficial bacteria. However, if you followed the salting instructions carefully, temperature is the more likely culprit. Don’t despair; even without vigorous bubbling, fermentation will still occur, albeit more slowly. The key is patience and eventual refrigeration.
Can I use different vegetables to make kimchi?
Absolutely! While Napa cabbage is the most common base for *kimchi*, the fermentation technique can be applied to a wide variety of vegetables. Popular variations include *kkakdugi* (cubed radish *kimchi*), *oi kimchi* (cucumber *kimchi*), *buchu kimchi* (garlic chive *kimchi*), and *gat kimchi* (mustard green *kimchi*). The fundamental principles of salting, seasoning with *gochugaru* and aromatics, and fermenting remain similar, but the preparation time and texture of the vegetables will differ. For instance, radish *kimchi* often uses larger chunks and may ferment slightly faster than cabbage *kimchi*. Exploring these variations is a natural next step once you’ve mastered the classic Napa cabbage version.
See also: kimchi
