The pungent, spicy aroma of freshly made kimchi, a cornerstone of Korean cuisine, often evokes images of bustling markets in Seoul or a meticulously prepared banchan spread. For many, it’s a dish steeped in tradition, a culinary art form passed down through generations. My own introduction to its profound depth wasn’t through a restaurant, but in a small, dimly lit kitchen in a Brooklyn apartment, where a Korean grandmother, with hands weathered by time and experience, patiently guided me through the intricate dance of salting, seasoning, and fermenting napa cabbage. The resulting kimchi was a revelation – a symphony of umami, spice, and a subtle tang that spoke of patience and the magic of transformation. Yet, the perceived complexity often deters home cooks. This guide aims to demystify the process, proving that crafting this probiotic powerhouse is not only achievable but deeply rewarding, even for the novice.
- The Essential Components: What You Need to Craft Your Kimchi
- The Method: A Step-by-Step Journey to Fermented Perfection
- Step 1: Preparing the Cabbage – The Salting Ritual
- Step 2: Crafting the Flavor Paste – The Heart of the Kimchi
- Step 3: Assembling the Kimchi – The Hands-On Art
- Step 4: The Fermentation Phase – Patience and Transformation
- Nutritional Profile: A Powerhouse of Goodness
- Elevating Your Kimchi Game: Expert Tips for Nuance and Depth
- Frequently Asked Questions about Homemade Kimchi
At a Glance: Essential Takeaways for Effortless Kimchi
- Simplicity is Key: Focus on fresh, quality ingredients and a straightforward process to achieve authentic flavor.
- Fermentation is Magic: Understand that time and temperature are your allies in developing the complex, tangy notes of true kimchi.
- Customization is Encouraged: Don’t be afraid to adjust spice levels and seasonings to suit your palate.
- Patience Yields Flavor: The best kimchi develops over time, so embrace the waiting period as part of the culinary journey.
The art of making kimchi has too long been shrouded in an aura of difficulty. This perception is a disservice to the vibrant, accessible nature of this fermented marvel. While regional variations and intricate preparations exist, the fundamental process of creating delicious, gut-friendly kimchi at home is remarkably straightforward. It’s a journey of simple ingredients undergoing a profound transformation, yielding a condiment that elevates everything from simple rice bowls to complex stews. My own kitchen experiences consistently show that with a few key principles and a willingness to engage with the process, anyone can replicate that sought-after depth of flavor.
The Essential Components: What You Need to Craft Your Kimchi
At its heart, kimchi is a celebration of fresh produce and the alchemy of fermentation. The foundational ingredients are surprisingly few, allowing the inherent flavors of the vegetables to shine through. This recipe focuses on the most common and beloved iteration: baechu kimchi, made with napa cabbage.
Core Ingredients for Napa Cabbage Kimchi
To begin your kimchi-making adventure, gather these fundamental components. The quality of your ingredients will directly influence the final outcome, so opt for the freshest produce you can find.
- Napa Cabbage: 1 large head (approx. 2-2.5 kg / 4.5-5.5 lbs). Look for firm, heavy heads with crisp, unblemished leaves.
- Sea Salt (Coarse): 1 cup (approx. 200g). Essential for drawing out moisture and initiating the fermentation process. Avoid iodized table salt, which can interfere with fermentation.
- Water: For rinsing and brining.
The Flavor Base: Gochugaru and Aromatics
This is where the signature flavor profile of kimchi truly takes shape. The balance of spice and aromatics is crucial, and this recipe offers a classic starting point.
- Korean Chili Flakes (Gochugaru): 1/2 cup (approx. 50g). This is non-negotiable for authentic flavor and color. Choose a medium-spicy variety for a balanced heat. You can adjust this quantity based on your preference.
- Garlic: 10-12 cloves, minced. A generous amount is key for that unmistakable pungent depth.
- Ginger: 1-inch piece (approx. 25g), peeled and minced. Adds a warm, zesty counterpoint to the spice.
- Fish Sauce: 2-3 tablespoons (approx. 30-45ml). Provides essential umami. For a vegetarian/vegan version, use soy sauce or a vegan fish sauce alternative.
- Sugar: 1-2 teaspoons (approx. 5-10g). Balances the saltiness and spice, and aids in fermentation.
- Optional: Korean Radish (Mu): 1 cup (approx. 150g), julienned. Adds a delightful crunch and subtle sweetness.
- Optional: Scallions (Green Onions): 4-5 stalks, cut into 2-inch lengths. Adds a fresh, oniony bite.
The Method: A Step-by-Step Journey to Fermented Perfection
The process of making kimchi can be broken down into distinct, manageable stages. Each step matter significantly in preparing the vegetables and ensuring a successful fermentation. Don’t be intimidated; the hands-on work is incredibly satisfying.
Step 1: Preparing the Cabbage – The Salting Ritual
This is arguably the most critical step, as it draws out excess water from the cabbage, making it pliable and preserving it for fermentation.
- Quarter the Cabbage: Trim the tough outer leaves of the napa cabbage. Cut the head lengthwise into quarters. If the core is very thick, make a shallow cut into it to help the salt penetrate.
- Brine the Cabbage: In a large basin or sink, generously sprinkle the coarse sea salt between each leaf, ensuring even distribution. Focus more salt on the thicker, white parts of the leaves.
- Soak and Wilt: Place the salted cabbage quarters in a large bowl or the basin. Let them sit for about 2-3 hours, turning them every 30 minutes. The leaves will wilt and soften as they release water, becoming flexible enough to bend without breaking.
- Rinse Thoroughly: Once wilted, rinse the cabbage quarters under cold running water at least 3-4 times. Gently squeeze out excess water between your hands. This removes excess salt and impurities. Let the cabbage drain well, cut-side down, for about 15-20 minutes.
Step 2: Crafting the Flavor Paste – The Heart of the Kimchi
While the cabbage is draining, prepare the vibrant, spicy paste that defines kimchi. This mixture infuses the vegetables with its complex flavor profile.
- Combine Aromatics: In a medium bowl, combine the minced garlic, minced ginger, Korean chili flakes (gochugaru), fish sauce, and sugar.
- Add Optional Ingredients: If using, stir in the julienned Korean radish and chopped scallions.
- Mix Thoroughly: Stir everything together until a thick, cohesive paste forms. Add a tablespoon or two of water if the paste is too dry, but it should be thick enough to adhere to the cabbage. Let this paste sit for about 15-20 minutes to allow the flavors to meld.
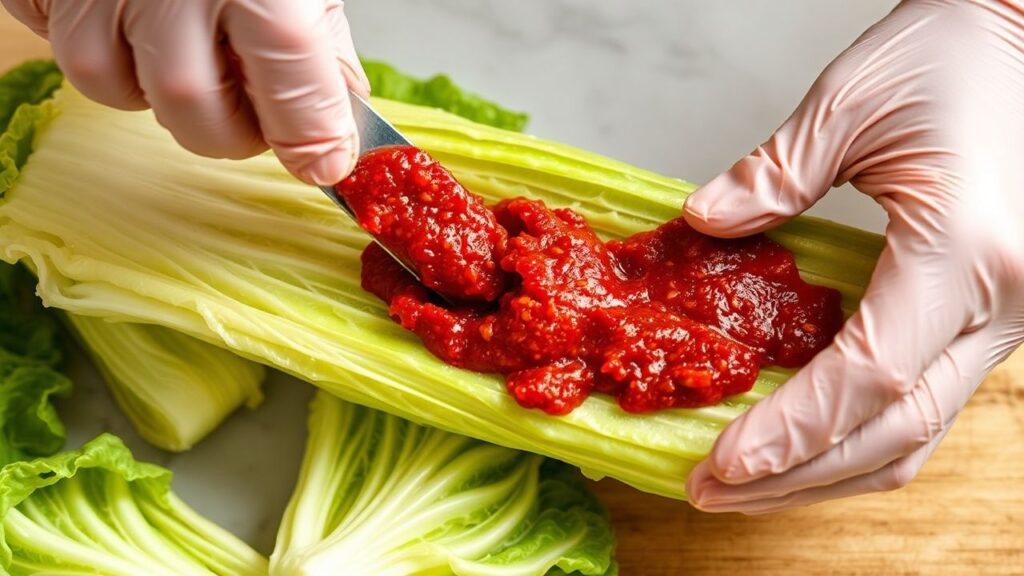
Step 3: Assembling the Kimchi – The Hands-On Art
This is the most tactile part of the process, where you’ll lovingly coat each cabbage leaf with the flavorful paste. Donning gloves is highly recommended.
- Coat Each Leaf: Take one quarter of the drained cabbage. Starting from the inner leaves and working your way outwards, generously spread the chili paste between each leaf. Ensure an even coating, paying special attention to the thicker stem areas.
- Fold and Pack: Fold each cabbage quarter in half, or tuck the outer leaves around the core to create a compact package.
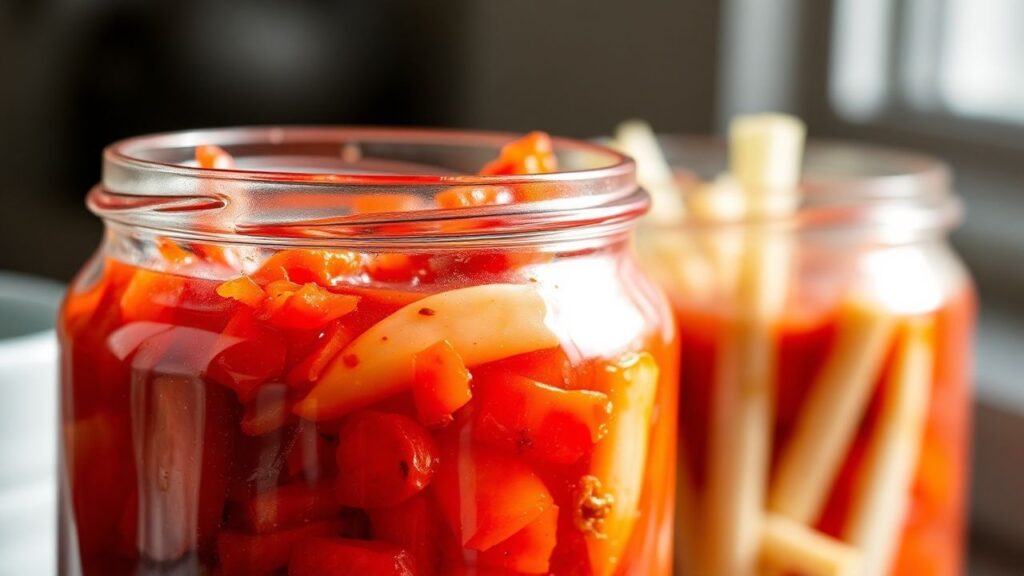
- Jar the Kimchi: Tightly pack the coated cabbage quarters into clean, sterilized glass jars or an airtight container. Press down firmly to remove any air pockets. Leave about an inch of headspace at the top, as the kimchi will release liquid and expand during fermentation.
The aroma at this stage is already intoxicating, a promise of the delightful tang to come. It’s a sensory experience that connects you directly to the food you’re creating.
Step 4: The Fermentation Phase – Patience and Transformation
This is where the magic of kimchi unfolds. Natural yeasts and bacteria begin their work, transforming simple ingredients into a probiotic-rich delight.
- Initial Fermentation at Room Temperature: Leave the jars or container at room temperature for 1 to 3 days. The duration depends on your ambient temperature and desired level of fermentation. Warmer days mean faster fermentation. You might see bubbles forming and a slight tangy smell developing.
- Check for Readiness: After 24 hours, gently press down on the kimchi in the jar. If you see liquid bubbling up, fermentation has begun. Taste a small piece; if it has a pleasant tang, it’s ready for the next step.
- Refrigerate to Slow Fermentation: Once you’ve achieved your desired level of initial fermentation, seal the jars tightly and transfer them to the refrigerator. The cold temperature will significantly slow the fermentation process, allowing flavors to mature and deepen.
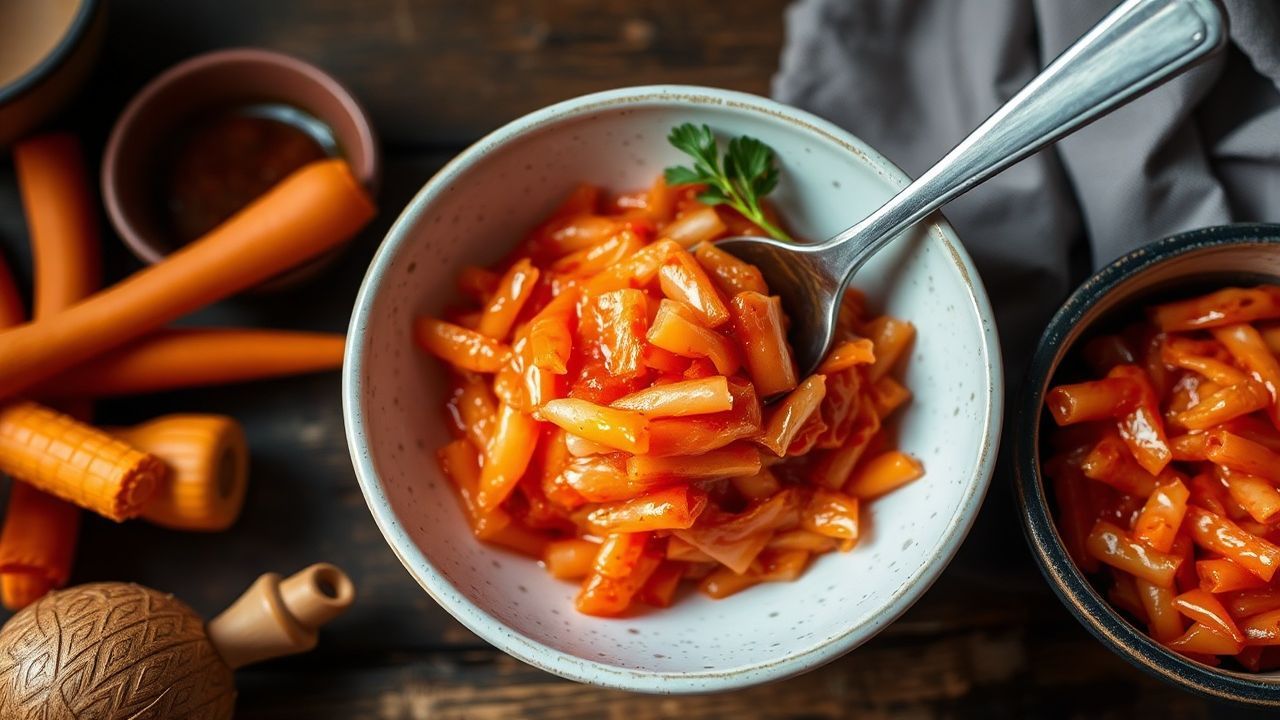
Nutritional Profile: A Powerhouse of Goodness
Kimchi is not just a culinary delight; it’s a nutritional powerhouse, renowned for its probiotic content and array of vitamins and minerals. While exact nutritional values can vary, a typical serving of homemade kimchi is incredibly beneficial.
Approximate Nutritional Information (Per 100g Serving)
This is an estimation, and actual values will depend on your specific recipe.
| Nutrient | Approximate Value |
|---|---|
| Calories | 30-50 kcal |
| Carbohydrates | 5-8g |
| Fiber | 2-3g |
| Protein | 1-2g |
| Fat | 0.5-1g |
| Vitamin C | Significant source |
| Vitamin K | Significant source |
| Probiotics | Beneficial bacteria (Lactobacillus species) |
The fermentation process is key to kimchi’s health benefits. Lactic acid bacteria produce probiotics, beneficial for gut health, aiding digestion, boosting the immune system, and contributing to nutrient absorption. The vegetables provide essential vitamins and minerals, making kimchi a truly holistic addition to your diet. A study published in the *Journal of Agricultural and Food Chemistry* highlighted the presence of over 100 different probiotic species in well-fermented kimchi, underscoring its significant contribution to a healthy microbiome.
Elevating Your Kimchi Game: Expert Tips for Nuance and Depth
Once you’ve mastered the basic recipe, there are several avenues to explore for further refinement and personalization, transforming your homemade kimchi from good to extraordinary. These are the subtle techniques that differentiate a home cook’s creation from that of a seasoned chef.
Harnessing the Power of Umami
The umami depth in kimchi can be further enhanced through careful ingredient selection and subtle additions.
Beyond Fish Sauce: Exploring Other Umami Boosters
While fish sauce is traditional, experimenting with other fermented products can add fascinating layers of complexity. Consider a small amount of fermented shrimp paste (saeujeot), a staple in many authentic Korean kitchens, for an intensely savory note. For a vegan alternative, a touch of mushroom powder or nutritional yeast can provide a savory, cheesy undertone, though it won’t replicate the exact profile of traditional ingredients. The key is moderation; these potent ingredients should complement, not overpower, the primary flavors of the kimchi.
The Art of Seasonal Variation
Kimchi is not a static dish; its preparation often reflects the seasons. While napa cabbage is the most common base, other vegetables can be incorporated.
Embracing Seasonal Produce
In the spring, delicate radishes and young greens can be incorporated. Autumn is the time for heartier root vegetables. Kkakdugi, made with Korean radish cubes, offers a delightful crunch and a different texture profile. Exploring these variations diversifies your kimchi repertoire and connects you to agricultural cycles and the freshest available produce. Thinly sliced daikon radish or even jicama can introduce a refreshing crispness that contrasts beautifully with the fermented cabbage.
Mastering the Fermentation Environment
The conditions under which your kimchi ferments have a profound impact on its flavor development and texture.
Optimizing Fermentation Conditions
As mentioned, temperature is paramount. A consistent, moderate temperature is ideal. If your kitchen is too warm, consider a cooler spot like a basement or a dedicated fermentation fridge. In cooler climates, gentle warming methods, such as placing the fermenting jars on a heating pad set to low, can kickstart the process. Observing the rate of bubbling is a direct indicator of microbial activity and fermentation progress.
Frequently Asked Questions about Homemade Kimchi
How long does homemade kimchi last?
Once refrigerated, well-made kimchi can last for several months, even up to a year, though its flavor will continue to evolve. The initial few weeks offer a vibrant tang, while aging results in more complex and sour flavors desirable for cooked dishes like kimchi jjigae (stew) or kimchi fried rice. Ensure your kimchi is always submerged in its brine; if it appears dry, top it up with lightly salted water.
What if my kimchi is too sour or not sour enough?
If your kimchi is too sour, it likely fermented for too long at room temperature or at too high a temperature. You can still use it in cooked dishes. To achieve a tangier kimchi, extend the room-temperature fermentation period or ensure it ferments in a slightly warmer environment. If it’s not sour enough after a few days at room temperature, it might indicate a cooler fermentation temperature or insufficient natural yeasts. Extend the room-temperature fermentation time or introduce a small amount of store-bought, unpasteurized kimchi as a starter culture.
Can I make kimchi without fish sauce?
Absolutely. For vegetarian or vegan kimchi, omit the fish sauce. To compensate for lost umami, use soy sauce, tamari (for gluten-free), or a vegan fish sauce. Some cooks add sautéed mushrooms or a pinch of MSG for an umami boost. Experiment to find your preferred balance. A common vegan alternative combines soy sauce with a touch of seaweed broth for depth.
What are the best ways to use leftover kimchi brine?
Don’t discard that flavorful brine! It’s a treasure trove of taste and beneficial bacteria. Use it as a base for salad dressings, add a splash to marinades, or incorporate it into soups and stews for complexity. It’s also fantastic in cocktails. Some people use it as a natural pickling liquid for other vegetables. The possibilities are vast. For instance, a drizzle of kimchi brine over avocado toast can be surprisingly delicious, as explored on sites like WhimRecipes.com.
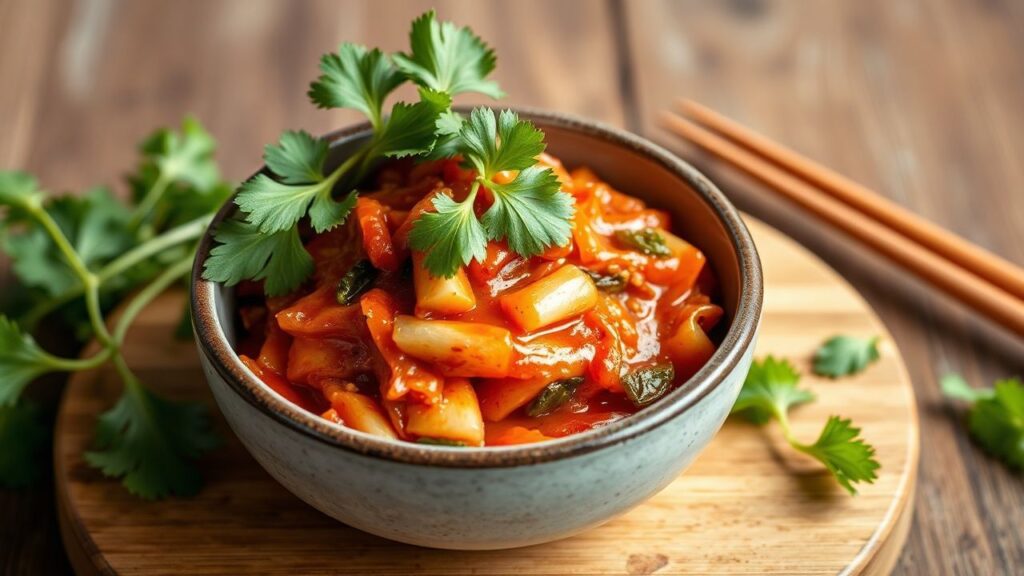
Crafting your own kimchi is a journey of discovery, a delicious exploration into the art of fermentation that rewards patience and experimentation. This recipe provides a robust foundation, but the true joy lies in adapting it to your unique taste preferences. Embrace the process, savor the aromas, and enjoy the incredible health benefits and vibrant flavors of your homemade kimchi. It’s a culinary skill that will undoubtedly enhance your cooking and delight your senses for years to come.
See also: kimchi

