Unlocking the Fiery Depths: Your Accessible Path to Authentic Homemade Kimchi
Have you ever found yourself captivated by the pungent, complex aroma wafting from a jar of perfectly fermented kimchi, only to dismiss the idea of making it yourself as an insurmountable culinary challenge? The vibrant hues of chili, the subtle tang, the satisfying crunch – it all speaks of a tradition steeped in time and meticulous fermentation. Yet, the perception of kimchi as an arcane art, accessible only to seasoned Korean grandmothers, is a persistent myth. In reality, the fundamental principles of creating this probiotic powerhouse are surprisingly straightforward, allowing even the most novice home cook to start of delicious discovery. This guide is designed to demystify the core mechanics and build confidence with an accessible recipe for delicious results.
- Unlocking the Fiery Depths: Your Accessible Path to Authentic Homemade Kimchi
- The Foundation: Essential Ingredients for Your First Kimchi
- The Ritual of Preparation: A Step-by-Step Guide to Crafting Your Kimchi
- Step 1: Brining the Cabbage
- Step 2: Preparing the Flavor Paste (Yangnyeom)
- Step 3: Assembling the Kimchi
- Step 4: Fermentation
- Step 5: Refrigeration and Maturation
- Nutritional Profile: A Glimpse into Kimchi’s Health Benefits
- Elevating Your Kimchi Game: Expert Tips for Perfection
- The Art of Patience: Understanding Kimchi Maturation
- Frequently Asked Questions About Homemade Kimchi
Key Takeaways:
- Simplicity is Paramount: This recipe prioritizes ease without sacrificing authentic flavor development.
- Fermentation Science Demystified: Understand the basic microbial processes at play for successful kimchi.
- Customization is Key: Learn how to adjust spice levels and ingredients to your personal preference.
- Patience Rewarded: The magic of kimchi lies in its transformation over time.
The allure of homemade kimchi extends far beyond its status as a mere condiment. It’s proof of the transformative power of fermentation, a culinary alchemy that imbues simple ingredients with profound depth and health benefits. Historically, kimchi served as a vital method of food preservation in Korea, particularly during the harsh winter months. It’s a practice deeply woven into the fabric of Korean identity, with regional variations and family recipes passed down through generations. The United Nations Educational, Scientific and Cultural Organization (UNESCO) even recognized the cultural significance of ‘Kimjang’, the communal kimchi-making tradition, by inscribing it on its Intangible Cultural Heritage list. This underscores that making kimchi is not just cooking; it’s participating in a living cultural practice.
This guide offers a clear, actionable roadmap to creating your own exceptional kimchi. We will explore the essential ingredients, the nuanced steps, and the subtle art of coaxing maximum flavor from humble napa cabbage. Prepare to transform your kitchen into a hub of vibrant fermentation, unlocking a world of probiotic goodness and unparalleled taste.
The Foundation: Essential Ingredients for Your First Kimchi
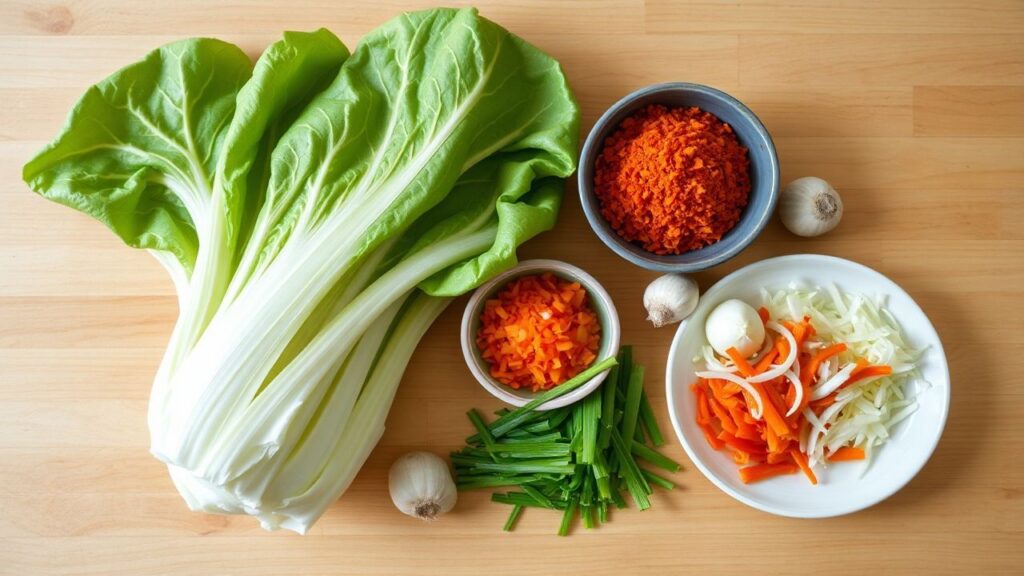
At its heart, kimchi is a symphony of fermented flavors, and the quality of your ingredients will directly influence the final composition. While there are countless variations, this foundational recipe focuses on the most accessible and widely loved elements, ensuring a successful and deeply satisfying outcome. The bedrock of most kimchi is napa cabbage, chosen for its tender leaves and ability to absorb brining solutions and spice pastes effectively.
Napa Cabbage
- Quantity: 1 large head (approx. 2.5-3 lbs / 1.1-1.4 kg)
- Selection: Look for a firm, heavy head with crisp, unblemished leaves. The outer leaves should be tightly packed.
The Brining Solution
Brining is crucial for drawing out moisture from the cabbage, creating a tender texture and initiating the fermentation process. This step also seasons the cabbage.
- Water: 8 cups (approx. 1.9 liters)
- Kosher Salt (or Sea Salt): 1/2 cup (approx. 120g) – Avoid iodized table salt, as it can impart a metallic taste and hinder fermentation.
The Flavor Paste (Yangnyeom)
This is where the characteristic taste of kimchi truly comes alive. The balance of spicy, savory, and slightly sweet elements is key.
- Gochugaru (Korean Chili Flakes): 1/2 cup (approx. 40g) – Use coarse-ground gochugaru for the best texture and color. Adjust to your spice preference.
- Garlic: 8-10 cloves, minced (approx. 40-50g)
- Ginger: 1 tablespoon, finely grated (approx. 15g)
- Fish Sauce: 2 tablespoons (approx. 30ml) – Provides essential umami. Anchovy or shrimp fish sauce are traditional.
- Sugar: 1 teaspoon (approx. 5g) – Balances the flavors and aids fermentation.
- Optional: 1/4 cup (approx. 60ml) Sweet Rice Flour Paste (made by simmering 2 tbsp sweet rice flour with 1/4 cup water until thickened, then cooled) – This helps the paste adhere to the cabbage and feeds the beneficial bacteria.
Aromatics and Vegetables
These add complexity, texture, and complementary flavors to the kimchi.
- Korean Radish (Mu) or Daikon Radish: 1 cup, julienned (approx. 100g)
- Scallions (Green Onions): 4-5, cut into 2-inch lengths (approx. 50g)
- Optional additions: Carrots (julienned), chives, or small pieces of pear/apple for a touch of sweetness.
The Ritual of Preparation: A Step-by-Step Guide to Crafting Your Kimchi
The process of making kimchi is as much about mindful preparation as it is about culinary execution. Each step matter significantly in developing the texture and flavor profile we associate with this iconic fermented dish. Embrace the tactile nature of the process; it’s a rewarding experience that connects you directly to the food you’re creating.
Step 1: Brining the Cabbage
This is arguably the most critical step for achieving the right texture and initial preservation of the cabbage.
- Remove any bruised or wilted outer leaves from the napa cabbage. You can keep a few of the cleaner outer leaves to use later for packing.
- Cut the cabbage lengthwise into quarters. For easier handling, you can trim away the tough core at the base of each quarter, but be careful not to separate the leaves completely.
- In a large bowl or clean sink, dissolve the kosher salt in the 8 cups of water.
- Submerge the cabbage quarters in the saltwater brine. Ensure all parts of the cabbage are in contact with the brine. You might need to weigh them down with a plate or a clean plastic bag filled with water.
- Let the cabbage brine for 2 to 4 hours, turning the quarters every hour. The leaves should become pliable and slightly wilted, with the thick white parts bending without snapping. The exact time will depend on the thickness of the cabbage leaves and ambient temperature.
- Once brined, thoroughly rinse each cabbage quarter under cold running water, at least 3-4 times, to remove excess salt. Gently squeeze out as much water as possible.
- Place the rinsed cabbage quarters cut-side down in a colander to drain for at least 30 minutes. This ensures no excess water dilutes your flavor paste later.
Step 2: Preparing the Flavor Paste (Yangnyeom)
While the cabbage drains, assemble the vibrant spice paste that will give your kimchi its signature character. This paste is the soul of the dish.
- In a medium bowl, combine the gochugaru, minced garlic, grated ginger, fish sauce, and sugar. If using, add the cooled sweet rice flour paste.
- Mix everything thoroughly until a thick, uniform paste forms. The consistency should be spreadable but not runny. If it seems too dry, add a tiny splash of water or more fish sauce.
Step 3: Assembling the Kimchi
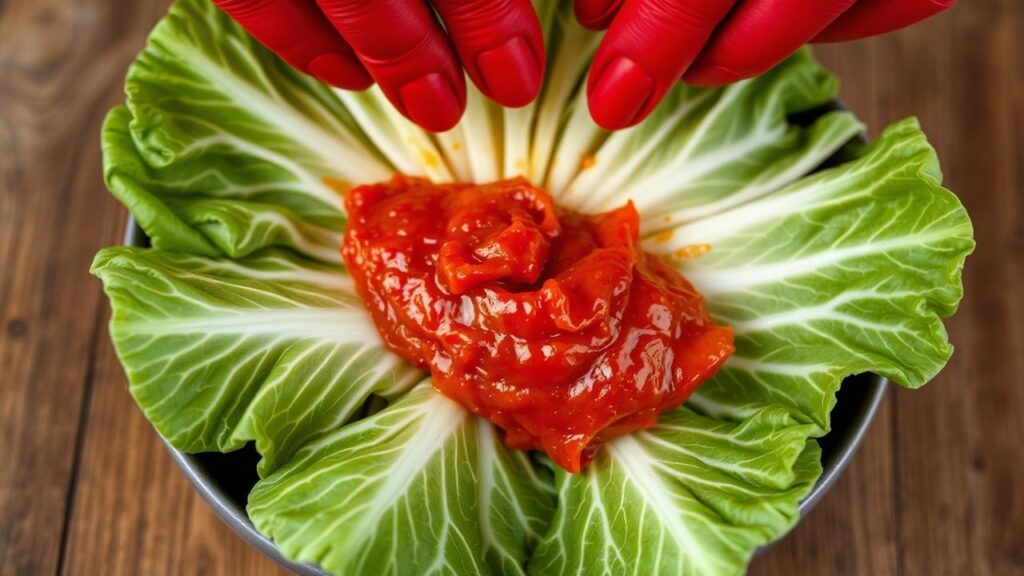
This is where the magic truly happens, as you individually coat each leaf with the flavorful paste. Wear gloves for this step – the gochugaru can stain and irritate skin!
- Take one drained cabbage quarter. Starting from the outer leaves and working your way inwards, carefully spread a generous amount of the flavor paste between each leaf. Ensure an even coating throughout. Be sure to get the paste right down to the core.
- Once each quarter is thoroughly coated, fold it in half and then tuck it into a compact shape.
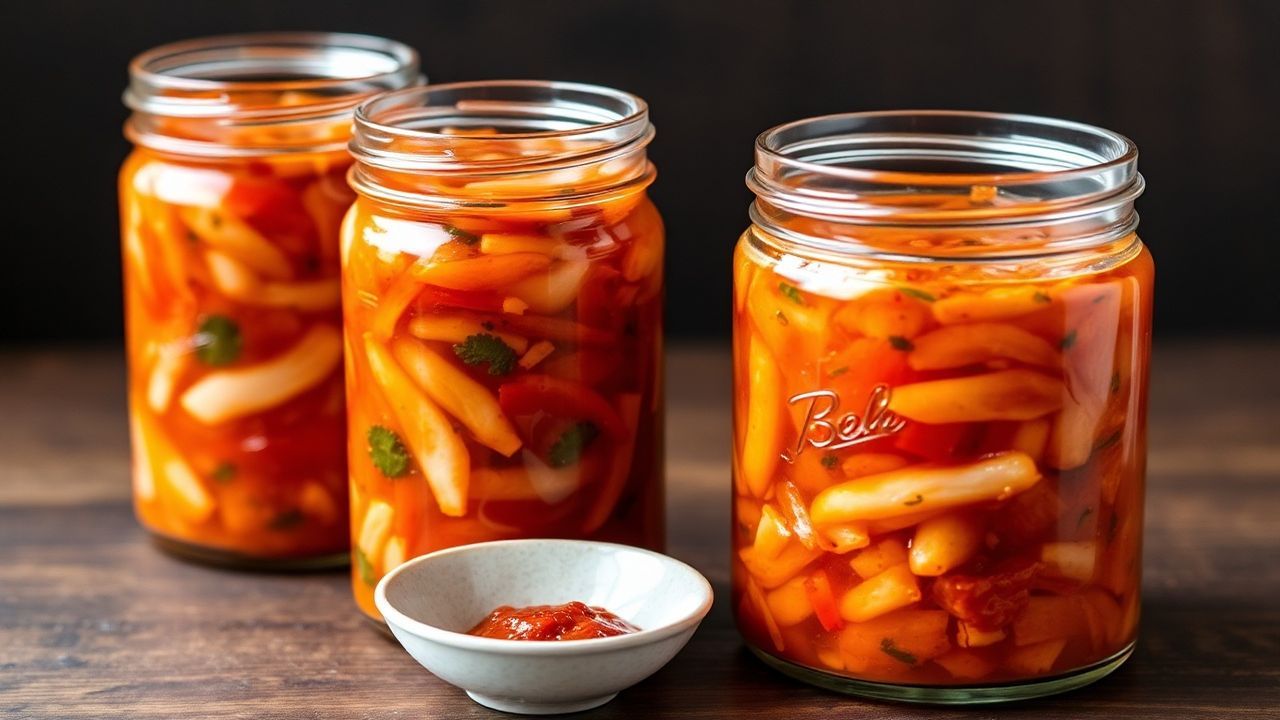
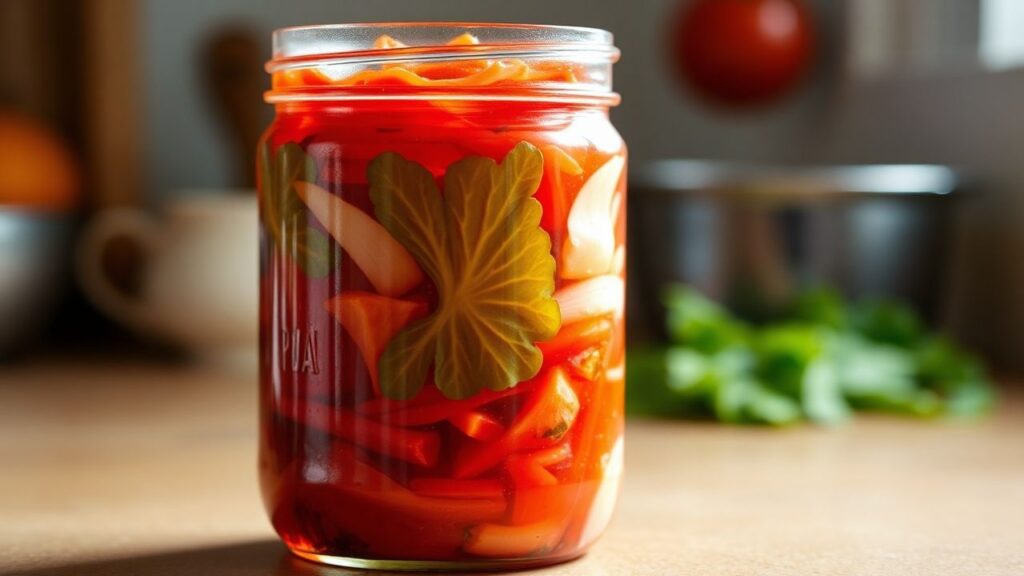
- Arrange the coated cabbage quarters snugly in a large, clean glass jar or food-grade plastic container. Press down firmly to remove any air pockets. If you have any reserved outer leaves, you can use them to cover the top of the kimchi.
Step 4: Fermentation
The fermentation is where the complex flavors and beneficial probiotics develop. This stage requires patience and observation.
- Seal the container tightly. If using a glass jar, leave about an inch of headspace at the top to allow for expansion during fermentation.
- Let the kimchi sit at room temperature (around 65-70°F / 18-21°C) for 1 to 3 days. The duration depends on the ambient temperature and your desired level of fermentation.
- During this period, you will start to see bubbles forming and liquid accumulating. This is a sign of active fermentation. Gently press down on the kimchi daily to keep it submerged in its brine. You may also notice a slightly sour aroma developing.
- Taste the kimchi daily after the first 24 hours. When it reaches a flavor profile you enjoy – a balance of spicy, tangy, and slightly salty – it’s ready for the next stage. For a milder, fresher kimchi, you might only need 1-2 days. For a tangier, more developed flavor, 3 days or more might be preferred.
Step 5: Refrigeration and Maturation
Once the kimchi has reached your desired tanginess at room temperature, it’s time to slow down the fermentation and allow it to mature.
- Transfer the container to the refrigerator. The cold temperature will significantly slow down the fermentation process.
- Your homemade kimchi will continue to develop flavor and complexity in the refrigerator. It can be enjoyed immediately, but its flavors will deepen and mature over the next week and beyond. The kimchi will become tangier and more mellow with time.
Nutritional Profile: A Glimpse into Kimchi’s Health Benefits
Beyond its culinary prowess, kimchi is a nutritional powerhouse, lauded for its probiotic content and a wealth of vitamins and minerals. The fermentation process not only enhances flavor but also unlocks and increases the bioavailability of certain nutrients, making it a truly healthful addition to any diet.
Per Serving (Approx. 1 cup / 200g, after 1 week of fermentation):
Nutritional values are approximate and can vary based on specific ingredients and fermentation time.
| Nutrient | Amount (Approximate) |
|---|---|
| Calories | 40-60 kcal |
| Carbohydrates | 8-12g |
| Fiber | 2-4g |
| Protein | 2-4g |
| Fat | 0-1g |
| Vitamin C | Significant source |
| Vitamin K | Significant source |
| Vitamin A | Good source |
| Potassium | Good source |
| Iron | Good source |
The fermentation process cultivates beneficial lactic acid bacteria, such as Lactobacillus species, which are renowned for their positive impact on gut health. These probiotics can aid digestion, support the immune system, and potentially influence nutrient absorption. The capsaicin in the gochugaru also offers antioxidant and anti-inflammatory properties. For instance, studies have suggested that regular consumption of fermented foods like kimchi can contribute to a more diverse gut microbiome, a factor increasingly linked to overall well-being.
Elevating Your Kimchi Game: Expert Tips for Perfection
Achieving a truly exceptional batch of homemade kimchi involves more than just following a recipe; it’s about understanding the nuances and making informed adjustments. These insights, honed through years of culinary exploration and fermentation practice, will help you refine your technique and consistently produce kimchi that delights the palate.
Harnessing Temperature for Fermentation
The rate of fermentation is directly tied to temperature. Warmer temperatures accelerate the process, leading to a tangier kimchi more quickly, while cooler temperatures slow it down, allowing for a more gradual development of complex flavors. If your kitchen is particularly warm, you might find your kimchi ferments within 24 hours. Conversely, in a cooler environment, it might take 3-4 days. Understanding your kitchen’s climate is key to predicting fermentation times. For those in very cold climates, a slightly warmer spot, like near a pilot light on a gas stove (not directly on it!), can provide a gentle warmth to kickstart fermentation.
The Art of Salting and Rinsing
The brining step isn’t just about wilting the cabbage; it’s also about seasoning it internally. Over-salting can lead to an unpleasantly salty final product, while under-salting can result in mushy cabbage and insufficient flavor. The key is to find that sweet spot where the cabbage is pliable but retains a slight crispness. Thoroughly rinsing after brining is non-negotiable to remove excess salt, preventing the kimchi from becoming too salty and allowing the spice paste to shine. A common mistake is not rinsing enough, leading to a brine that is too strong. This is why tasting a piece of the brined cabbage before proceeding is a good practice.
Balancing the Flavor Paste
The “yangnyeom” is where personal preference truly shines. While the recipe provides a solid foundation, don’t be afraid to adjust. If you prefer a milder spice, reduce the gochugaru. If you crave more heat, add a pinch of cayenne or a different type of chili flake. The sweetness from sugar or fruit can be amplified or reduced. Some traditional recipes include a small amount of finely chopped onion or even a tablespoon of Korean plum extract (maesilcheong) for a unique sweet and sour note. Exploring these variations is part of the joy of making kimchi at home. For inspiration on flavor pairings, consider resources like reciperevelation.com.
Beyond the core ingredients, consider introducing other vegetables to your kimchi. Thinly sliced carrots add a touch of sweetness and vibrant color. Chives or garlic chives contribute a fresh, oniony bite. Some regional variations even incorporate small pieces of seafood, like salted shrimp, for an added layer of umami. However, for your first few batches, keeping it simple with napa cabbage, radish, and scallions will allow you to master the fundamental techniques before venturing into more complex variations. The goal is to build confidence with a solid, reliable recipe.
The Art of Patience: Understanding Kimchi Maturation
The journey of kimchi from fresh to fermented is a fascinating one, marked by a transformation of flavor, texture, and aroma. While the initial preparation is crucial, the subsequent fermentation and maturation phases are where the true magic unfolds. It’s proof of the power of beneficial microbes working their alchemy.
From Fresh to Tangy: The Role of Lactic Acid Bacteria
Upon transferring the prepared kimchi to room temperature, the natural lactic acid bacteria present on the cabbage leaves begin to proliferate. These microorganisms consume the sugars in the vegetables, producing lactic acid, carbon dioxide, and other compounds. This process is what gives kimchi its characteristic tangy flavor and effervescence. The warmer the environment, the more rapid this bacterial activity. A common observation is the appearance of small bubbles and a slight souring aroma, indicating that fermentation is actively underway. This is the stage where you can actively influence the final flavor profile by controlling the duration of room-temperature fermentation. A shorter period yields a fresher, crisper kimchi, while a longer period results in a more pronounced sourness, ideal for dishes where a bolder tang is desired.
The Slow Dance of Refrigeration
Once the kimchi has achieved your preferred level of tanginess at room temperature, refrigeration acts as a control mechanism. The cold environment dramatically slows down the fermentation process, preventing the kimchi from becoming overly sour too quickly. However, it does not halt it entirely. Instead, it encourages a slow, steady maturation. Over weeks and months in the refrigerator, the flavors continue to meld and deepen. The sharp tang mellows into a more complex, nuanced sourness, and the overall taste becomes richer and more rounded. This is why older kimchi, often referred to as “mukeunji” (aged kimchi), is highly prized for its intense flavor and is frequently used in stews and stir-fries where its robust character can shine.
The concept of “perfectly fermented” kimchi is subjective and depends entirely on individual preference. Some enjoy their kimchi young and crisp, with a subtle tang. Others prefer it well-aged, with a pronounced sourness and a softer texture. The beauty of making it at home is the ability to tailor it to your palate. A good practice is to taste your kimchi at regular intervals once it’s in the refrigerator. You’ll notice how the flavor evolves, allowing you to identify when it reaches your personal ideal. This iterative process of tasting and observation is key to mastering your own kimchi-making style. For those seeking to explore the science behind fermentation, resources like fermentation on Wikipedia offer a wealth of information.
Frequently Asked Questions About Homemade Kimchi
How long does homemade kimchi last?
Homemade kimchi can last for several months in the refrigerator, provided it is stored properly in an airtight container. Initially, it will be crisp and tangy. As it ages, it will become softer and more sour. While it won’t “spoil” in the traditional sense, its flavor and texture will change. Generally, kimchi is considered good to eat for at least 3-6 months, though many people enjoy it even longer, especially for cooking purposes where its robust flavor is beneficial. You’ll know it’s past its prime if it develops mold or an off-putting, rancid smell, which is rare if handled correctly.
What if my kimchi doesn’t bubble?
A lack of bubbling during the initial room-temperature fermentation can be due to several factors. The most common is that your environment might be too cool for the lactic acid bacteria to become active. Try moving the kimchi to a warmer spot, ideally between 65-75°F (18-24°C). Another possibility is that the salt concentration was too high, inhibiting bacterial growth, or conversely, too low, leading to spoilage rather than fermentation. Ensure you used the correct type and amount of salt and rinsed the cabbage thoroughly. In some cases, especially if using pre-brined cabbage or a very large batch, the fermentation might be slower to start. Don’t despair; keep it at room temperature and check it daily. If after 3-4 days there are still no signs of activity, it might be worth considering if there was an issue with ingredient freshness or preparation, and you might consider starting over with fresh ingredients. For consistent results, consider investing in a fermentation mat or a dedicated fermentation vessel, available from specialty kitchen suppliers like whimrecipes.com.
Can I make kimchi with other vegetables?
Absolutely! While napa cabbage is the most common base, kimchi can be made with a wide variety of vegetables. Popular variations include cucumber kimchi (oi-kimchi), radish kimchi (kkakdugi, using cubed Korean radish), green onion kimchi (pa-kimchi), and even cabbage kimchi made with regular green cabbage (yangbaechu-kimchi). The fundamental process of brining (or salting) and seasoning with the gochugaru-based paste remains similar. When experimenting with different vegetables, consider their water content and texture. Harder vegetables like radishes may require slightly different brining times or cutting methods. For instance, to make kkakdugi, you’d cube the radish, salt it, and then mix it with the flavor paste. The key is to adapt the brining and preparation steps to suit the specific vegetable’s characteristics. Exploring these variations can lead to exciting new flavor discoveries, and you can find a plethora of ideas on sites like recipesfoodie.com.
My kimchi smells very strong. Is that normal?
Yes, a strong, pungent aroma is a normal characteristic of fermented kimchi, especially as it ages. This smell is a result of the metabolic processes of the lactic acid bacteria and other microorganisms involved in fermentation. It’s a complex aroma, often described as sour, tangy, and even slightly yeasty. The intensity of the smell will increase with the duration of fermentation. If the smell is overwhelmingly foul, or if you detect signs of mold (fuzzy white or colored patches on the surface, distinct from the clear brine), it may have spoiled. However, a strong, vinegary, and sour smell is generally a good indicator of active and healthy fermentation. Proper sealing of your kimchi container will help to contain the aroma within the container, especially when stored in the refrigerator.
See also: kimchi

