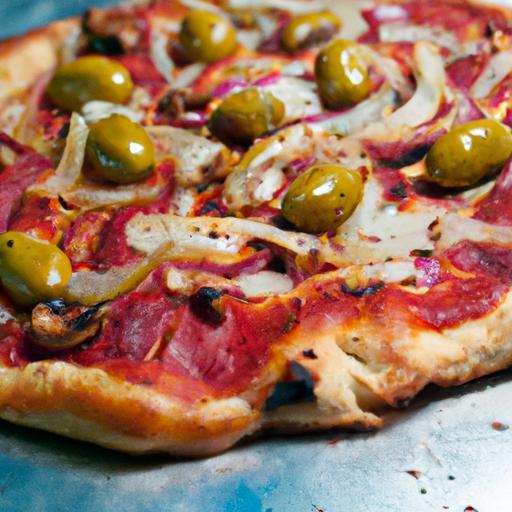
In the vibrant world of pizza lovers, the quest for the perfect crust can often feel like a treasure hunt-especially when gluten is off the table. For those navigating the gluten-free terrain, achieving that ideal balance of crispy exterior and tender, chewy interior can seem elusive, often resulting in crumbly disappointment. But fear not: mastering gluten-free pizza is not only possible, it’s an art waiting to be perfected. This article will guide you through the secrets of crafting a flawless gluten-free crust-one that holds together with pride, bakes with golden perfection, and satisfies every craving without a single crumb left behind. Get ready to transform your pizza nights into a celebration of texture, taste, and gluten-free greatness.
Mastering gluten-free pizza begins with the essential choice of the right flour, which can elevate your crust from crumbly disappointment to a culinary triumph. As someone who has crafted countless gluten-free pizzas, I’ve discovered that the foundation of a flawless base lies in understanding the nuances of each gluten-free flour-its texture, absorbency, and binding potential. Today, I’m excited to guide you through selecting the ideal flour, perfecting dough texture, expertly shaping your crust, and baking it to golden, crispy perfection.
Prep and Cook Time
- Preparation: 20 minutes
- Resting/Proofing: 45 minutes
- Baking: 15-20 minutes
- Total Time: Approximately 1 hour 25 minutes
Yield
Serves 2 medium pizzas (about 8-inch each)
Difficulty Level
Medium – Perfect for cooks ready to explore gluten-free baking with confidence
Ingredients
- 1 cup gluten-free all-purpose flour blend (preferably with xanthan gum included)
- ½ cup almond flour (adds richness and structure)
- 2 tsp baking powder (for lift and lightness)
- 1 tsp fine sea salt
- 1 tbsp sugar (balances the flavor and aids yeast)
- 1 packet (7g) active dry yeast
- ¾ cup warm water (110ºF/43ºC)
- 1 tbsp olive oil (extra virgin for flavor)
- 1 tsp apple cider vinegar (reacts with baking powder for tenderness)
Instructions
- Activate your yeast: In a small bowl, combine warm water, sugar, and yeast. Stir gently and let it sit for 5-7 minutes until foamy, indicating the yeast is alive and ready to work its magic.
- Mix dry ingredients: In a large bowl, whisk together the gluten-free flour blend, almond flour, baking powder, and salt. Ensuring these are evenly combined will create a uniform dough texture.
- Combine wet elements: Add the activated yeast mixture, olive oil, and apple cider vinegar to the dry ingredients. Stir with a sturdy spoon until a sticky dough begins to form. Use your hands-or a stand mixer fitted with a dough hook-to gently bring the dough together into a smooth ball.
- Rest and proof: Cover the dough with a damp cloth or plastic wrap and set it aside in a warm area for 45 minutes. This rest is crucial for gluten-free dough to hydrate properly and develop elasticity.
- Prepare your workspace: Lightly dust a silicone baking mat or a clean surface with gluten-free flour. Transfer the dough and gently press it down into a disc. Let the dough rest for 5 minutes if it resists shaping.
- Roll and shape: Using a rolling pin dusted with flour, roll the dough from the center outward to maintain an even thickness-aim for about ¼ inch thick. Don’t rush; gentle, steady pressure works best to avoid tears. If the dough sticks, dust with more flour sparingly.
- Transfer to baking sheet: Carefully lift the dough with your hands or a spatula onto a parchment-lined baking sheet or pizza stone. Dock the surface lightly with a fork to prevent unwanted large air bubbles.
- Bake the crust: Preheat your oven to the highest setting (usually 475-500ºF / 245-260ºC). Place the crust in the oven for 8-10 minutes until it just begins to set and develop a faint golden hue.
- Add your toppings: Remove the crust and quickly add your favorite sauce, cheese, and toppings. Return to the oven and bake for an additional 7-10 minutes or until the cheese melts and edges crisp beautifully.
- Cool and serve: Allow the pizza to rest 3-5 minutes before slicing. This helps the crust set fully so it holds together cleanly with no crumbs.
Tips for Success
- Flour choice matters: Blends with a combination of rice flour, tapioca starch, and potato starch often yield the best texture. Adding almond flour or ground flaxseed improves binding and flavor.
- Hydration is key: Gluten-free doughs need extra moisture; don’t hesitate to add an additional tablespoon of water if your dough feels dry.
- Vinegar works wonders: The acid from apple cider vinegar activates leavening agents, producing a tender, much less crumbly dough.
- Use parchment paper: It prevents sticking and makes transferring your pizza effortless, ensuring your crust stays intact.
- Pre-bake crust: Partially baking before toppings guarantees a crispy bottom that supports even heavy, moist toppings.
- Storage & make-ahead tip: Par-baked crusts can be cooled completely and frozen in airtight bags. Reheat in a hot oven (425ºF / 220ºC) for 5 minutes before topping and final bake.
Serving Suggestions
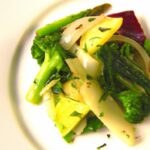
Present your gluten-free masterpiece on a rustic wooden board or stone platter to highlight its artisanal appeal. Finish with fresh basil leaves, a drizzle of high-quality extra virgin olive oil, or a sprinkle of crushed red pepper for a hint of heat. Pair with a bright, crisp salad featuring arugula, cherry tomatoes, and a lemon vinaigrette to balance the richness. For a special touch, serve alongside a chilled glass of unoaked white wine or a sparkling water with fresh citrus slices.
| Nutrient | Per Serving (1 medium pizza) |
|---|---|
| Calories | 320 kcal |
| Protein | 10 g |
| Carbohydrates | 32 g |
| Fat | 13 g |
Explore more gluten-free recipes to complement your pizza night.
For detailed information on gluten-free flours and their properties, see the Gluten-Free Living Flour Guide.

Q&A
Q&A: Mastering Gluten-Free Pizza – Perfect Crust Without Crumbs
Q1: Why is gluten-free pizza crust notoriously crumbly?
A: Gluten is the protein that gives traditional pizza dough its elasticity and chewy texture. Without it, the dough tends to be more fragile and crumbly because it lacks the binding and stretchy properties. This makes the crust prone to breaking apart, which is the biggest challenge when making gluten-free pizza.
Q2: What’s the secret to achieving a perfectly firm yet tender gluten-free pizza crust?
A: The magic lies in the blend of flours and the right combination of binders like xanthan gum or psyllium husk powder. These ingredients mimic gluten’s elasticity and help hold the dough together. Also, incorporating moisture-like eggs, yogurt, or olive oil-adds structure and keeps the crust from drying out and crumbling.
Q3: Which gluten-free flours work best for pizza dough?
A: A mix is best! Popular choices include rice flour for a mild base, tapioca starch for chewiness, and almond or chickpea flour for flavor and protein content. Balancing these flours allows you to customize texture and taste while avoiding the gritty or sandy feel some gluten-free crusts have.
Q4: How important is hydration in gluten-free pizza dough?
A: Essential! Gluten-free flours absorb water differently than wheat flour. A higher hydration level often creates a softer, more pliable dough. But too much water can make the dough sticky and hard to work with. Finding the sweet spot not only improves texture but also helps prevent crumbly edges.
Q5: Should the dough be refrigerated before baking?
A: Yes! Letting gluten-free dough rest in the fridge for at least 30 minutes helps hydrate the flour fully and firms up the dough, making it easier to roll or press out. This rest also allows binders to activate, resulting in a sturdier crust.
Q6: What’s the best baking method to ensure a crispy gluten-free crust?
A: Preheat your oven at a high temperature (450-500°F or 230-260°C) with a pizza stone or inverted baking sheet inside. The hot surface mimics a pizza oven floor, giving the crust a quick, firm bake and crispy bottom. Avoid low temperatures, which can make the crust soggy and crumbly.
Q7: Can gluten-free pizza dough be prepared ahead of time?
A: Absolutely! You can prepare the dough and freeze it before baking. When ready, thaw it in the fridge overnight, then shape and bake. This way, you always have fresh gluten-free pizza on demand without sacrificing crust quality.
Mastering gluten-free pizza crust is all about understanding your ingredients and techniques-embracing the challenge and turning crumbly frustrations into crispy, tender delights. Happy baking!
To Conclude
Mastering gluten-free pizza is no longer a quest shrouded in crumbly uncertainty. With the right blend of ingredients, techniques, and a little culinary confidence, you can craft a crust that’s both sturdy and satisfyingly chewy – the perfect foundation for any topping your heart desires. Embrace the art of gluten-free baking, and transform each pizza night into a celebration of flavors and textures that rival the traditional. Remember, the secret to a flawless crust lies not just in the recipe, but in the joy of experimentation and the patience to let your dough rise to the occasion. So grab your rolling pin, preheat that oven, and get ready to enjoy pizza nights where the only thing missing is the crumbs.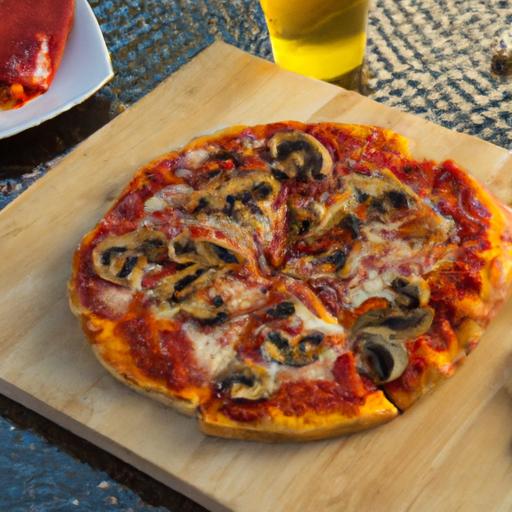


