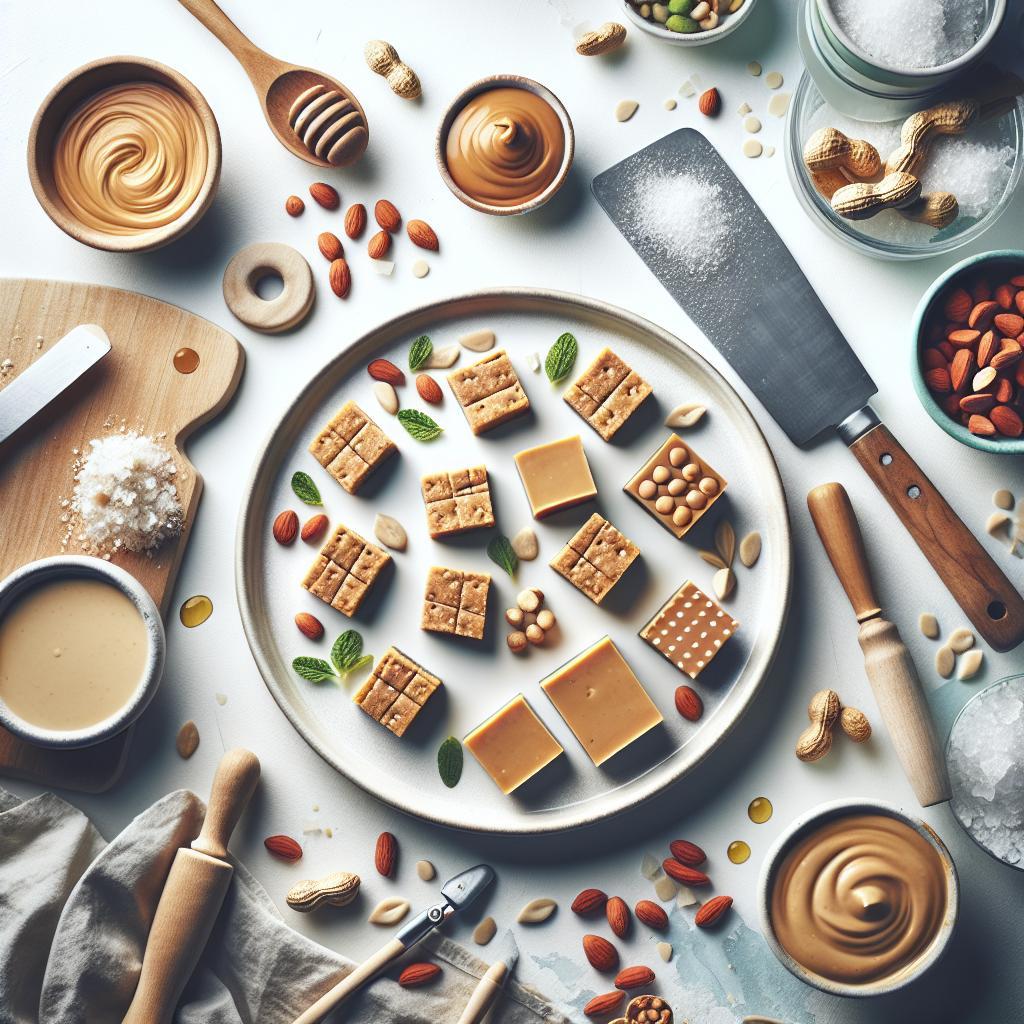
When it comes to satisfying our sweet tooth without spending hours in the kitchen, no-bake treats are the ultimate game-changer. Enter the no-bake peanut butter bar-a delightful fusion of creamy richness and chewy texture that’s as simple to make as it is irresistible to eat. Whether you’re a seasoned baker looking for a quick fix or a snack lover craving a homemade indulgence, these bars hit the sweet spot every time. In this article, we’ll unveil the secrets behind these easy, delicious treats and show you how to whip them up with minimal effort and maximum flavor. Prepare to discover your new favorite go-to snack that’s perfect for any occasion!
No-Bake Peanut Butter Bars are the ultimate fusion of comfort and convenience, delivering a rich, nutty flavor and irresistibly creamy texture without ever turning on the oven. This timeless treat traces its roots back to mid-20th century Americana, where busy home cooks sought delicious, fuss-free desserts. Today, it’s a beloved classic that perfectly balances the buttery roast of peanut butter with sweet, velvety layers of honey and chocolate – all in a quick, straightforward preparation. Whether you’re craving a midday pick-me-up or a luscious after-dinner indulgence, these bars are a surefire way to satisfy your sweet tooth while keeping things refreshingly simple.
Prep and Cook Time
Prep Time: 15 minutes
Chill Time: 2 hours (no baking required)
Yield
Approximately 16 generously sized bars
Difficulty Level
Easy – perfect for beginners and busy home chefs alike
Essential Ingredients for Irresistible No-Bake Peanut Butter Bars
- 1 cup creamy peanut butter (preferably natural, for a rich, authentic flavor)
- 1/2 cup unsalted butter, melted
- 2 cups powdered sugar, sifted for smoothness
- 1 1/2 cups graham cracker crumbs (finely crushed)
- 1 1/2 cups semi-sweet chocolate chips
- 1 tbsp honey or light corn syrup, for subtle sweetness and binding
Step-by-Step Guide to Crafting the Ultimate No-Bake Peanut Butter Bars
- Prepare your pan: Line an 8×8 inch square baking pan with parchment paper, leaving an overhang for easy removal after chilling.
- Create the base mixture: In a mixing bowl, combine the melted butter and peanut butter until fully blended and silky smooth.
- Add dry ingredients: Gradually stir in the powdered sugar and graham cracker crumbs, mixing until a thick, uniform dough forms. Tip: Use a sturdy spatula or your hands to ensure even mixing and avoid clumps.
- Press into pan: Transfer the peanut butter mixture to the lined pan. Using a flat-bottomed glass or spatula, press firmly and evenly into the base to create a compact foundation.
- Prepare the chocolate topping: In a microwave-safe bowl, combine chocolate chips and honey. Microwave in 20-second bursts, stirring each time, until the chocolate is fully melted and glossy.
- Top the bars: Pour the melted chocolate mixture over the peanut butter layer. Use an offset spatula to spread it evenly, ensuring every inch is covered with a smooth chocolate cap.
- Chill to set: Place the pan in the refrigerator for at least 2 hours, or until the bars are firm enough to cut cleanly.
- Slice and serve: Lift the bars out using the parchment paper overhang. Cut into 16 squares with a sharp knife, wiping the blade between cuts for neat edges.
Expert Tips and Flavor Variations to Elevate Your Peanut Butter Bars
- Texture tweak: Swap out graham cracker crumbs for crushed digestive biscuits or gluten-free alternatives to suit dietary needs.
- Crunch factor: Fold in 1/2 cup chopped roasted peanuts or pretzel bits into the base for a delightful crunch contrast.
- Sweetness balance: Adjust the honey or powdered sugar quantities depending on your preferred sweetness intensity – start with less and add gradually.
- Chocolate upgrade: Experiment with dark chocolate or add a sprinkle of sea salt on top before chilling to amplify flavors.
- Make ahead: These bars stay fresh when wrapped tightly in the fridge for up to one week or freeze for longer storage, thawing before serving.
Serving Suggestions
Present your No-Bake Peanut Butter Bars on a rustic wooden board or a chic dessert platter. Garnish with a light dusting of cocoa powder or chopped peanuts for visual appeal. Pair with a cold glass of milk or a cappuccino to enhance the indulgent peanut butter and chocolate combination. For a festive touch, drizzle with white chocolate or sprinkle mini chocolate chips atop the chilled bars.
| Nutrient | Per Serving (1 bar) |
|---|---|
| Calories | 210 |
| Protein | 6g |
| Carbohydrates | 18g |
| Fat | 14g |

For related bite-sized delights, check out our Easy No-Bake Chocolate Treats collection. To deepen your understanding of peanut butter’s nutritional benefits, visit the Nutrition.org Peanut Facts page.
Q&A
Q&A: No-Bake Peanut Butter Bars: Easy, Delicious Treats Unveiled
Q1: What makes no-bake peanut butter bars stand out from other desserts?
A1: No-bake peanut butter bars are the ultimate blend of simplicity and flavor. Without ever turning on the oven, you can whip up a decadent treat that’s creamy, crunchy, and satisfyingly sweet. They’re a perfect answer to last-minute cravings or when you want to impress guests without the fuss.
Q2: What are the key ingredients that create those irresistible layers?
A2: The magic lies in classic pantry staples: creamy peanut butter, buttery graham cracker crumbs, powdered sugar for sweetness and texture, and a luscious layer of melted chocolate on top. Together, these ingredients build a harmonious texture and a rich, nutty flavor that keeps you coming back for more.
Q3: How difficult is it to make these bars for a beginner baker?
A3: Even total kitchen novices can succeed with these bars. The no-bake nature means you avoid complicated techniques like precise baking times or temperature control. Mix, press, chill, and drizzle-the steps are straightforward and forgiving, making it a perfect first DIY dessert.
Q4: Can these bars be customized for different tastes or dietary needs?
A4: Absolutely! Swap out peanut butter for almond or cashew butter to mix up the flavor. Use gluten-free graham crackers or substitute the sugar with natural sweeteners like honey or maple syrup for a healthier twist. You can even add a sprinkle of sea salt on top to elevate the sweetness with a salty contrast.
Q5: What’s the best way to store no-bake peanut butter bars?
A5: Keep them in an airtight container in the refrigerator, where they’ll stay fresh and firm for up to a week. For longer storage, pop them in the freezer-just thaw for a few minutes before indulging to regain that perfect chewy texture.
Q6: Why are no-bake peanut butter bars a crowd favorite at gatherings?
A6: These bars balance rich and hearty peanut butter flavor with the silky smoothness of chocolate, making them universally loved. Plus, they’re bite-sized, portable, and mess-free, ideal for parties, picnics, or potlucks where finger food reigns supreme.
Q7: Can kids safely help make these treats?
A7: Definitely! Because there’s no oven involved, kids can participate in mixing and pressing the layers. It’s a fun, hands-on way to introduce little chefs to dessert making without any safety worries, fostering creativity and confidence in the kitchen.
Q8: What’s the secret to getting a perfect chocolate topping?
A8: Gently melt your chocolate-using a double boiler or microwave in short bursts to avoid scorching-and spread it quickly before it sets. For an elegant touch, add a drizzle of peanut butter or a sprinkle of crushed nuts atop the chocolate layer before chilling.
These no-bake peanut butter bars aren’t just treats; they’re a celebration of ease and indulgence, revealing that sometimes the simplest recipes make the most memorable desserts.
Insights and Conclusions
As the last crumb of these no-bake peanut butter bars melts on your tongue, you’ll appreciate how simplicity and flavor can come together in perfect harmony. These easy, delicious treats prove that you don’t need an oven or hours in the kitchen to satisfy your sweet tooth. Whether you’re whipping up a quick snack or impressing guests with minimal effort, these bars are a testament to the magic of peanut butter paired with just a handful of ingredients. So next time you crave something indulgent yet effortless, remember-sometimes the best recipes are the ones you don’t have to bake at all.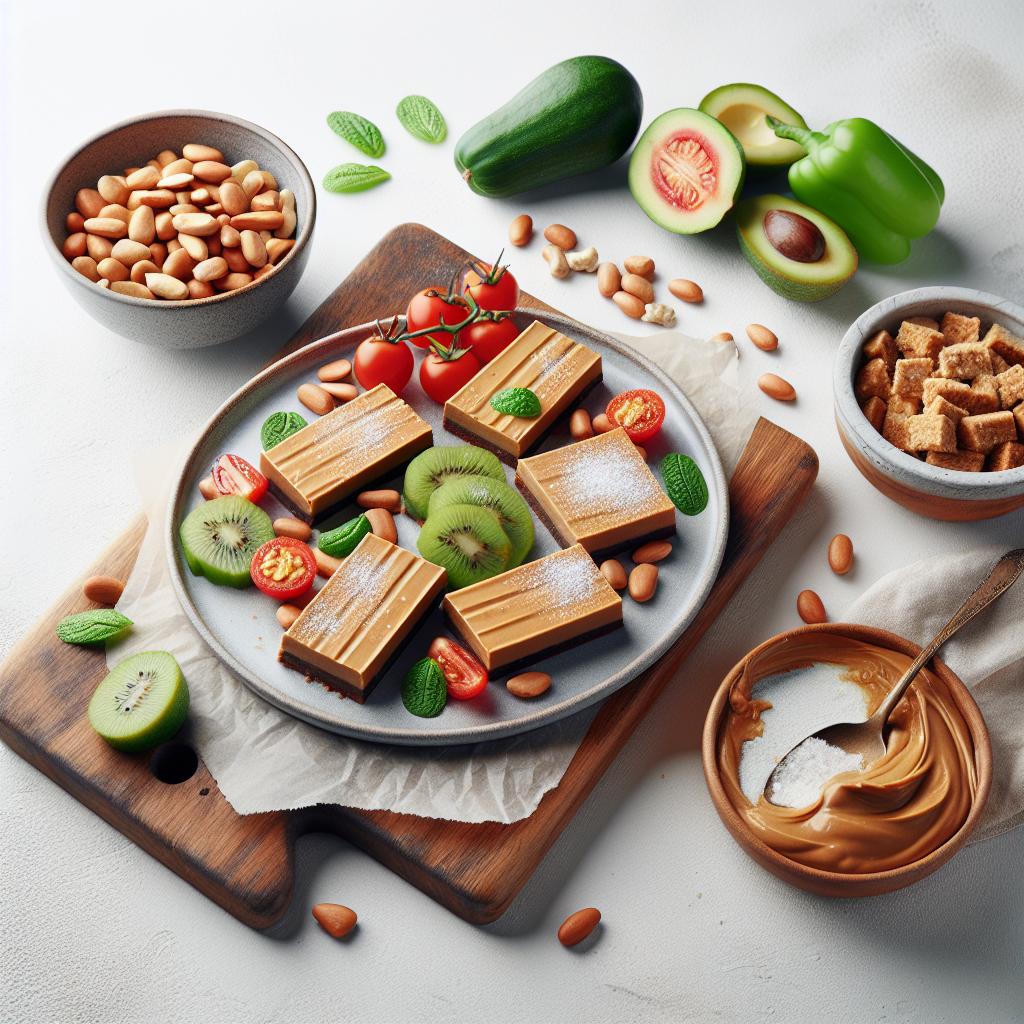


