
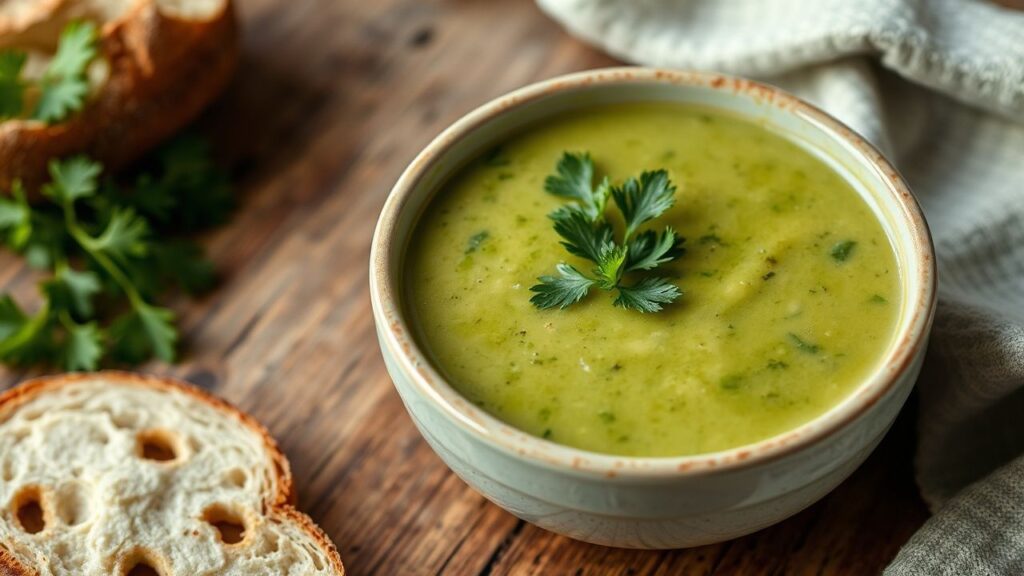
Pea soup, a dish steeped in tradition and comfort, finds a remarkable new expression in the modern kitchen. This humble legume, transformed by the pressure-cooking prowess of the Instant Pot, offers a pathway to deeply flavorful, velvety smooth pea soup with astonishing speed and minimal fuss.
“The humblest ingredients, when treated with respect and understanding, can yield the most profound culinary revelations.” – Auguste Escoffier
The enduring appeal of pea soup lies in its elemental goodness. From hearty peasant fare to refined gastronomic interpretations, the simple pairing of peas and a savory base has resonated across centuries and cultures. Traditionally, this meant hours of simmering, coaxing flavour from dried peas and a simmering ham hock. While this slow-cooked method possesses its own charm and depth, the advent of the electric pressure cooker, particularly the ubiquitous Instant Pot, has democratized the creation of truly exceptional pea soup, making it accessible even on the busiest weeknights. This article guides you through crafting a pea soup that is not merely good, but transcendent, leveraging the Instant Pot’s capabilities to unlock its full potential.
- The Instant Pot dramatically reduces cooking time for split pea soup, transforming tough dried peas into a creamy, tender delight in under an hour.
- Achieving a rich, nuanced flavour profile requires more than just cooking; it involves strategic aromatic building and the judicious selection of complementary ingredients.
- Beyond the classic ham hock, creative additions can elevate your pea soup to new heights, offering surprising textures and flavour dimensions.
- Understanding the role of acidity and seasoning is paramount to balancing the inherent sweetness of peas and achieving a truly harmonious dish.
The magic of the Instant Pot lies in its ability to rapidly increase the internal temperature and pressure, accelerating chemical reactions that would otherwise take hours at atmospheric pressure. For dried split peas, this means a dramatically reduced cooking time, allowing them to break down and release their starches, creating that characteristic creamy texture without the need for prolonged stovetop simmering. This accelerated cooking also helps to retain more of the peas’ vibrant colour and nutrients. Furthermore, the sealed environment minimizes moisture loss, concentrating flavours and ensuring that every ingredient contributes its full aromatic potential to the final broth. The “set it and forget it” nature of the Instant Pot frees the home cook from constant monitoring, allowing for greater efficiency in meal preparation.
Crafting an exceptional pea soup begins with selecting the finest ingredients. While the core components are simple, their quality and interplay are crucial.
Yields: 6-8 servings
Prep time: 15 minutes
Cook time: 45-55 minutes (plus natural pressure release)
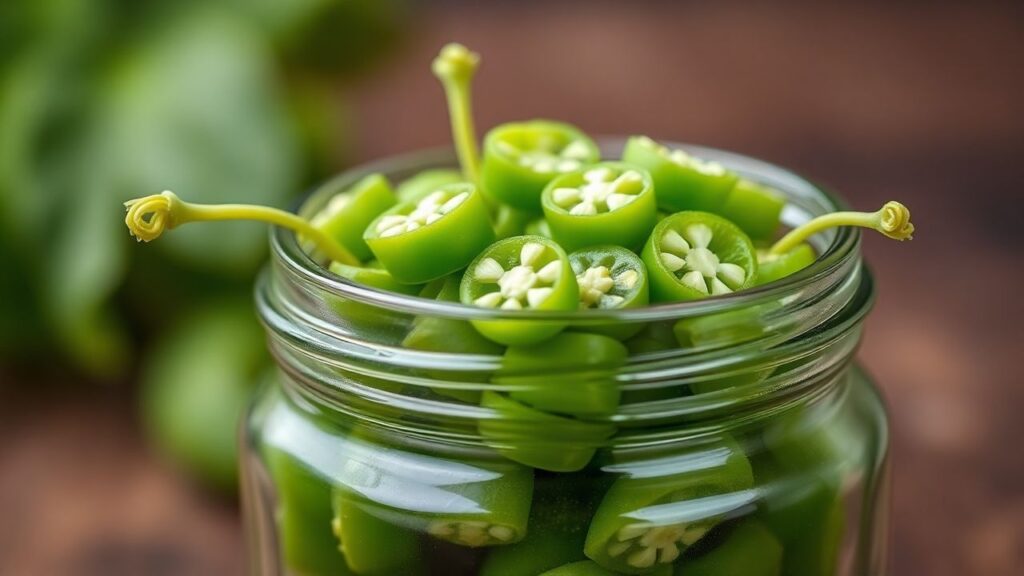
- Dried Split Peas: 1 pound (approximately 450g) – Green split peas are traditional and offer a more robust flavour, while yellow split peas yield a milder, sweeter soup. Ensure they are fresh and free from excessive dust or debris.
- Aromatics:
- 2 tablespoons olive oil or unsalted butter
- 1 large yellow onion, finely diced
- 2 medium carrots, peeled and finely diced
- 2 stalks celery, finely diced
- 4 cloves garlic, minced
- Liquid Base:
- 8 cups (approximately 2 liters) low-sodium chicken or vegetable broth – Using low-sodium allows for better control over the final saltiness.
- The Savory Heart (Choose One or Combine):
- 1 pound (approximately 450g) smoked ham hock or smoked turkey leg – This is the classic flavour enhancer, imparting a deep, smoky richness.
- 1/2 pound (approximately 225g) thick-cut smoked bacon, diced – Provides a smoky, salty foundation and renders delicious fat.
- Herbs and Spices:
- 1 teaspoon dried thyme
- 1/2 teaspoon dried rosemary (optional, but adds a lovely herbaceous note)
- 1/4 teaspoon black pepper, freshly ground
- Salt, to taste (add towards the end)
- Finishing Touches (Optional but Recommended):
- 1 tablespoon apple cider vinegar or lemon juice – Crucial for brightening the flavours.
- Fresh parsley or chives, chopped, for garnish
- Vegetarian/Vegan: Omit the ham hock/bacon and use smoked paprika (1-2 teaspoons) for a smoky flavour. Ensure vegetable broth is used. For added richness, consider a tablespoon of nutritional yeast.
- Spicy Kick: Add 1/4 teaspoon of red pepper flakes with the aromatics.
- Creamier Texture: Reserve about 1 cup of the cooked soup, blend it until smooth using an immersion blender or standard blender, and stir it back into the pot.
The Instant Pot simplifies the process, but attention to detail in the initial sautéing and the final seasoning is what separates a good pea soup from a truly memorable one.
-
Preparation and Sautéing
Begin by rinsing the dried split peas thoroughly under cold running water until the water runs clear. This removes any residual dust or debris. Next, select the “Sauté” function on your Instant Pot and set it to “Normal” or “Medium.” Add the olive oil or butter to the inner pot. Once shimmering, add the diced onion, carrots, and celery. Sauté, stirring occasionally, for 5-7 minutes, or until the vegetables have softened slightly and the onion is translucent. This initial sautéing phase builds a foundational layer of flavour, caramelizes the natural sugars in the vegetables, and creates aromatic depth.
If using bacon, add it now and cook until crispy, then remove the bacon with a slotted spoon, leaving the rendered fat in the pot. The bacon can be crumbled and added back to the soup later for texture. If using a ham hock or turkey leg, add it to the pot after the vegetables have softened. Sear it for a minute or two on each side to develop some colour and initial flavour. Add the minced garlic and cook for another minute until fragrant, being careful not to burn it. The goal is to bloom the aromatics and create a complex flavour base before introducing the main ingredients.
-
Deglazing and Adding Main Ingredients
Pour in about 1/2 cup of the broth and use a wooden spoon or spatula to scrape up any browned bits stuck to the bottom of the inner pot. This process, known as deglazing, is essential for preventing the dreaded “Burn” notice from the Instant Pot and for incorporating all those concentrated flavours into the soup. Once the bottom is clean, add the rinsed split peas, the remaining broth, dried thyme, dried rosemary (if using), and black pepper. If you opted for the bacon, set aside the cooked, crumbled bacon for now. Ensure the ham hock or turkey leg is fully submerged in the liquid.
-
Pressure Cooking
Secure the lid of the Instant Pot and ensure the steam release valve is set to the “Sealing” position. Select the “Manual” or “Pressure Cook” setting and set the cooking time to 30 minutes at high pressure. The Instant Pot will take some time to come up to pressure, which is factored into the overall cooking time. Once the cooking cycle is complete, allow the pressure to release naturally for at least 15 minutes. This natural pressure release (NPR) is crucial for split pea soup, as it allows the peas to continue to soften and the flavours to meld further without becoming mushy or breaking down too aggressively.
After 15 minutes of natural release, you can carefully perform a quick release of any remaining pressure by moving the steam release valve to the “Venting” position. Stand back to avoid the steam. Once the float valve has dropped, indicating all pressure has been released, carefully open the lid, tilting it away from you. The ham hock or turkey leg should be very tender and easily fall off the bone. Remove the bone and any large pieces of fat or skin from the meat, then shred or chop the meat and return it to the pot.
-
Finishing and Seasoning
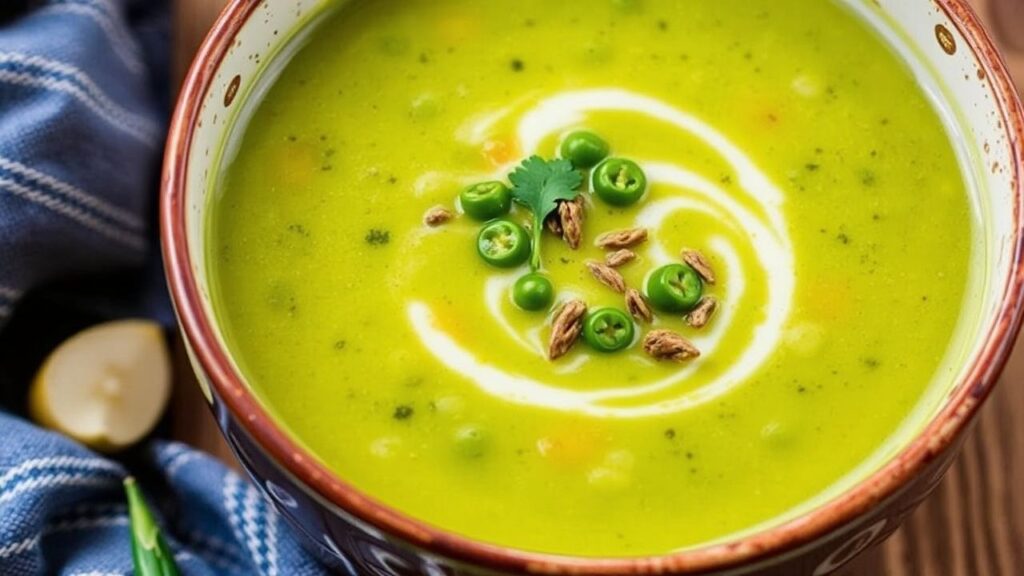
At this stage, the soup will likely be quite thick. Stir the soup well. If you desire a smoother consistency, use an immersion blender to blend the soup directly in the pot until it reaches your preferred texture. Alternatively, you can transfer portions of the soup to a standard blender (being cautious with hot liquids) and blend until smooth, then return it to the pot. Taste the soup and season generously with salt. Remember that the ham hock or bacon will have contributed salt, so it’s important to taste before adding too much. The addition of apple cider vinegar or lemon juice at this point is a masterstroke; it cuts through the richness and sweetness of the peas, brightening the entire flavour profile and adding a professional polish.
Stir in any reserved crumbled bacon. Ladle the hot pea soup into bowls. Garnish with freshly chopped parsley or chives for a burst of freshness and colour. This final touch elevates the presentation and adds a subtle herbaceous counterpoint to the rich, savory soup.
Split pea soup, particularly when prepared with lean protein sources, is a nutritional powerhouse. It’s an excellent source of dietary fiber, crucial for digestive health and promoting satiety. The peas themselves are packed with plant-based protein, making it a satisfying meal for vegetarians and a valuable addition to any diet. Furthermore, they offer a good supply of essential vitamins and minerals, including iron, folate, and vitamin K.
The inclusion of vegetables like carrots and celery adds further vitamins and antioxidants. When prepared with a smoked ham hock or turkey leg, the soup contributes lean protein and essential minerals like zinc. Opting for low-sodium broth is a prudent choice for managing blood pressure.
Approximate Nutritional Information per Serving (assuming 8 servings, without added salt beyond what’s in broth/meat):
- Calories: 300-400 kcal (depending on protein source)
- Protein: 20-25g
- Fiber: 10-15g
- Fat: 8-15g (highly variable based on ham hock/bacon)
- Carbohydrates: 30-40g
- Sodium: 400-800mg (highly variable based on broth and cured meats)
Transforming a simple split pea soup into something truly exceptional involves understanding the nuances of flavour development and textural balance.
The inherent creaminess of split pea soup is its hallmark, but achieving the perfect consistency requires attention. After pressure cooking, the soup will be thick. If you prefer a soup with some texture, simply stir in the shredded meat and serve. For a completely smooth, velvety texture, the immersion blender is your best friend. Blend until completely smooth, then reheat gently. For a slightly more rustic appeal, you can blend only half the soup and return it to the pot with the unblended portion, creating a delightful contrast.
The foundation of flavour begins with the mirepoix (onion, carrot, celery) and the sautéing process. Don’t rush this step; allow the vegetables to soften and develop sweetness. The choice of protein is also paramount. A good quality smoked ham hock or a flavorful smoked turkey leg will impart a depth of flavour that cannot be replicated with other ingredients. If using bacon, ensure it’s a good quality, thick-cut variety. For a vegetarian rendition, smoked paprika is a good substitute, but consider adding a bay leaf during the cooking process for an extra layer of aroma.
Seasoning is a multi-stage process. The initial addition of pepper is a starting point. However, the most critical seasoning occurs at the end. Salt should be added judiciously after the soup has been cooked and, if desired, blended. This is because the flavour of the broth and any cured meats will concentrate during cooking. The addition of acid – be it apple cider vinegar or lemon juice – is non-negotiable. It awakens the palate, balances the earthy sweetness of the peas, and provides a bright counterpoint to the richness. A small amount, about a tablespoon, is usually sufficient.
The Instant Pot has not merely sped up the process of making split pea soup; it has refined it. By harnessing the power of pressure, we can achieve a depth of flavour and a silken texture in a fraction of the time, making this comforting classic more accessible than ever. Whether you’re a seasoned cook or a novice venturing into the world of pressure cooking, this recipe offers a reliable and deeply satisfying path to a truly exceptional bowl of pea soup. It’s proof of how modern technology can honour and enhance timeless culinary traditions, proving that comfort food doesn’t have to be time-consuming. The rich aroma that fills your kitchen as it cooks is a prelude to the comforting embrace awaiting you in each spoonful.
While fresh peas offer a vibrant green colour and a lighter flavour, they are fundamentally different from split peas and will not produce the same creamy, thick texture that is characteristic of traditional pea soup. Dried split peas are specifically processed to break down and release their starches during cooking, creating that signature velvety consistency. If you wish to use fresh or frozen peas, they are best added towards the end of the cooking process of a different type of soup or used for a lighter, more broth-based pea soup, rather than attempting to replicate the texture of split pea soup. The cooking time would also be significantly different, requiring only a few minutes of simmering rather than the extended pressure cooking needed for dried split peas.
If your Instant Pot pea soup isn’t as thick as you’d like after the initial cooking and pressure release, there are several effective methods to achieve your desired consistency. The most straightforward approach is to use an immersion blender directly in the pot. Gently pulse the blender to break down some of the peas, which will release more starch and thicken the soup. Be careful not to over-blend if you prefer some texture. Alternatively, you can carefully ladle out about 1-2 cups of the soup, blend it until smooth in a standard blender, and then stir it back into the main pot. For a more concentrated flavour and thickness, you can also leave the lid off the Instant Pot and simmer the soup on the “Sauté” function for 10-15 minutes, allowing excess liquid to evaporate. Ensure you stir occasionally to prevent sticking.
Instant Pot pea soup stores exceptionally well. Once cooled to room temperature, transfer the soup to airtight containers and refrigerate for up to 3-4 days. The flavours often meld and deepen overnight, making it even more delicious on the second day. For longer storage, the soup freezes beautifully. Allow it to cool completely, then portion it into freezer-safe containers or heavy-duty freezer bags, leaving about an inch of headspace to allow for expansion. It can be frozen for up to 3 months. To reheat, you can gently warm the soup on the stovetop over medium-low heat, stirring occasionally, or microwave individual portions until heated through. If the soup has thickened considerably during storage or freezing, you may need to add a splash of water or broth to achieve your desired consistency.
See also: Pea soup

