When winter rolls in, the classic snowman has always been a beloved symbol of chilly fun and festive creativity. But what if you could bring that frosty joy indoors, far away from the cold air and melting snow? Enter the delightful world of crafting a snowman using hard-boiled eggs-a whimsical twist that merges kitchen crafts with seasonal spirit. This unique project not only sparks imagination but also transforms simple eggs into charming, edible sculptures perfect for holiday parties, family activities, or simply brightening up your dining table. Join us as we explore this playful blend of art and culinary craft, where the humble hard-boiled egg becomes your snowy canvas for creating a tiny winter wonderland.
Crafting a Snowman Using Hard-Boiled Eggs: A Fun Twist invites you to transform simple kitchen staples into a charming winter centerpiece. This creative culinary project delights both the eyes and palate, turning hard-boiled eggs into a whimsical frosty friend. Achieving stability and expressive character in your eggy snowman requires careful selection and preparation, imaginative decoration, and thoughtful assembly. Whether crafting a cozy holiday atmosphere or brightening a chilly day, this guide will inspire your inner food artist and guarantee playful success.
Prep and Cook Time
Total Time: 20 minutes (includes boiling and cooling eggs)
Yield
Serves 4 mini snowmen (each composed of 3 eggs)
Difficulty Level
Easy – perfect for family fun or beginner decorators
Ingredients
- 12 large eggs, fresh and unblemished
- 1 tablespoon white vinegar (for easy peeling)
- 1 teaspoon salt (to enhance boiling)
- Black olives or black sesame seeds (for eyes and buttons)
- Baby carrots (for noses)
- Thin chives or green onion strips (for scarves)
- 1 tablespoon cream cheese or soft cheese (to secure pieces)
- Food-safe markers or edible ink pens (for detailing)
- Small pretzel sticks or toothpicks (for assembly)
Instructions
- Prepare the Eggs for Stability: Place 12 large eggs in a single layer within a saucepan. Cover with water by about an inch, add 1 tablespoon white vinegar and 1 teaspoon salt. Bring to a boil over medium-high heat.
- Boil and Cool: Once boiling, turn off heat and cover. Let the eggs sit for 12 minutes for fully hard-boiled whites and yolks. Immediately transfer eggs to an ice-water bath to halt cooking and ease peeling.
- Peel with Care: Gently crack shells all over and peel under running water to preserve smooth surfaces essential for stacking.
- Design the Snowman Base: Choose three eggs per snowman. For the bottom stability, select the most oval-shaped egg so it can rest flat. You can trim a tiny slice off the bottom with a knife for extra firmness, being cautious not to break the egg.
- Assemble the Snowman Body: Use cream cheese as edible glue, applying a small amount where eggs meet. Secure each tier with a toothpick or small pretzel stick gently inserted through two eggs, stabilizing the sculpture without rupturing the egg.
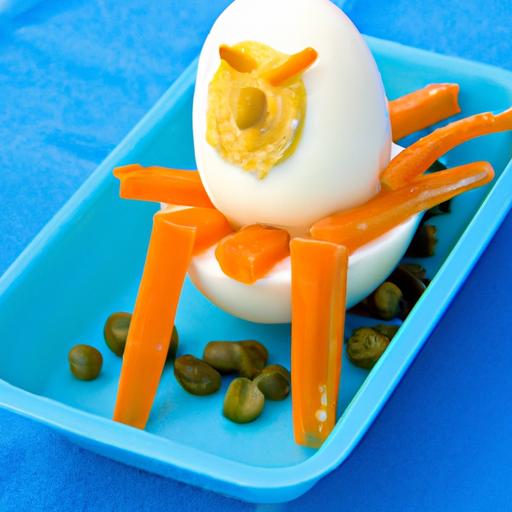
- Create Expressive Features: Cut black olives or use black sesame seeds for eyes and buttons, attaching them with a dab of cream cheese. Use baby carrot sections for the classic carrot nose, secured similarly. Draw subtle smiles or rosy cheeks with food-safe edible ink pens.
- Add Accessories: Tie thin strips of chives or green onions gently around the neck for scarves. You can even fashion tiny hats from colorful bell pepper pieces or use strips of nori for scarves and hats.
- Presentation Tips: Arrange your eggy snowmen on a festive platter with a light dusting of paprika for “snow” or tiny leafy sprigs for a winter forest effect. Bright lighting highlights the satin sheen of the eggs and enhances the playful details.
- Optional – Seasonal Variations: Swap accessories to match themes-mini pumpkin seed hats for autumn or pomegranate arils as berry buttons to deepen the festive vibe.
Tips for Success
- Select eggs that are uniform in size: This consistency aids stacking and balance.
- Peeling is easiest the day after boiling: Let eggs rest overnight in the refrigerator for smoother peeling.
- For heightened stability: chill assembled snowmen during the build to help the cream cheese “set.”
- Explore alternative adhesives: softened avocado or hummus also work well for securing features naturally.
- Make ahead: Fully assembled snowmen can be refrigerated for up to 24 hours wrapped in plastic wrap.
Serving Suggestions
This playful snowman makes a perfect seasonal appetizer or centerpiece. Serve alongside a colorful salad or winter vegetable platter to add festive flair. Garnish with sprigs of fresh dill or rosemary to evoke pine trees, or scatter edible flowers for a delicate touch. Encourage guests to “build their own” as a delightful activity that doubles as entertainment. These bite-sized creations also pair wonderfully with classic winter dips such as smoked salmon cream cheese or a tangy mustard sauce.
| Nutrient | Per Snowman (3 eggs) |
|---|---|
| Calories | 210 kcal |
| Protein | 18 g |
| Carbohydrates | 3 g |
| Fat | 14 g |

For more whimsical food craft ideas, check out our Holiday Food Art Tips and discover expert advice from Serious Eats for perfect egg boiling techniques.
Q&A
Q&A: Crafting a Snowman Using Hard-Boiled Eggs – A Fun Twist
Q1: Why use hard-boiled eggs to make a snowman instead of traditional materials like snow or clay?
A1: Using hard-boiled eggs offers a deliciously creative twist on the classic snowman craft! It’s perfect for indoor fun when the weather outside isn’t cooperating, and it doubles as a tasty treat once your frosty friend is complete. Plus, eggs have a smooth, oval shape that lends itself beautifully to forming a mini snowman.
Q2: What supplies do I need to create a hard-boiled egg snowman?
A2: You’ll need a few simple ingredients and craft materials: hard-boiled eggs, food-safe markers or edible paint for decoration, tiny bits of carrot or olives for facial features, toothpicks or small pretzel sticks for arms, and maybe some chives or parsley for a scarf or hair. Don’t forget a small plate or napkin as a base!
Q3: How do I assemble the snowman without it rolling away?
A3: Start by carefully peeling your eggs and drying them. Use one larger egg for the body and a slightly smaller one for the head. You can attach them using a dab of cream cheese or a toothpick inserted gently through both eggs. Position the snowman on a flat surface, and if needed, create a little “nest” of soft cream cheese or hummus to keep it steady.
Q4: What’s the best way to decorate the egg snowman’s face?
A4: Get whimsical! Use tiny bits of vegetables-like a small carrot triangle for the nose, olive slices or peppercorns for eyes, and thin strips of chives or herbs for a mouth. Edible markers make drawing cheeks, buttons, or scarves simple and fun. Remember, the charm is in the tiny details!
Q5: Can kids safely participate in this craft?
A5: Absolutely! This is a fantastic hands-on project for kids, combining creativity with a snack. Just ensure there’s adult supervision when handling toothpicks or small choking hazards, and remind little ones to be gentle with their egg masterpieces.
Q6: How long can my egg snowman last?
A6: Since it’s made from hard-boiled eggs, your snowman is best enjoyed within a day or two if kept refrigerated. It’s a fun, temporary decoration that doubles as a healthy snack-just don’t leave it out too long!
Q7: Any creative variations for the egg snowman?
A7: The sky’s the limit! Try adding a mini hat from a sliced olive or a scarf made from a thin strip of bell pepper. Create a family of egg snowmen with different sizes or dress them up with edible glitter or crushed nuts for “snow.” You can even turn this into an egg-cellent centerpiece for your holiday table!
Q8: What makes crafting an egg snowman a memorable experience?
A8: It’s a delightful blend of art, play, and food-transforming everyday kitchen staples into charming characters. This innovative activity sparks imagination, encourages fine motor skills, and brings a touch of whimsy to mealtime or holiday festivities. It’s crafting you can eat, which is always a win!
Insights and Conclusions
Whether you’re looking to add a playful touch to your holiday brunch or simply want to infuse a bit of whimsy into your winter celebrations, crafting a snowman from hard-boiled eggs is sure to delight. This fun twist on a classic craft combines creativity with a tasty treat, offering a hands-on activity that both kids and adults can enjoy. So gather your eggs, get crafty with your favorite decorations, and watch as these edible snowmen bring a spark of joy and imagination to your table-all while inspiring smiles one bite at a time. Happy crafting, and may your snowmen never melt away!