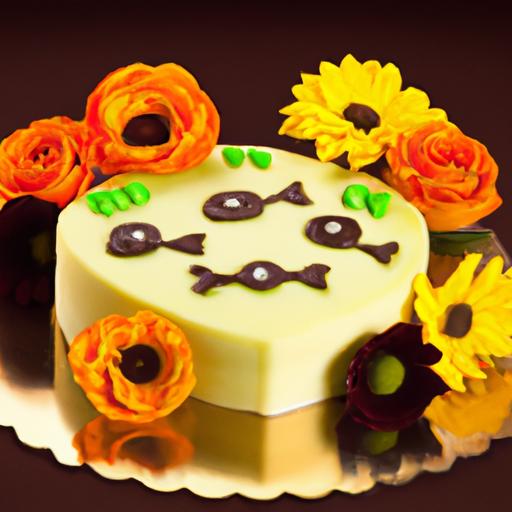
There’s something irresistibly eerie about a spooky graveyard cake-an edible tableau where the macabre meets the delectable. Whether you’re gearing up for Halloween, a gothic-themed party, or simply want to add a dash of dark whimsy to your dessert table, crafting a hauntingly beautiful graveyard cake is an art that blends creativity with culinary skill. From crumbly cookie “dirt” to delicate tombstone cookies and ghostly fondant figures, this treat invites you to explore playful techniques that transform sugar and spice into a chillingly delightful centerpiece. In this article, we’ll unearth essential tips and tricks to help you design a graveyard cake that’s as delicious as it is spooky-perfect for sending shivers down the spine of any sweet tooth.
Crafting a Spooky Graveyard Cake: Tips for a Haunting Treat
Crafting a spooky graveyard cake is a thrilling way to celebrate Halloween or any eerie occasion. This haunting treat combines rich flavors and haunting textures that create an unforgettable sensory experience, perfect for impressing guests and satisfying sweet cravings alike. With each bite, the contrasting elements-from velvety chocolate sponge to crackling cookie soil-set a chillingly delightful stage that brings a gothic graveyard to life on your dessert table.
Prep and Cook Time
Preparation: 45 minutes
Cooking: 30 minutes
Decorating: 1 hour
Yield
1 graveyard cake, serves 10-12
Difficulty Level
Medium – Ideal for bakers comfortable with decorating and layering techniques
Ingredients
- For the Cake:
- 1 ¾ cups all-purpose flour, sifted
- ¾ cup unsweetened cocoa powder, high quality
- 1 ½ tsp baking powder
- 1 tsp baking soda
- ½ tsp salt
- 1 cup buttermilk, at room temperature
- ½ cup vegetable oil
- 2 large eggs, room temperature
- 1 ¼ cups granulated sugar
- 1 tsp pure vanilla extract
- For the Frosting:
- 1 cup unsalted butter, softened
- 4 cups powdered sugar, sifted
- ¼ cup heavy cream
- 1 tsp vanilla extract
- Black food coloring
- For Decorations:
- Crushed chocolate cookies (for “graveyard soil”)
- Marzipan or fondant for tombstones and skulls
- Black licorice strands (to mimic creeping vines)
- Edible silver dust or glitter
- Mini candy bones or white chocolate shards
Instructions
- Prepare the cake batter: In a large bowl, whisk together flour, cocoa powder, baking powder, baking soda, and salt. In a separate bowl, beat buttermilk, oil, eggs, sugar, and vanilla until smooth. Gradually add the dry ingredients into the wet, mixing gently until just combined to keep the cake tender.
- Bake the cakes: Pour the batter evenly into two greased 9-inch round pans. Bake at 350°F (175°C) for 25-30 minutes or until a toothpick inserted in the center comes out clean. Allow to cool completely on wire racks to prevent moisture buildup.
- Mix the frosting: Beat softened butter until creamy. Gradually add powdered sugar, alternated with heavy cream, followed by vanilla. Mix until fluffy. Tint with black food coloring slowly, stopping once a deep charcoal tone is achieved.
- Assemble the layers: Level the cakes if needed. Spread a thick, even layer of frosting between cakes before stacking. Cover the top and sides with a crumb coat of frosting to lock in crumbs; refrigerate 20 minutes.
- Finish frosting with ghostly texture: Applying the final coat, use a flexible spatula to create uneven, swirling patterns resembling mist or smoke. For an extra ghostly effect, allow some layers to peek through with lighter strokes.
- Create edible graveyard soil: Sprinkle crushed chocolate cookies generously around the base and on top to resemble disturbed earth and cracked grave dirt.
- Design and place tombstones: Shape marzipan or fondant into crude tombstone shapes, using a knife to carve spooky epitaphs or symbols. Dust lightly with edible silver dust for a supernatural shimmer and insert them standing in the cookie soil.
- Add finishing spooky details: Use black licorice as creeping vines weaving through tombstones. Scatter candy bones or white chocolate shards for eerie skeletal remnants. Optionally, paint subtle faces or cracks on fondant skulls using edible ink pens.
Tips for Success
- Use room temperature eggs and buttermilk to ensure smooth batter incorporation and evenly risen layers.
- Avoid overmixing the cake batter to keep the crumb tender and light, which enhances the contrast with crumbly “soil.”
- For a darker frosting, add black gel food coloring gradually; gel color won’t affect frosting consistency as much as liquid dyes.
- Create tombstones a day ahead and allow them to firm up by wrapping in plastic wrap – this makes sculpting easier and improves stability.
- Consider incorporating a splash of coffee or espresso powder in the batter to deepen the chocolate notes.
- Keep the cake refrigerated until serving to maintain the integrity of decorations and frosting texture.
Serving Suggestions
Present your graveyard cake on a rustic wooden slab or black serving platter to enhance the spooky theme. Surround the cake with dry ice vapor or small battery-operated LED candles flickering around the edges for a haunting ambiance. Serve slices with a side of berry compote, which adds a tangy contrast and mimics eerie “blood” drizzles. Garnish each serving with a fresh mint leaf shaped like a tiny eerie leaf or spider web for an artistic finish.
| Nutritional Info (per slice) | Calories | Protein | Carbs | Fat |
|---|---|---|---|---|
| Approximate values | 420 kcal | 5 g | 55 g | 18 g |
Internal Link: For more creative Halloween baking ideas, check out our Spooky Desserts to Make This Halloween.
External Link: Learn more about proper cake decorating techniques at Craftsy Cake Decorating Tutorials.

Q&A
Q&A: Crafting a Spooky Graveyard Cake: Tips for a Haunting Treat
Q1: What makes a graveyard cake spooky yet appealing?
A1: The magic lies in balancing eerie elements with delicious treats. Think dark, moody colors like black, grey, and deep purple, combined with edible tombstones, creepy crawlies, and fog-like frosting swirls. The cake should intrigue and delight-invoking the thrill of a haunted graveyard without scaring away your guests!
Q2: What type of cake works best as the base for a graveyard theme?
A2: A rich, dark cake is ideal. Chocolate or devil’s food cake provides a “dirt-like” look that complements the theme perfectly. Plus, their dense texture is great for holding up heavy decorations like cookie tombstones and candy bones.
Q3: How can I create realistic tombstones and graveyard decorations?
A3: Use fondant or cookie dough shaped into tombstones, then paint or write spooky epitaphs with edible markers or icing. Crumbled cookies or crushed Oreos make excellent “dirt.” For creepy details, add gummy worms, candy bones, and edible moss made from green-tinted coconut flakes or crushed pistachios.
Q4: Any tips for spooky frosting techniques?
A4: Frost your cake with a dark-colored buttercream-charcoal grey is perfect for graveyard soil. Use a spatula to create uneven textures, resembling dirt mounds. For a ghostly fog effect, lightly brush on black or grey luster dust, or pipe delicate swirls with a lighter shade of frosting.
Q5: How can I add atmosphere beyond the cake itself?
A5: Presentation is key! Place the cake on a rustic wooden board or a black platter. Surround it with dry ice fog (safely handled) or scatter faux spider webs and plastic spiders around the cake stand to amplify the haunted vibe.
Q6: What’s a simple way to make the cake kid-friendly spooky?
A6: Keep decorations playful rather than terrifying. Use cartoonish ghosts made from mini marshmallows and edible ink faces. Opt for bright, candy colors mixed with classic spooky elements. This maintains the fun spirit without frightening younger guests.
Q7: How far in advance can I prepare the graveyard cake?
A7: You can bake and crumb-coat the cake a day ahead. Assemble and decorate the tombstones and candy details separately, then add them just before serving to keep them fresh and intact. If using fondant decorations, make those up to a week ahead and store them in airtight containers.
Q8: Any final creative twist to try?
A8: For an interactive treat, embed “buried” candy treasures beneath the surface-like gummy skeleton fingers or candy eyeballs. When guests slice the cake, the surprise ghoulish goodies inside make the experience even more thrilling!
Crafting your spooky graveyard cake is all about channeling a haunted story into edible art. With these tips, your eerie creation will be the star of any Halloween or spooky-themed celebration!
Closing Remarks
As the last crumb settles and your eerie graveyard cake stands proudly on its platter, you’ll know that every spooky detail- from the crumbled “dirt” to the ghostly toppers- was crafted with care and a dash of mischief. Whether you’re throwing a Halloween bash or simply craving a hauntingly delightful dessert, these tips will help you summon a cake that’s as delicious as it is delightfully creepy. So grab your tools, don your witch’s hat, and get ready to bewitch your guests with a treat that proves: sometimes, the best things come from beyond the graveyard. Happy haunting-and happier baking!