
In the world of food artistry, few creations capture the heart quite like animal onigiri-those charming, bite-sized rice sculptures that transform a simple staple into delightful edible companions. Crafting cute animal onigiri is more than just making a meal; it’s an imaginative journey where culinary skill meets playful creativity. This fun guide will take you through the whimsical process of turning plain rice into an array of adorable creatures, from fluffy bunnies to mischievous pandas. Whether you’re a seasoned cook or a curious beginner, prepare to discover the joy of rice art and how these tiny, tasty masterpieces can brighten any lunchbox or party table. Let’s dive into the enchanting world of crafting cute animal onigiri!
Crafting Cute Animal Onigiri: A Fun Guide to Rice Art
Crafting Cute Animal Onigiri is an exciting culinary adventure that transforms simple rice balls into whimsical, edible art. Originating from Japan, onigiri has long been treasured as a portable, comforting staple. This guide will inspire you to elevate your onigiri-making skills, combining soft and fluffy rice with delightful fillings, precise shaping, and creative decorating to create adorable animal designs that are sure to impress both kids and adults alike.
Prep and Cook Time
- Preparation: 20 minutes
- Cooking: 25 minutes
- Total: 45 minutes
Yield
- Makes 8 medium-sized animal onigiri
Difficulty Level
- Medium (perfect for home cooks eager to experiment with food styling)
Ingredients
- 2 cups Japanese short-grain rice, rinsed and soaked for 30 minutes
- 2 1/4 cups water
- 1 teaspoon salt
- 2 tablespoons rice vinegar
- 1 tablespoon sugar
- 1/2 cup cooked salmon flakes or canned tuna mixed with mayonnaise
- 1/4 cup finely chopped pickled umeboshi plums (optional for tartness)
- Nori sheets – cut into small strips and shapes
- Thinly sliced vegetables (carrots, cucumbers, radishes) for decoration
- Sesame seeds and edible food markers or colored powders for accents
Instructions
- Cook the rice: Drain the soaked rice and combine with water in a rice cooker. Cook until the water is fully absorbed and the rice is tender-approximately 20 minutes. Let it sit covered for 10 minutes afterward.
- Season the rice: In a small bowl, mix rice vinegar, sugar, and salt until dissolved. Gently fold this seasoning into the cooked rice while it’s still warm. Use a wooden spatula with a slicing motion to avoid crushing grains. Allow rice to cool to handling temperature.
- Prepare the fillings: Flake the cooked salmon or mix canned tuna with mayonnaise. For subtle tartness, finely chop umeboshi and drain excess juices.
- Shape the onigiri: Wet your hands lightly with water and sprinkle with salt to prevent sticking. Take about 1/2 cup of rice and form into a triangle or oval shape, pushing a small indent in the center.
- Fill your onigiri: Place about 1 tablespoon of filling into the indent, then cover with a thin layer of rice, sealing the filling inside. Shape firmly but gently to maintain fluffiness.
- Master animal shapes: Use small molds or hand-shape the rice into ears, tails, or paws by pinching and molding with your fingers. For round faces, soft oval shapes work best to start.
- Decorate creatively: Cut nori into eyes, whiskers, and mouths using scissors or craft punches. Use thin vegetable ribbons as ears or noses. Sesame seeds make excellent paws or freckles. Edible food markers help detail finer features without overpowering.
- Assemble final touches: Press decorations gently onto the rice surface, securing them by slightly moistening the rice where needed. Serve immediately or wrap tightly with plastic wrap to keep the onigiri moist and intact.
Tips for Success
- Rice choice is crucial: Always opt for Japanese short-grain rice for its sticky and tender texture, ideal for molding without crumbling.
- Moist hands prevent mess: Keep your hands wet and lightly salted throughout shaping to maintain perfect texture and taste balance.
- Fillings add personality: Don’t be afraid to mix flavors-spicy tuna, teriyaki chicken, or pickled vegetables make vibrant alternatives.
- Work quickly with nori: Nori crisps fast in moisture-apply it just before serving for the crispest detail on your animal designs.
- Troubleshooting: If onigiri crumbles, add a light sprinkle of water and reshape firmly. For uneven shapes, gently press and adjust with damp fingers rather than over-handling.
- Make-ahead hint: Prepare rice and fillings earlier; assemble and decorate 30 minutes before serving to maintain freshness.
Serving Suggestions
- Place onigiri on a bamboo mat or in a bento box lined with edible leafy greens for a natural backdrop.
- Serve with side pickles, miso soup, or chilled green tea for an authentic Japanese meal experience.
- Encourage creativity by offering various toppings and fillings at the table for guests to customize their own animal friends.
| Nutrient | Per Onigiri |
|---|---|
| Calories | 180 kcal |
| Protein | 6 g |
| Carbohydrates | 32 g |
| Fat | 3 g |

Creative Decoration Tips for Crafting Cute Animal Onigiri
Use simple tools like scissors, tweezers, and toothpicks to carefully place nori and vegetable accents. Thinly sliced carrots can be curled to mimic whiskers or tails, while cucumber thin rounds make perfect paws. Tiny sesame seeds or minced herbs can add texture for fur or feather details. Edible food color powders enhance the look, allowing additional color without compromising flavor. The idea is to enhance the personality of each onigiri animal without overwhelming its natural charm.
For more expert tips on Japanese rice dishes, explore our Perfect Japanese Rice Techniques article. To deepen your understanding of rice varieties and their culinary uses, visit Ricepedia.
Q&A
Q&A: Crafting Cute Animal Onigiri: A Fun Guide to Rice Art
Q1: What is animal onigiri, and why has it become so popular?
A: Animal onigiri are adorable rice balls shaped and decorated to resemble cute animals like bears, rabbits, cats, and more. This playful twist on traditional Japanese rice balls combines culinary creativity with artistry, making mealtime more fun-especially for kids and bento lovers! Their popularity stems from being both visually delightful and deliciously satisfying.
Q2: What kind of rice should I use to make perfect onigiri for my animal creations?
A: For crafting animal onigiri, short-grain Japanese sushi rice is your best friend. Its sticky, slightly clumpy texture helps the rice hold together snugly, which is essential for molding precise shapes without crumbling. Remember to rinse the rice well and cook it just right for that perfect stickiness!
Q3: What tools do I need to create these charming rice critters?
A: While your hands are the main tools, a few handy accessories can elevate your rice art: plastic wrap for shaping, small cookie cutters or mold sets designed for onigiri, tweezers for placing tiny seaweed details, scissors to cut nori (seaweed), and food-safe markers or edible coloring for added flair. Creativity is the limit!
Q4: How do I safely decorate onigiri without making a mess or losing the shape?
A: Start by shaping your rice tightly but gently. Use small strips or pieces of nori to create facial features-eyes, noses, whiskers-carefully pressing them onto the slightly moist rice surface so they stick well. For color, try natural dyes like beet juice or turmeric-infused rice. Using edible glue (a dab of cooked rice or miso) helps attach delicate parts securely.
Q5: Can I make animal onigiri in advance, or are they best enjoyed fresh?
A: Onigiri are best enjoyed the same day they’re made to retain moisture and freshness, especially since decorations like nori can get soggy over time. However, you can prepare the rice balls in advance and store them in an airtight container, then add sensitive decorations just before serving. For outings, keep them cool to maintain their cute charm and taste!
Q6: How can I add personality or tell a little story through my animal onigiri?
A: Think like a storyteller! Add tiny accessories like a nori bow tie for a dapper penguin, carrot ears for a playful bunny, or a sprinkle of toasted sesame seeds for a fuzzy texture on a bear. Position your little rice friends in themed bento arrangements-maybe a forest scene with leaf-shaped vegetables or a seaside tableau with fish-shaped onigiri pals-to bring your edible creations to life.
Q7: Are there any fun flavor variations that work well with animal onigiri?
A: Absolutely! While classic salted rice is delicious, mixing in ingredients like finely chopped herbs, cooked salmon flakes, or even furikake seasoning adds bursts of flavor. For a sweeter twist, try filling your onigiri with sweetened red bean paste or mixing coconut flakes and a hint of sugar into the rice. Just remember to balance taste with how well the rice sticks together for shaping.
Q8: How do I get started if I’m new to making onigiri art?
A: Begin simple! Start with basic shapes-round or triangular rice balls-and gradually add features like ears or eyes using nori cutouts. Watch tutorial videos to see shaping techniques in action and don’t hesitate to experiment. Most importantly, have fun-rice art is about playing with food and expressing your creativity!
In Summary
As you embark on your own journey of crafting cute animal onigiri, remember that each rice ball is more than just a snack-it’s a playful expression of creativity and care. With a pinch of imagination and a handful of simple ingredients, you can transform everyday meals into delightful little works of edible art that bring smiles to the table. So gather your nori, shape your rice, and let your inner artist wander through the charming world of onigiri. Happy crafting, and may your rice art adventures be as joyful and unique as the animals you create!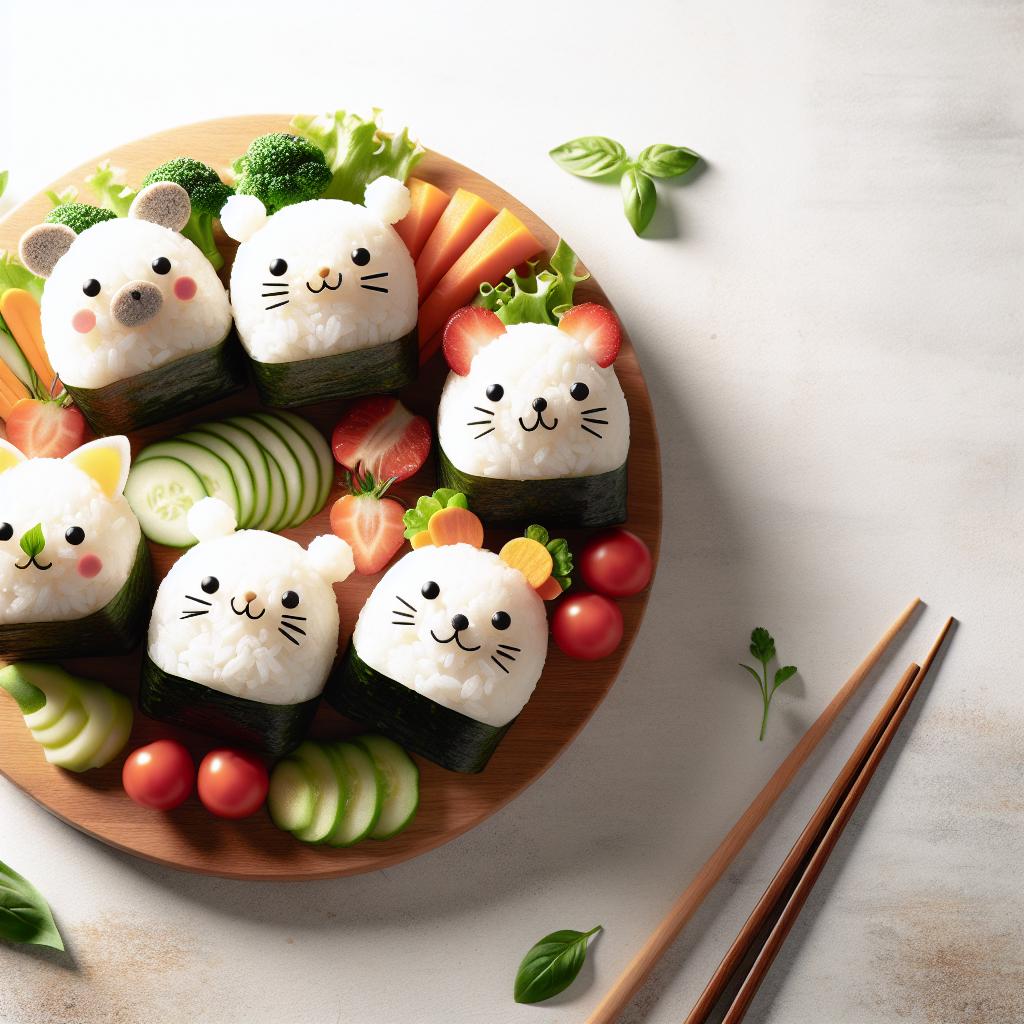

